3D Printed Namco Reunion Dust Washer

C74C52D8-AA23-48DA-8F57-3A9D8654EDD6_1_105_c.jpeg

I’ve been meaning the breath some new life into my Reunion Cab for over a year. Around a year ago I knew that would come in some form of the gaming experience provided by Bitkit. That part, was easy. Install the Bitkit. Install some ROMS - have fun.

Unfortunately, the controls on my 20yr Reunion cabinet sort of sucked.

For my Namco 20yr Reunion Cab, I really wanted spring-leaf controls. I play alot of Pac and I don’t like the clicky microswitches for Pac games.

The original 20yr Reunion Controller.

The original 20yr Reunion Controller.

Groovy Game Gear sells a very nice spring-leaf-switch variant based on the dimensions of this joystick.

Unfortunately, it has one serious flaw. If you look at the pictures above, both dust washers have a ton of play between the shaft and the dust-washer-shaft-cut-out. For the original, this wasn’t such a big deal but the Groovy Game Gear remake’s E-clip is constantly popping across that gap. So, you guy the fancy joystick for super smooth operation and you get these random “catches” in the action as the dust-washer and the e-clip interact with one another.


3D Printer to the rescue. I design a 3mm dust washer that fits tightly against the ball-shaft, eliminating the e-clip nonsense. The one pictured here was printed on ABS and is working great so far.

7722E7C9-D493-4197-A148-90CDA4BA864A_1_105_c.jpeg
F0048DAD-0894-4607-9AE6-378669CB70AB_1_105_c.jpeg

Want the model to make your own? No Problem-o, check it out:
Download link: https://www.dropbox.com/s/88xnewifeacb15u/reunion%20washer%203mm.stl?dl=0

BitKit

Left the dust because - it is real dust. Collector dust.  This way, you know it is real! :)

Left the dust because - it is real dust. Collector dust. This way, you know it is real! :)

When I was growing up, my mom had this sister, that wasn’t actually a blood relative. Through the transitive property of whatever, that made her sister’s three boys my cousins. They were a bit older but were cool to me and I always liked to visit them.

I’d loose innocence by the centimeter every time we’d hang out.

In my memory at least, every one of them was a different avatar of a Jack Black character. They were raised by MTV and Basic Cable, Rock Posters on the walls of their cluttered rooms and the kind of energy you get with three teenaged boys resonating off of one another. I’d spend every car ride home mentally digesting another discovery in heavy metal or some sex-joke I didn’t quite understand yet but knew must be hilarious.

That tangent to express my notion that Bitkit was a secret all the cool kids knew about and I’m just now really discovering. I sort of feel like Bitkit is to my arcade-discovery as Queensrÿche was to my cousin-imposed music discoveries. I knew of the Bitkit, even had one tucked away for later-use for over a year..

But having the Bitkit tucked away is like hearing a single on the radio and playing it is like listening to the full album.

When I first was introduced to Bitkit and started to find out its capabilities as they pertain to specific games, large parts of it go unspoken, I suspect in a deliberate attempt to stay under the radar or not court the wrong type of licensing attention. In this post, I want to shine a little flashlight on the Bitkit. Not a bat-signal to wake the neighbors but maybe a bit of clarity for those of you who know where to look. I don’t want to blow up anyone’s spot here but I do want you to see the potential in this awesome little card and hopefully feel compelled to support the developer of it.

CraftyMech

CraftyMech is among a short credit-roll of stand out names in this hobby for creating awesome tools and being a positive influence. Back when I was struggling to find an MCR Compatible monitor to finish out my Tapper, a friend suggested this neat little tool that I just absolutely had to have. The tool, was the CraftyMech TPG.. I knew the name CraftyMech from numerous helpful KLOV posts and some Broken Token Podcasts.

The TPG is an essential tool for monitor troubleshooting and dial in. Really glad I bought it!

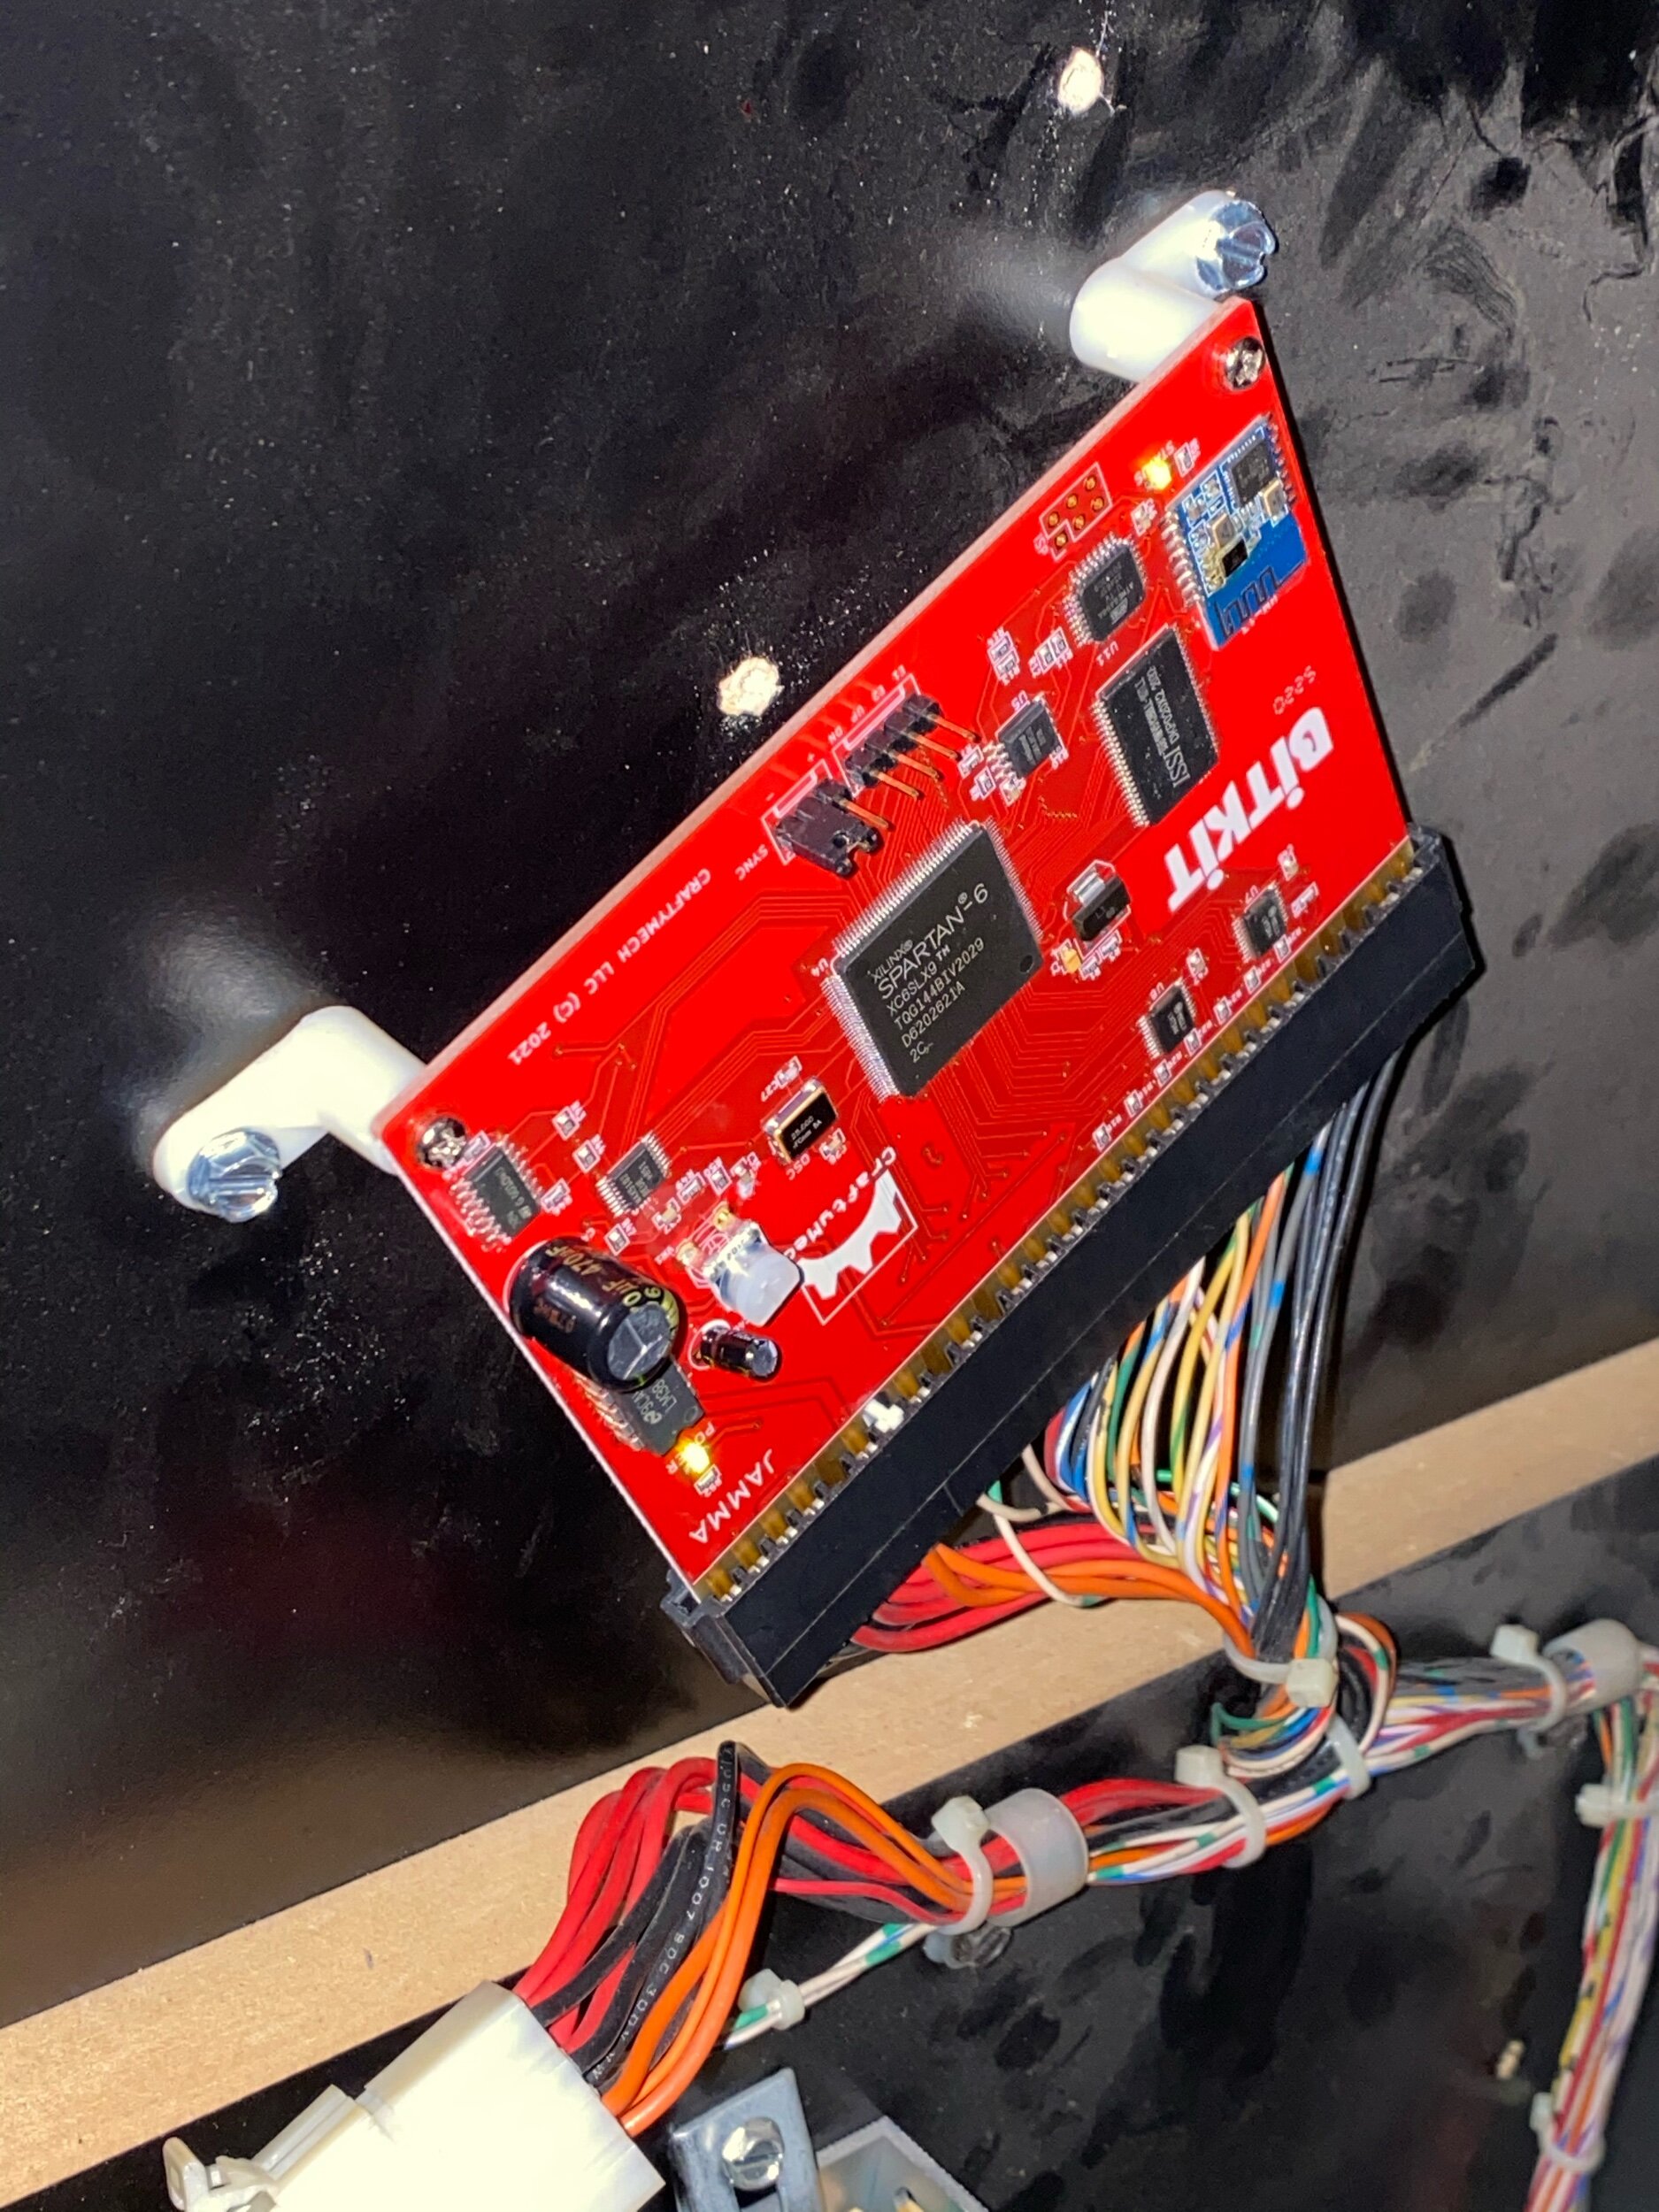
Anyway.. back to Bitkit. Bitkit is a JAMMA-based FPGA of various popular early arcade hardware. If it had a Z80 (even.. 3 of them..), the Bitkit is probably technically capable of playing it. It is sort of similar to the popular JROK-designed wSYSFPGA Multi Williams PCB or the Clay Cowgill designed ArcadeSD PCB (although ArcadeSD is actually really-good emulation, not FPGA).

In a sentence: It is a modern board that can mimic (note, I didn’t use the work emulate) classic arcades with near perfection.

FPGA

To understand what separates boards like Bitkit from the old 60-in-1 Chinese pirate rom PCBs, you need to at least understand what FPGA is. Field Programmable Gate Array’s are user-customizable chips that can be programmed to mimic other hardware.

Imagine the original Atari Centipede boardset where you have a main game board and an audio board / amplifier. The Atari Centipede PCB had something like 32 distinct IC’s, half a dozen ROMS, 3 distinct classes of RAM in 11 different configurations, a micro processor, host of capacitors, transistors and resistors.

Well, if you have sufficient IO & behavior specs for all of that hardware you could arrange it all into a workflow in something like MatLAB and essentially design the entire Centipede PCB as a bin-file that can be flashed into a single chip or chipset. That chip/chipset is the FPGA. Any code the game might have used is missing but you would have recreated the entire hardware platform with the benefit of modern chip design and a placeholder to insert the game code in a ROM slot.

That’s about where my knowledge stops. I do know a dozen or so programming languages from three decades but if you brought me a chip or a populated circuit and said “fPGA this thing” - I wouldn’t know where the F to begin. I’m just going to assume as always that step 1)Drink Bourbon. From there, I’m out of my experience.

In the same way I once blew the mind of a C-Suite exec by explaining on a plane ride to China that I had a near-enough copy of their AS/400 dataset on my cheap laptop, if you really stop and think about it:

We can put 8 billion transistors in your $700 iPhone. We can put 92 billion transistors in a $9,000 industrial fPGA. Of Course we can put a couple million transistors in a $18 FPGA chip like the Spartan-6.

Bitkit, Specifically

On the surface, Bitkit targets some lesser-known titles from the 80’s; games you aren’t likely to see the Stranger Things kids playing or see referenced in 80’s pop culture digests. CraftyMech’s original release of the Bitkit card targeted the SNK 6502 arcade hardware that was used for games like Nibbler, Vanguard, Pioneer Balloon, Satan of Saturn, Zarzon & Fantasy.

Since that initial release, the developer has added support for Pac-man arcade hardware to bring in games like Lizard Wizard, Abscam, Eyes, Pac. I’d personally like to see Van-Van-Car added. I love that game for some stupid reason.

Within a year, the developer added (a targeted subset of) Namco-Galaxian arcade hardware to get games like Scramble, Jump Bug, Amidar, Anteater.

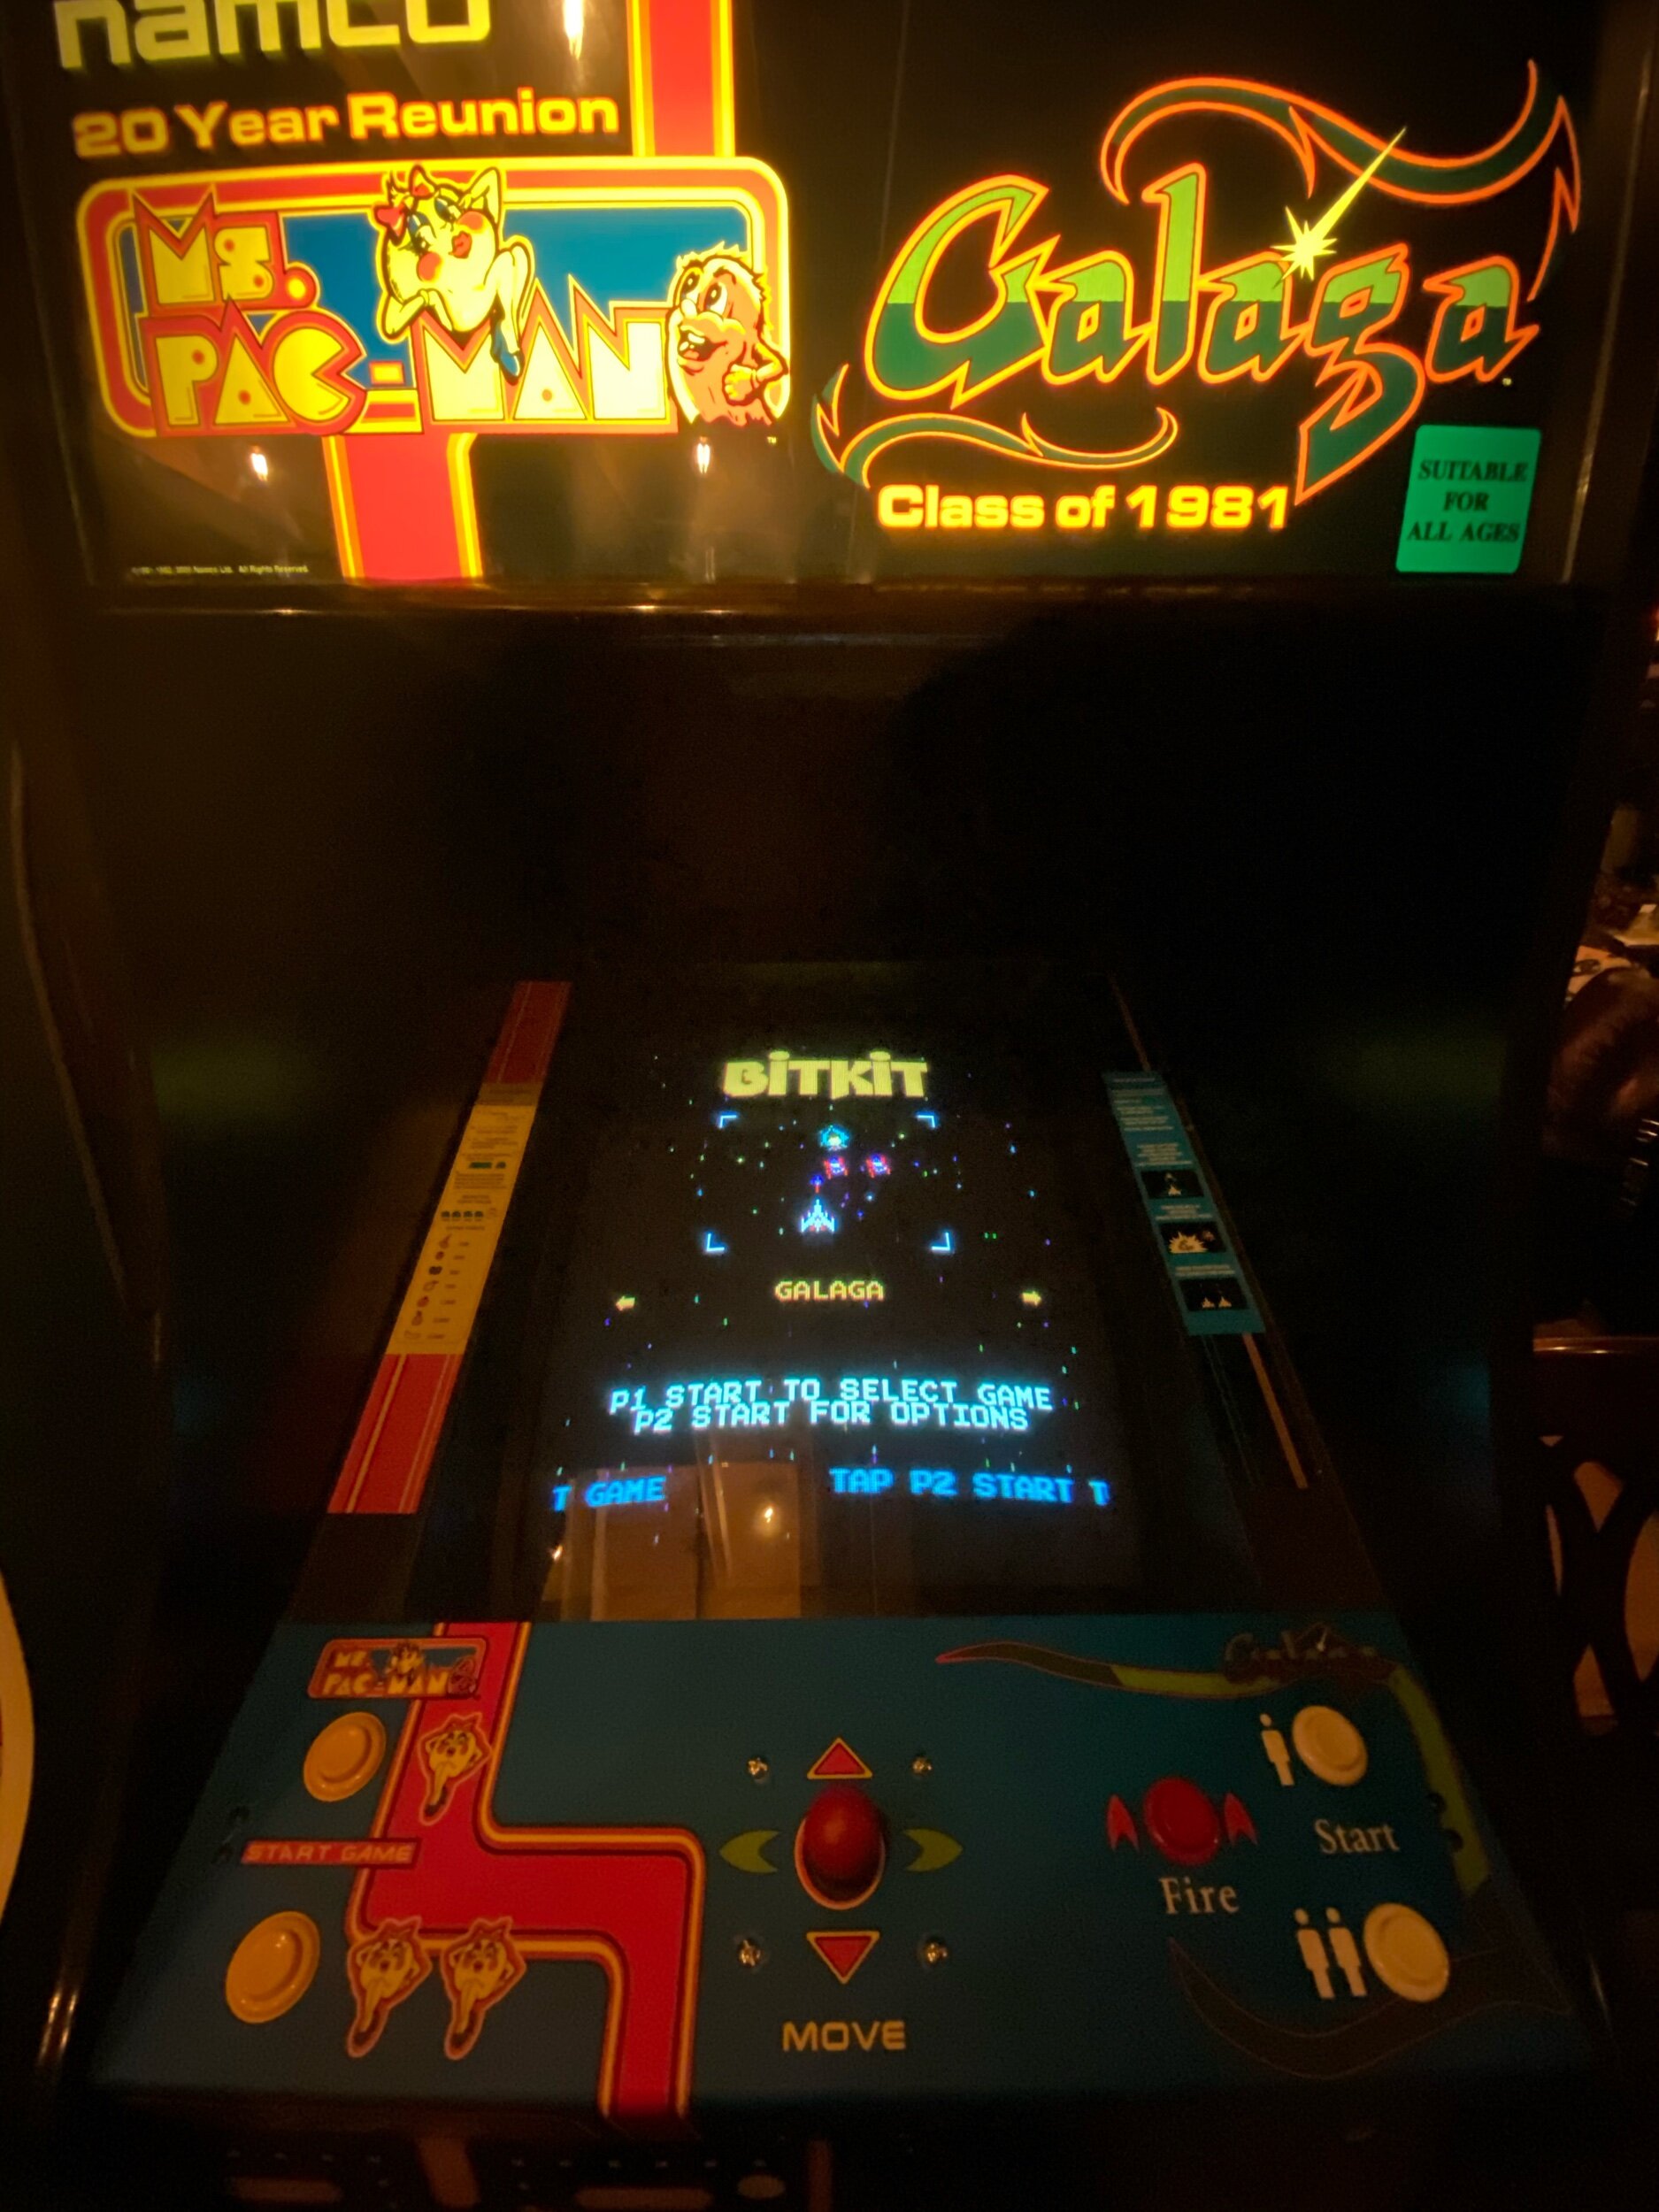
By the end of 2020, he added support for Galaga-alike hardware, which opens up future potential for 3xZ80 games.


Bitkit, Reunion. Reunion, Bitkit

The 20yr Namco Reunion cabinet is an odd duck. Galaga’s sounds were just a little off in ways I’m not experienced enough to describe and the decision to hide Pac-man on the game board only to be accessible by a sequence (Up, Up, Up, Down, Down, Down, Left, Right, Left, Right, Left) is bizarre to me. Whiskey. Tango. Foxtrot.

The Reunion PCB isn’t known for extreme durability and reliability, either. The giant vertical-orientation monitor makes it novel, as well.

It may be the perfect cabinet for Bitkit.

IMG_4956.jpeg
IMG_4958.jpeg
 

The Bitkit came in a USB model originally and now comes in a Bluetooth model. You initially set up the card (upload game roms, download and upload High Scores) from a well made Windows or MacOS app, Bitkit Manager. I have one of each type of card and my general impression is that while Bluetooth sets up easily and works well it does have range limitations, at least for my use-case. I’d hoped to be able to connect from a tower PC in my Gameroom that is 9 ft, 6 in from this cabinet without obstruction. It did connect but the transfer times were painfully slow. It would take over an hour plus multiple re-attempts per ROM file upload.

For comparison, I can use an xBox One Controller on the PC from the same distance and bluetooth transfer between IOS and Android devices in that same distance. All that said, I don’t necessarily fault the Bitkit for Bluetooth range, it is possible that by placing the Bitkit farther from the monitor chassis frame I could have improved the distance but I didn’t feel like redoing all of the cable management in the cabinet, at least not right now. Long term, I’m either going to need to drag a USB extension cable with another bluetooth radio nearby the cabinet or switch it over to my USB spare. All doable and unique to my gameroom layout.

All that said, Bluetooth is cool if you are within a few feet of the cabinet. Once I resigned to carry a laptop over to the cabinet, the setup went smoothly. There is rumor of an IOS or Android version of the Bitkit Manager App - that would solve my distance snafu with style, here’s hoping it happens I have spare iPads and Android tablets coming out of my ears from past dev projects.

 
IMG_4967.jpeg
IMG_4965.jpeg

The on-screen setup menu system is well appointed but not cluttered, self explanatory features for enabling the ability to boot straight to a game, rearrange or hide game slots and assign buttons. The BitKit is sold as a home-use JAMMA card, so there aren’t pricing options to adjust through menus but since it is full-hardware FPGA on a JAMMAS harness, the coin up buttons do still trigger a credit advance in games I’ve tried. That’s handy if your game room has tokens or a bucket of quarters for guests to play out of.

 
The game selection menu system is a carousel style left or right selection of the game title art.  It has an appealing star field and simple font selection that feel right for this era of games.

The game selection menu system is a carousel style left or right selection of the game title art. It has an appealing star field and simple font selection that feel right for this era of games.

The Bitkit can be put in single game mode and set to boot to a particular game, making it a handy solve, alternative or replacement for older hardware, in a pinch. MsPac board on the fritz? Get a Bitkit. Galaga acting up? Get a Bitkit. I have a friend right now with a stack of problematic Bosconian PCB’s patiently waiting for support to come to Bitkit.

In my cabinet, I have the Bitkit booting to menu and with the full romset and exploring some of these lesser known games will be a large part of my Q1. In Summary: I freaking love this PCB.


Got a Bitkit and looking for roms? Let me save you some time. Go here -> Bitkit/Roms

Joust

Arcade Booty Call

 
JoustBC.jpg
 

Being around some awesomely free-spirited pinball friends, I observed this pattern of weekend calls in the middle of the night, “Hey, you up for some Pinball?”

I started to play around with the this concept of a “Silver Ball Booty Call”. I used the name for some tournaments, I even have a domain or two…some shirts… a twitter handle..

Arcades have Booty Calls too, though. Arcade Booty Calls come in two flavors.

[Wanna Play?]
-and-
[Wanna Buy?]

..and because of quality decision making while 1/2 into a celebratory bottle of holiday whiskey, late at night…

I got a Joust!

Buying a Joust makes absolutely no sense at all. I have an original Robotron cabinet with a Multi-Williams PCB and spare Multi-Williams control panel in it. It plays Joust - just fine.

I have been doing… hurricane cleanup involving many-many trees, tile work, fence repair and replacement, carpentry work, electrical rewiring in the kitchen. I didn’t want another project, right now.

On top of all that, I’ve been noodling around the idea of shedding a few games to make more room for a bar-space, hangout area & VR stuff. I’m currently at 14x Arcades, 4x Pinballs and 1x [whatever Ice Cold Beer is to be considered]. I was thinking that by parting with a couple Arcades and at least one pinball, I could gain more space to hang out in, anticipating some Post-Covid parties.

But, here I am a few days after New Years rolling a Joust into the basement. The model of self control! [/not]

Joust-iMessages.jpg

Not.. 100%, After all.

IMG_4781.jpeg
IMG_4782.jpeg
IMG_4775.jpeg
IMG_4778.jpeg
IMG_4779.jpeg

Similar to my Robotron, the game was missing the Williams D-8784 5773-09679-00 linear power supply; replaced instead with an oddly mounted 8-liner switching power supply.

The switching power supplies and the 6809 CPU creates an issue where the CMOS gets flooded with crap on power down.

IMG_4862.jpeg

ArcadeShop designed and sells a nifty adapter that aims to add support for switching power supplies to games that were designed for the characteristics of a linear power supply. They typically support the original connections to prevent the need from hacking up a factory harness though they do sometimes require you to tap into the switched power interlock loop.

They often have some idiosyncrasies to overcome but work well if you spend time in the conversion.

Unfortunately, at the time of this project [not-a-project], these $40 little beauties were out of stock.

Weighing My Options

IMG_4734.jpeg

In Summary…

  • Covered up side art

  • Missing the correct power supply, includes the wrong one

  • Possibly Related Main Board Issues

  • Malfunctioning Marquee Light (Ballast, seemingly)

  • No Player 1 Right Movement (IO Board and/or Ribbon Cables)

  • Wrong Joysticks

  • Swollen Front Bottom
    (Mop Cleanup at end of shift from the Pizza Joint or Bowling Alley)

  • It is not playable.

Originality vs Pragmatism

At this point, I’m thinking that I’m going to be at least a couple hundred more dollars into the game before I can even play the first match on it. The rabbit hole of PCB stuff, power supply stuff and whatever else isn’t something I have spare brain cycles for at this very moment. I just want it working but I also don’t want to do anything overtly hackish or irreversible.

FPGA Time

I’m a huge fan of FPGA boards for these games. The Williams Multi FPGA board in my Robotron has been running solid for years and is mostly indistinguishable from the “real thing.” Luckily, at the time of this project, the JROK Designed Williams Multi wSysFPGA Board was in stock.

The downside of this approach is that it requires a switch over to JAMMA. I also picked up a fresh JAMMA Harness and a HAPP 20 Amp Power supply.

IMG_4772.jpeg

Instead of fooling with the old ballast that has an odd range of tube size / support wattages and instead of using a ballast bypass LED tube, I went with this 12” GE Fixture mostly because of availability locally and selectable brightness. 12” fits exactly between the original fluorescent tube mounting posts - so no modifications to the original were performed. If I feel super-OCD later, I can go back to the original fluorescent tube.

IMG_4851.jpg
power brick wiring0.png

I tucked away the old power origination block and ISO Trans. Using a spare 1/2” wood block, I mounted a fresh isolation transformer and terminal block and wired in a new cabinet power switch, neatly zip tying all of the old wiring but leaving it in the cabinet.

This also bypasses the interlocks, which I neither want nor need with this setup. This wiring method bypasses the switches on the power supply itself but there is a way to wire in a 4 conductor switch to the power supply itself through a 4 position molex. I never have been able to find the proper wiring for that thing, so I usually just do this.

IMG_4892.jpeg

3D Printing Monitor Adjustment Tools

CRT Adjustment tools are often made from Nylon or Plastic. Being a natural insulator, it decreases your changes of shorting out something within the monitor chassis. Being made from the same material as the adjustment pots, it prevents you from damaging the on-board adjustment pots with sharp metal tools. Finally, some adjustment coils (like the horizontal width adjustment coil on common G07 & K4900’s) are often ferrite core - metal tools can demolish them.

2021-01-24_20-11-42.jpg

Before I set out to create one, I did a quick search and found this set:

https://www.thingiverse.com/thing:1802360/files

2.5mm is close enough to the .100” adjustment tool for a horizontal width coil adjuster.

I scaled it on the y-axis to give myself a little room to maneuver around the yoke assembly.

I scaled it on the y-axis to give myself a little room to maneuver around the yoke assembly.

IMG_4837.jpeg
 

Slot head for nylon adjustment pots

2021-01-26_15-36-00.jpg
IMG_4842.jpeg

For the nylon adjustment pots, a small flat-head tool is handy.

I found this one and scaled it down to about 25% of the original design size.

https://www.thingiverse.com/thing:3916160/files

3D Printing Connectors

The connector dilemma.. How often when working on games do you find yourself in the position of “dangit, I need connector x in order to be able to proceed.”

On the hack side of the decision matrix you can go with twisted connections, solder and shrink tubed, electrical tape or wire nuts.


On the OCD side of the decision matrix you place an order for the connectors, pay $8 in shipping for $5 in parts and have to wait a week for them to arrive so you can finish your task.

Eventually, you end up with something like this.   Varied pins and housings.  Some for DC applications, some for AC applications.

Eventually, you end up with something like this. Varied pins and housings. Some for DC applications, some for AC applications.

Once you get bitten by the “I need this one part” bug enough times and you end up over-buying spares or mixed-lots that include dozens of varieties of pins and connectors.


Cost Considerations

$.14c in material cost for a connector is a pretty decent deal.

$.14c in material cost for a connector is a pretty decent deal.


Working on Ice Cold Beer, I recall paying ~$8/each for the 18 position dual-leaf PCB edge connector housings and around $70 for 30Au Gold 22-26AWG pins. (Sourced from arcadepartsandrepair.com )

Working on my first pinballs (Data East Star Wars, Sega Star Wars) I recall waiting a week for appropriate .156 IDC connectors or .156 molex-equivalents to improve interconnect reliability.

2 or 3 position Molex connectors are often used in arcade / pinball power or modding situations. I’ve paid $.50c up to $2 for individual Molex connector pairs. $.14c for a 3D printed pair in under an hour is pretty nice!


Originality Vs Pragmatic Convenience

Detail-oriented collectors might focus in on sourcing exactly the right connectors, something like the Red AMP connector that was manufactured in the middle-80’s. Profit-oriented operators would often direct-solder wires to board pins or use electrical tape and shrink tubed solutions in order to keep their amusement machines in service.

I’m not wholly opposed to a wire nut or compression slice with the justification that most of the wiring in our homes use these methods inside of electrical boxes for switches and plugs.

But mostly for arcades and pinballs I try to use connectors when it makes sense.

Finding Models

Connector-housings are actually pretty easy to “eyeball and approximate”. Taking measurements or looking at the spec, there are alot of connector-housing models on thingiverse to support peoples’ electronics projects. The two sets I found below were some of the most impressive in terms of quality and closeness to originals.

3-pin Molex
https://www.thingiverse.com/thing:4139433
https://www.thingiverse.com/thing:4131380

2-pin Molex
https://www.thingiverse.com/thing:4139450
https://www.thingiverse.com/thing:4139409

Searching around, it turns out the CAD models for Molex (and other) connectors are available from the official sources

For example, the commonly used .093” pin connectors often found on the AC lines of arcades:

Plug Side
Receptacle Side

Broader categories
- you will recognize alot of these from wiring harnesses in cars, common appliances in addition to arcade and pinball uses.

AMP Dual Leaf 28 Position (like a JAMMA card edge connector)

The file formats are common CAD formats that can be converted to printable .STL files pretty easily.

I’m not sure around the legality of using them but for the sake of this post we are going to assume hobby use one-offs won’t be a problem.

Finally, GrabCAD has a really handy library of all sorts of engineering CAD models, connectors included.

FINDING THE CONDUCTORS

There are so many different connector and mating-conductor standards used in Arcades & Pinballs, I’m not going to even attempt a comprehensive list but here are a few that you will probably run into frequently.


MOLEX .156

Molex .156 are often used in Arcade monitors (RGB, G, Sync) connections. The .156 size is also what most Bally, Williams, Data East, White Star, Sega and SAM Pinballs use for power interconnects. Though the pinball applications are typically as IDC (vampire tap-style) connectors. Molex is a solid upgrade and will mate perfectly with the .156 header pins on those boards.

https://www.aaarpinball.com/TwilightZone/TwilightZone.htm

https://www.aaarpinball.com/TwilightZone/TwilightZone.htm

https://www.flippers.be/basics/101_general_illumination.html

https://www.flippers.be/basics/101_general_illumination.html

Yellow one is .156 spacing, red one is .100 spacing.

Yellow one is .156 spacing, red one is .100 spacing.

http://www.ukvac.com/forum/connector-idsolvednow-id48-drive-board-versions_topic359385.html

http://www.ukvac.com/forum/connector-idsolvednow-id48-drive-board-versions_topic359385.html

Molex .100 are often used for lower voltage interconnects or in cases where component spacing was tight on the original board designs. Stuff like, Controlled Lamp to Cabinet Harnesses for Pinball and IO interconnects on some arcade cabinets.

https://www.arcadeshop.com/search?q=.100

https://www.arcadepartsandrepair.com/product-category/connectors-sockets-pins/100-kk-molex/

MOLEX .093

https://primetimeamusements.com/tech-tips-monitor-issues/

https://primetimeamusements.com/tech-tips-monitor-issues/

https://www.pinballlife.com/power-tap-and-8-way-power-splitter-board-for-williamsbally-wpc-pinball-machines.html

https://www.pinballlife.com/power-tap-and-8-way-power-splitter-board-for-williamsbally-wpc-pinball-machines.html


Molex .093 are very commonly used in 2 position and 3 position AC applications in arcades. Usually from a power tap before the isolation transformer running to the marquee light.

https://www.arcadeshop.com/search?q=.093%22

https://www.arcadepartsandrepair.com/product-category/connectors-sockets-pins/093-molex-connectors/

AMP and MOLEX Leaf Connectors

https://www.youtube.com/watch?app=desktop&v=WYi6_xv1mSY

https://www.youtube.com/watch?app=desktop&v=WYi6_xv1mSY

https://www.instructables.com/install-a-JAMMA-harness-in-an-arcade-cabinet/

https://www.instructables.com/install-a-JAMMA-harness-in-an-arcade-cabinet/

These edge connectors are the basis behind the JAMMA 56 pin card-edge connector found in many arcades.
Taito’s Ice Cold Beer uses three partially populated 36 pin card-edge connectors. I’ve also seen them used as beefy interconnects between some multi-board stack arcade PCBs.

https://www.arcadeshop.com/search?q=edge

https://www.arcadepartsandrepair.com/product-category/connectors-sockets-pins/edge-connectors/amp-twin-leaf-edge-connectors/


That’s enough to get you started though there are obviously others. As like most things in the electrical component space, you can also find these things at mouser.com, greatplainselectronics.com, digikey.com and other electronics suppliers. Personally, I try to support arcade and pinball specific suppliers when shipping is convenient and pricing isn’t out of hand.

IMG_4764.jpeg

A Note ABout Materials

Did you know PLA thermoplastics come from corn? PLA is formed from the sugars in corn starch by immersing corn kernels in sulfur dioxide which breaks down the corn into starch, protein and fiber components. Sort of like a fermentation process.. The oils are extracted into long-chain polymers that behave similarly to fossil fuel byproducts that can be made into plastics, polystyrene and textiles.

The most common thermoplastics used in 3D printing tend to be great insulators. The exception being, any filaments that might be reinforced with metal fibers and some carbon-fiber composites. Heat is the largest concern. You wouldn’t want to use 3D printed connectors in a service environment where it might be exposed to heat greater than the material tolerance.

PLA is a solid electrical insulator but only within a nominal temperature range. You can use PLA but understand that applications above 125F degrees carry risk as PLA starts to break down and loose structure at higher temperatures.. A moving truck or storage unit can reach temperatures of 120F degrees. You can use PLA to print connectors but it isn’t the first choice for electrical applications.

ABS can keep its properties above 200F Degrees. going to have similar temperature properties to PLA but a flatter melt-curve at the melting temperatures. (It will deform less)

PETG falls between PLA and ABS with support of temperatures up to around 160F degrees.

Nylon, which also support 200F+ Degrees (often much more) is commonly used in electrical applications. Wall plates, even some electrical wall boxes are constructed from Nylon or Nylon composites.

I make most of my connectors from Nylon, ABS, PC, or sometimes enhanced PLA. (ToughPLA or PLA+)

Christmas Vacation

Using the AmuseLabs PuzzleMe Builder, I created a Crossword based on Christmas Vacation. Want to try it?

One funny aspect of Lampoon’s Christmas Vacation is how people relate to it. Do most fathers relate to Clark and most mother’s relate to Helen? Or.. Do people come down on Eddie & Catherine being the more relatable of the bunch?

I think, most days, even in my early 40’s, I find myself inhabiting one of the Griswold kids. In that role, Christmas just sort of “happens” to me and seems to be out of my control, ostensibly the adults are in charge, right? Some days, I find myself rebuilding a toilet apparatus on the back deck on a 30 degree day and for some reason I’m wearing shorts. My inner Eddie is just below the surface.

https://altonbrown.com/recipes/aged-eggnog/

https://altonbrown.com/recipes/aged-eggnog/

Some days my inner Frank Shirley has had enough of the hearing the same ancient songs on the radio and I’m just ready to get back to the normalcy of the other 11 months of the year. Other days, I channel my inner Clark and tend to overdo the sentiments and search of perfection. The perfect gift… the perfect holiday meal, the perfect holiday moment. A fool’s errand but at least there’s help to be had from Jack Daniels.

I have this theory that the more dysfunctional your childhood was, the more you enjoy and relate to this movie. Whether you love it or hate it, whether your Christmas bonus is the stuff of pensions or the spreadable stuff for morning toast lovers: I hope you find a way to have a good Christmas and Near Years and enjoy yourselves.

Cheers!

Ready Player [n]

wp2318723-ready-player-one-wallpapers.jpg

Ready Player One (2011)

Members of the Oculus Quest team were all given copies of Ready Player One and they lifted many concepts from the book in their hardware and software design for the Oculus VR.

As I mentioned in a movie review post a couple years ago, Ready Player One is the sort of book that seemed to be genetically engineered to induce a nostalgia brain-boner for the inner kid in someone like me.

Ready Player One starts in an exposition-filled introduction where the main character, Wayde Watts, introduces the reader to a dystopian vision for the near future in 2045. Wayde is a resourceful kid without much opportunity, relegated to trailer park life in the outskirts of Oklahoma City. Work is scarce, food isn’t plentiful and the times are dangerous. An energy crisis, wars, famine & economic turmoil have ravaged the comparably comfortable society that we currently inhabit. Things are hard, especially for the least fortunate among us and the rich and poor alike seek distraction from the harshness of reality in a Virtual Reality MMO called The OASIS.

One of the OASIS’s cofounders, an eccentric high-functioning autistic genius billionaire named James Halliday, has died. His death triggers a multi-year virtual scavenger hunt to collect keys & solve challenges in search of an Easter Egg hidden somewhere inside the OASIS. These objectives are tied to the co-creator’s passions and interests, which are mostly anchored in 80’s nerd culture. This necessitates a planet-hopping, multi-year adventure that is densely packed with pop-culture references, fueled by 80’s nostalgia and performed by a cast of sympathetic characters. The winner will inherit Halliday’s fortune and control of the company that runs the OASIS, GSS.

Some combination of narrative connective tissue with the protagonist and Halliday and myself has led me to read the book numerous times on paperback or e-Book. Some of the specific references in the book (Joust, Wargames, Pac-man, Zork, Monty Python’s Holy Grail) ring the bell to bring out my inner 10 year old. That BBS-hopping, BASIC text-adventure-game-making nerd kid was me. When I wasn’t playing in the woods or in the tire-fields around our trailer, I was on the C64 spending hours on Aztec Challenge, Lode Runner, Donkey Kong, Law of the West & Snokie

When I first heard that Spielberg was going to be helming the film project, I was really hopeful that the movie would be a hit. It was commonly accepted that a direct translation of book to movie wouldn’t be feasible on terms of product licensing, alone.

The hook for me in the original story was the kid-adventure aspect of discovery of the Tomb of Horrors. It had the “treasure in your backyard” Goonies vibe as Parzival came to the realization the first key was hidden on planet Ludis, accessible to him despite his low-character strength and lack of wealth.

I never would have guessed that the writer of Goonies would opt instead to eliminate the entire “kid adventure in your backyard” vibe in favor of a CG-Fueled Death Race clone with no real soul or story. I would liked to have been a fly on the wall for how that came to pass.

Any chances of seeing Parzival traverse the Tomb of Horrors to ultimately confront Acererak in a Joust match are now relegated to fan-creations.

 
Epic fan art concept by Cole Marchetti

Epic fan art concept by Cole Marchetti

In preparation for the release of Ready Player Two, I watched the film again and listened to the audiobook.

This time, watching the film, I was able to appreciate it a little more as a standalone creation though I still miss the arcade video game references that were cut in favor of more recognizable pop culture fair. Decision by committee, I get it.

I really would have liked to see more classic arcades in the film, I really would have liked to see Parzival’s asteroid stronghold and a final battle closer to that of the original story. I’m mostly okay with the idea of remixing Wayde’s time as a shaved-like-a-naked-mole-rat IRL reclusion and infiltration into IOI with Art3mis’s movie plot. It makes Art3mis a stronger character, a fierce and independent young woman that will be far more interesting in the next movie, if they make one.

The audio book form of the original book is a treat. It is narrated by Wil Wheaton; the perfect choice for this material. It clips along at a good pace and is perfectly suited for the audiobook platform. Mr. Wheaton also narrated Armada, Ernest Cline’s love letter to The Last Starfighter.


Ready Player Two (2020)

Ready Player Two kicks off a few days after the close of Ready Player One’s storyline. Even though it continues from the book narrative it felt more like a screenplay for a second movie than a standalone sequel novel. Like the first novel, Ready Player Two’s primary narrative resolves around a scavenger hunt based on the original GSS founders’ obsessions. They do this while adjusting to their new positions of authority within GSS and over the OASIS and through the backdrop of their evolving relationships.

Wil Wheaton performs the audiobook narration and does an excellent job. He really has grown in skill as a narrator since the first book. This time around, when he inhabits the character of Wayde Watts, he does so in the beginning with a junky-like espresso-fueled excited rambling energy that really comes through in the performance. I found myself more than once checking the playback speed to see if it was still on 1x. That choice.. was a masterful one considering the storyline.

Without specifics and spoilers.. The stakes are huge and the storyline dips into numerous compelling contemporary concepts. Certain Characters are given a chance to grow and shine and some of those aspects will be fascinating to see on screen if this story is ever translated to film. Other characters’ idiosyncrasies get brought into daylight, sometimes to an uncomfortable degree but ultimately in service of the larger plot. That too, will be interesting to see in the market-tested, rounded and safe version that one days makes it screen. Spielberg has stayed in touch w/ Cline over the creation of the second book and even made a request of him concerning one of his favorite characters.

Ultimately, I liked Ready Player Two but I didn’t love it. The number of pop culture references per minute are cut considerably down and many of those chosen for this book didn’t resonate with me as much as the first. This book is a little more sci-fi concept with some D&D references, light on video games and heavier on 80’s pop music and film.

Just like the Ready Player One movie, this vision for Ready Player One Two may resonate with a broader audience by moves similar to swapping Zork for The Shining. Ultimately, it bums me out b/c the obscure, specific video game references from my childhood made Cline’s 1st book seem like it was written for me.

This? Not as much. Don’t get me wrong, I’m down for Cline’s world view and the central premise on this story and I think he’s a great storyteller and world builder. I just wanted more sprites and quarters in this escapism and less reminder of things like pandemics, broken governments and Purple Rain. YMMV. :)

Ready Player… Crossword

Using the AmuseLabs PuzzleMe Builder, I created a Crossword based on Ready Player One. Want to try it?

3D Printed Scared Stiff Slings (cont’d)

About a month ago, I started down the path to try to create:

(in my best sarcastic George Carlin voice) Scared Stiff Inspired, Slingshot Alternatives

You can follow along the first part of this adventure by clicking here.

front: single color extruded, masked then painted  back: dual extrusion Red and Grey Kodak PETG.

front: single color extruded, masked then painted back: dual extrusion Red and Grey Kodak PETG.

First, I tried a transparent red PLA from 3D Universe and dissolvable PVA for supports.
This yielded a really decent single-material result, though the inclusion of PVA pushes up the build cost by a couple bucks.

-Not a huge deal, these are just for me… or friends that ask for them but it also takes a bunch of time to clean up the PVA boogers or let them dissolve all the way. It ties up a build plate for 12-24 hours while it dissolves.

IMG_4287.jpeg
IMG_4304.jpeg

But what I really wanted to do is to get a decent dual-extrusion print template, separating out the transparent red from the original from the opaque parts. The idea being, if I could match the red translucent and print the rest in grey, each one is just a little detail paint work away from being closer to the originals.

In order to do multi material / multi extruder prints, you need a model that dissected into pieces.

Though not perfect, I eventually ended up with decent enough cutouts for a multi material print.

Though not perfect, I eventually ended up with decent enough cutouts for a multi material print.

Getting the model broke into components pushed the limits of the capabilities of Shapr3D and my skills in this arena. Shapr3D doesn’t give you a great way to perform contoured or free-hand cuts so I ended up duplicating the model into three copies and erasing away portions of the model with varied overlapping edit-cylinders used to mask out subtraction zones.

I tried an EDU copy of Solidworks as well but I have more learning in that area before I can be effective. A couple days ago, I ran across Mesh Mixer, which may end up being a better solution for my use case in the future.

IMG_4403.jpg

Kodak makes filament? Yep and it is really quite decent too. Good price, the spools have smooth cylinder walls and roll well and the material properties are very consistent. They are even food safe.

I’m mostly okay with the luminosity of the translucent PETG. The color is a little off from the original but a stickler could print on clear and used translucent hobby paints to tint in the red.

I’m mostly okay with the luminosity of the translucent PETG. The color is a little off from the original but a stickler could print on clear and used translucent hobby paints to tint in the red.

IMG_4385.jpeg
I still need to paint the feet lime green but so far my play testing set is holding up.

I still need to paint the feet lime green but so far my play testing set is holding up.

Have a Scared Stiff and need slings? You can pull down my models from here:

https://www.dropbox.com/sh/0t7wzhce1593ljl/AABL449nCkC3ols3Zp2hge2ba?dl=0

(please note the current prototypes still have a few small flaws but they are definitely playable)