
As an avid listener of The Broken Token Arcade and Pinball Podcast I’ve enjoyed following Brent’s adventures into getting into 3D Printing and Vacuum forming. It doesn’t take a lot of imagination to see how the ability to make your own parts at home can be handy.
I’ve had an eye on 3D printing for hobby usage back since a really insightful article from Microsoft Developer Blogger, Scott Hanselman back in 2015.
My takeaway from both, broadly, was that 3D printing would be a massive time suck. Who has time for that?
Well, it turns out we are quarantined at home now and my social calendar just freed up for 30-90 days. Time to jump in.
Three different printers had my eye.
Budget Conscious: Creality CR-10S

I see lots of forum posts where people struggled to get started with the Creality CR-10 and CR-10s printers.
“Please refer to the 50 page sticky post about common setup issues and how to solve them”
Once running and once the material specifics are worked out, most owners seemed thrilled with their choice, though. Almost to the point of shilling for the machine and overlooking minor flaws.
Pros:
Nice Entry Price (~$500)
Impressive build surface ~(12.75 x 12.75 x 15.5) inches
Cons:
Kit-built
Easy but fidgety assembly and setup
Machine footprint, Spool placement
Looks like the offspring of an erector set and Johnny 5
Middle of the Road: Prusa i3 MK3S

Time and time again the only bad thing I could find about the Prusa MK3S was that it wasn’t a major change from its predecessor. Usually with a footnote of “but we can’t really think of anything we’d like changed” though. The Prusa came up time and time-again as the winner amongst Maker enthusiasts in posts and articles, based on my research.
Pros:
Reasonably priced (~$750)
Good (but slightly compromised) build surface ~(9.8 x 8.2 x7.8) inches
Flexible options, available as pre-built or as a kit
Good Software
Exceptional reputation amongst enthusiasts, known to be a workhorse
Cons:
Occasional failures on long prints
Still has the erector-set aesthetic.
The ”All In” Option: Ultimaker 2+ or 3

The Ultimaker was the only one that seemed to offer a hassle free setup process from the beginner’s perspective. Most of my research landed on “we love it but it costs too much” as the shared consensus amongst Maker enthusiasts. The Ultimaker machines support NFC chips installed in the Ultimaker material spools. This means that the machine has built in profiles for Ultimaker materials and automatically adjusts by reading the NFC from the installed spool. It seemed to me that the vast majority of bad prints come from improperly calibrated settings in respect to material type, so extension of that logic is:
Foolproof material settings means less fouled prints.
Pros:
Easy setup
Comes pre-assembled
Well-supported by manufacturer
Parts availability
Automated print settings when used with Ultimaker Materials
Gold-Standard in Slicing Software (Cura)
Helpful companion apps for iOS and Android (monitor prints, reprint, pause - resume
Cons:
Highly priced (UM2+ is $2500, UM3 is $3500)
Slightly smaller build surface ~(8 x 8.5 x 8) inches
More expensive parts and consumables
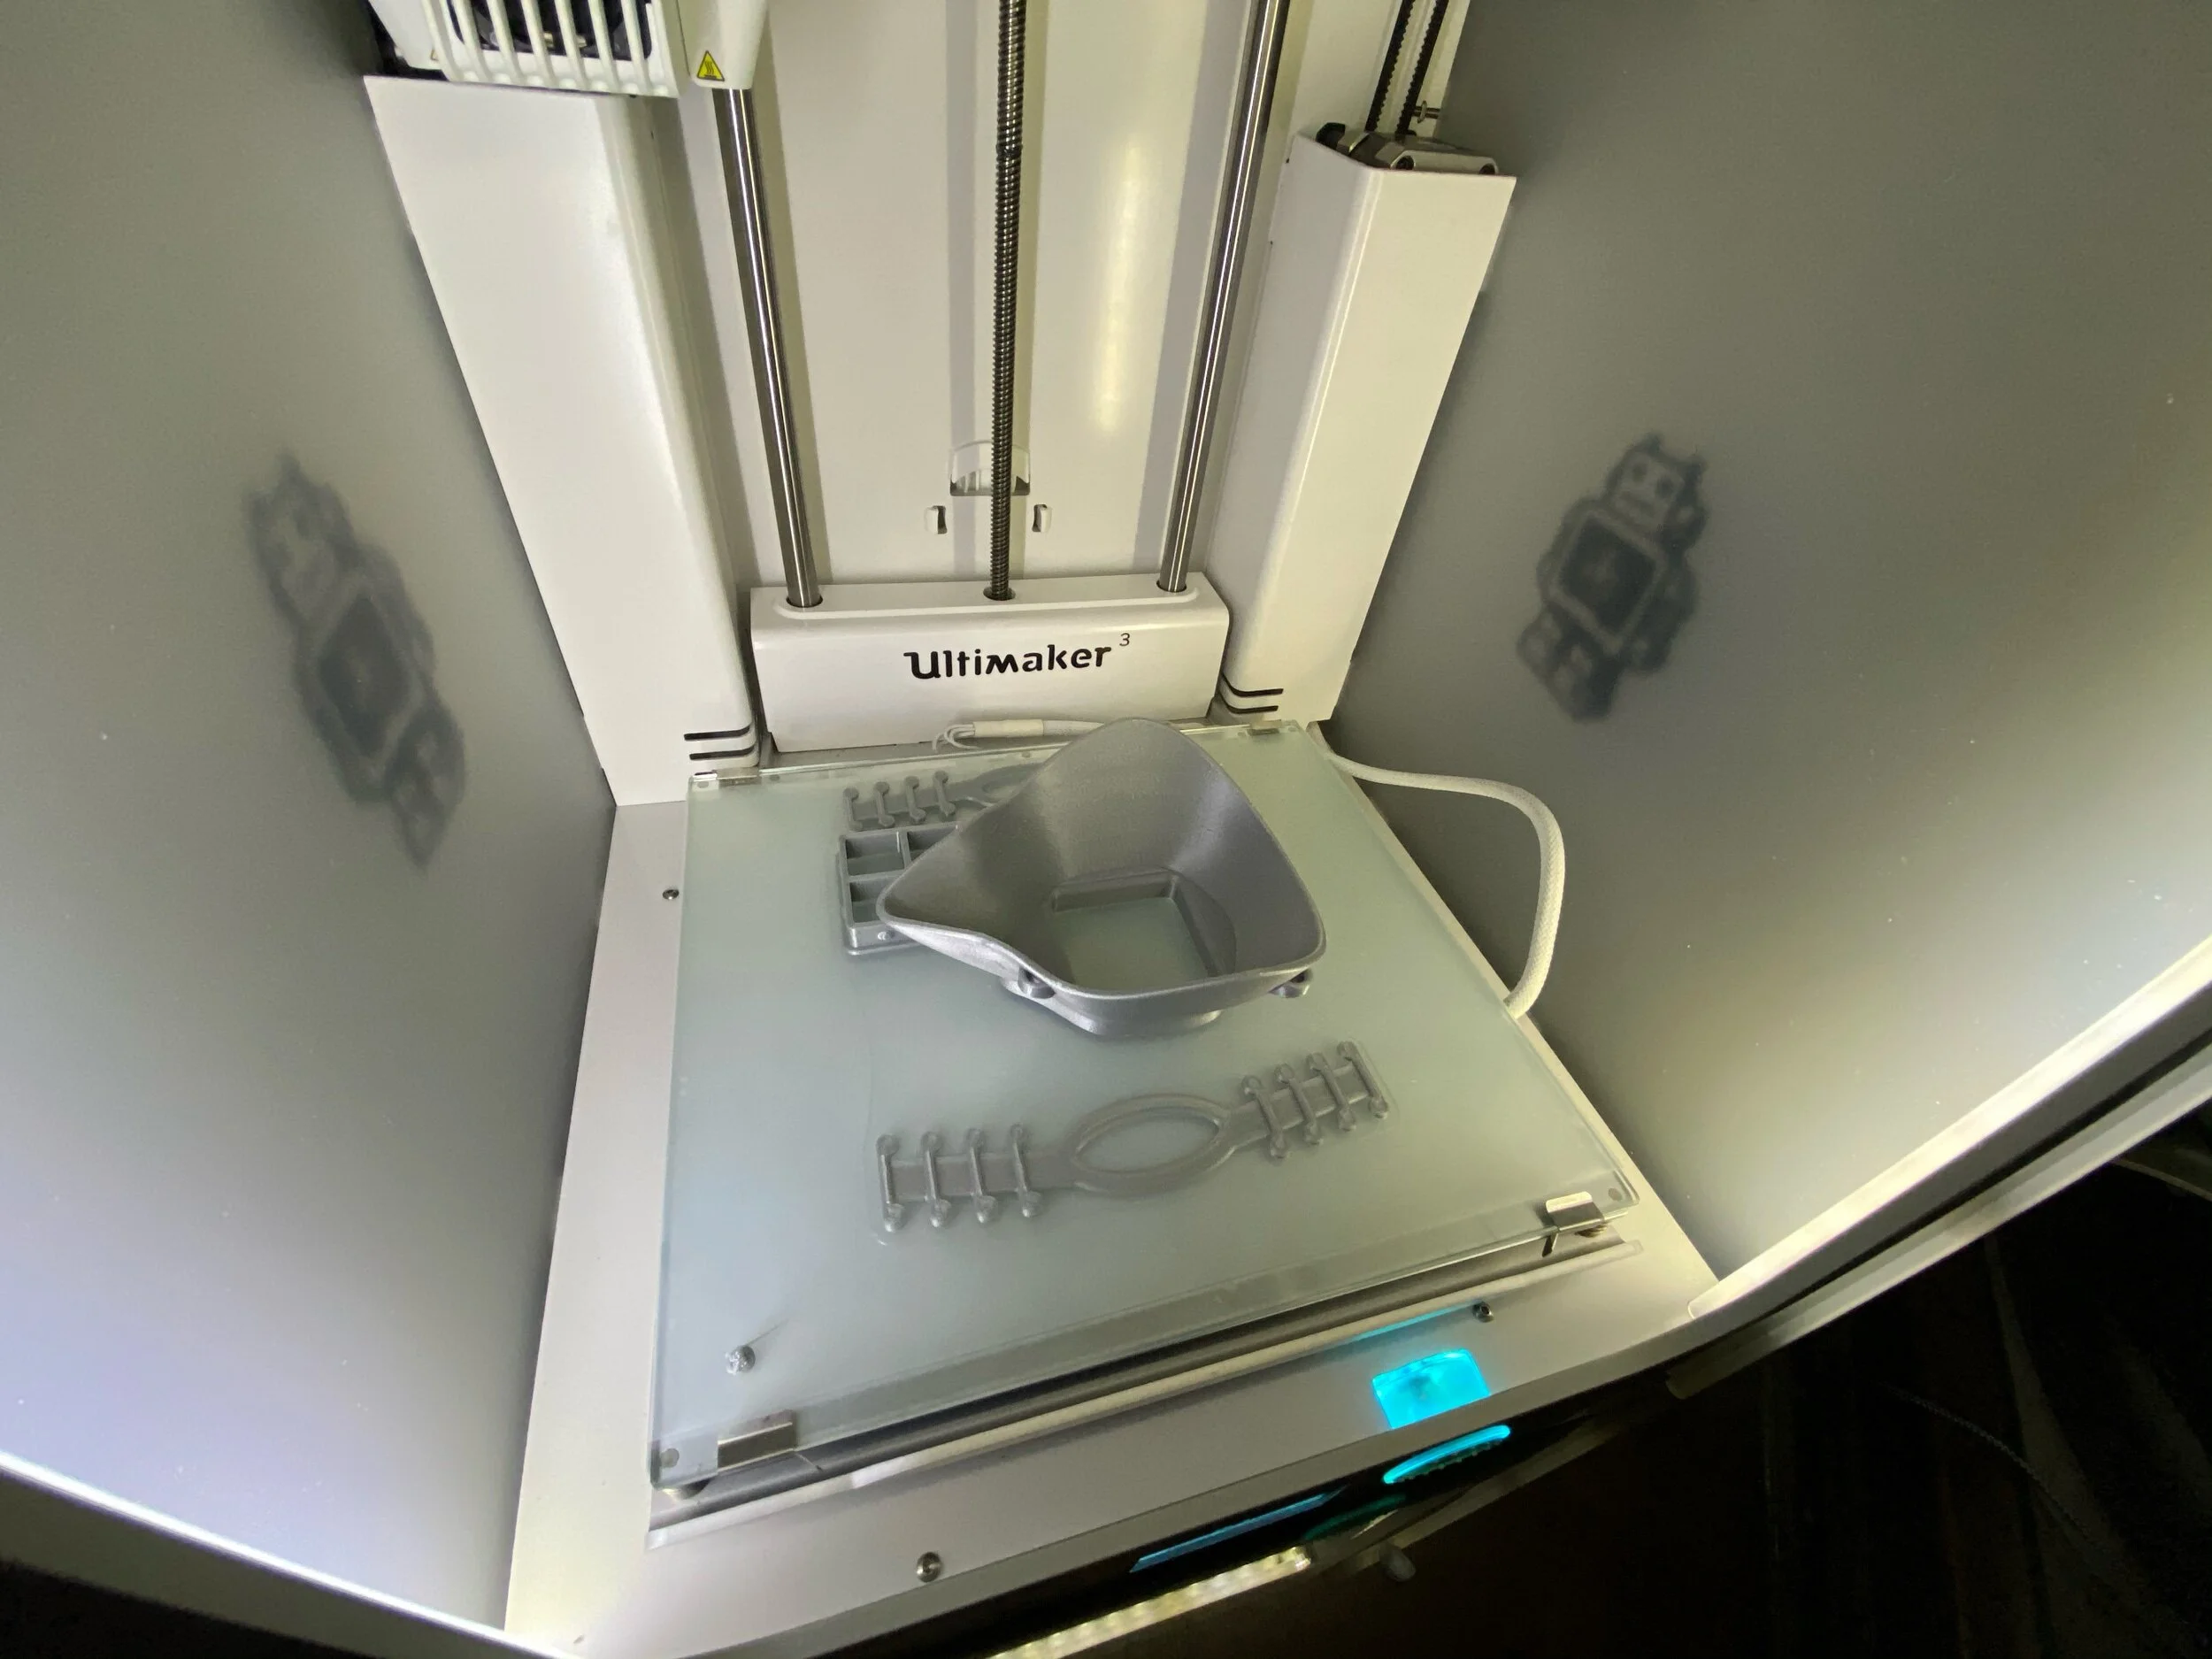
Ultimaker 3
After much deliberation I went with a refurbished Ultimaker 3.
I chose the Ultimaker line (among other reasons) because it seemed like a more self-contained machine, something I’d be apt to just leave set up on my desk. I chose the UM3 specifically because it was Wifi capable, supported dual-extrusion: the ability to print with two materials at once. I chose refurbished because of parts availability, factory warranty and because my Amex reward points only go so far. :)
Software Stuff
Slicing
Slicing is the process of ingesting a model and material properties and building a print plan for the printer to follow. (GCode File)
If you’ve ever done professional publishing where you send off print-ready file formats to the publisher - this is basically the same thing, at the high level anyway. Ultimaker Cura is a gold standard solution for Slicing, it is made by Ultimaker and is free even if you aren’t using Ultimaker printers. Having a 1st class slicing experience contributed to my decision to fork out the extra dough for an Ultimaker printer.

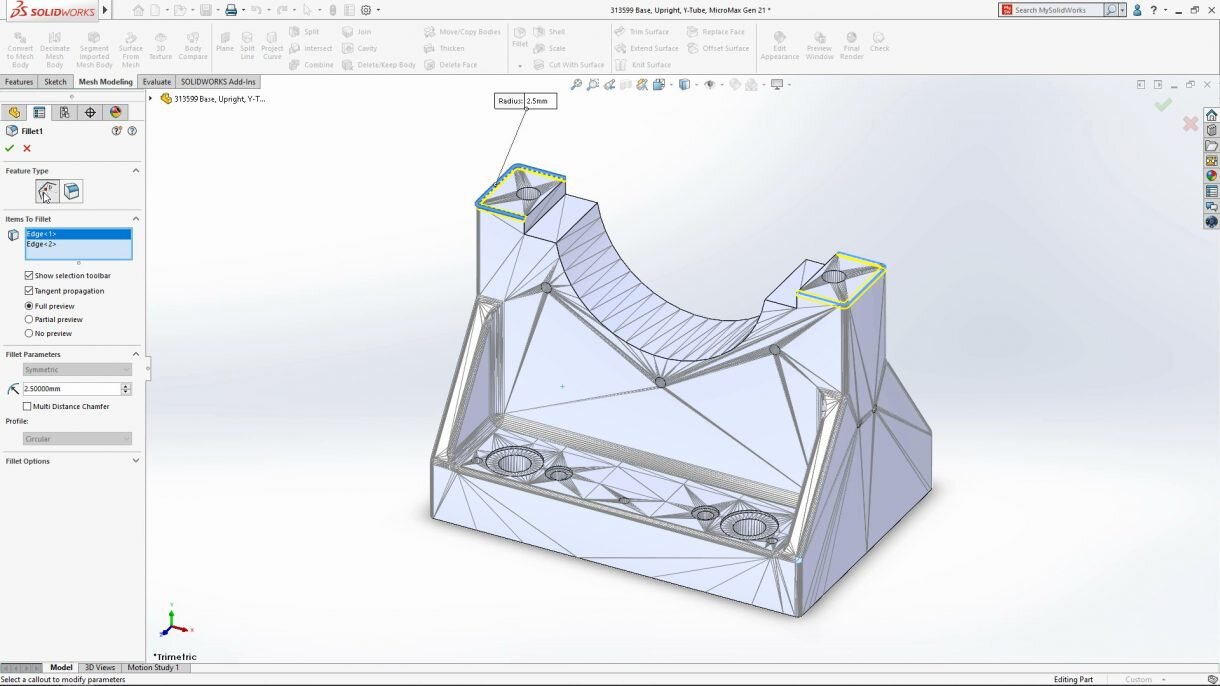
Design
SolidWorks is the Gold Standard Engineering and design solution. At $3400/year for the Standard edition, I can’t even consider this right now. <Closes Tab>
Tinkercad is an awesome solution for building printable 3D models. Schools often use it in STEM or Gifted labs as an introduction to engineering and design concepts.. It is cross platform and has AutoDesk support behind the product. It’s also free. The limitations will come in on high-polygon count or heavily complex models as well as certain import interpolations. But for simple 3D printing, TInkercad is the goto.

If you have an iPad and Apple Pencil, Shapr3D is very powerful middle-of-the-road option.

Shapr3D shares the same solid modeling Engine as SolidWorks (Siemens Parasolid™). It is iPad-only and requires the Apple Pencil but since I’m an iOS and Android Developer I didn’t have to look far for an iPad to commit to this use. The software is free to try and is about $240/year for the pro version. $1 apps might make that seem like a lot but taking in the app’s powerful foundation, level of polish, performance and extensive training library - $240/year sounds like a bargain to me.
Future versions will support object import via the iPad Pro’s new LiDAR camera. (There are videos of this in beta available on Youtube). So, I’m using a combination of TinkerCard and Shapr3D for modeling work.
The Tools are Here, Now What?
This is the point in this story where I’d normally be showing you 3D printed realized objects created from scratch in service of the pinball and arcade hobby. Things like that hard-to-find coil bracket for Ice Cold Beer or 3D printed unobtainium replacements like the Data East Star Wars Death Star plastic that I once paid $175 for.
But first, the ongoing global pandemic and the shortage of PPE have me focused on trying to be helpful in some small way in aiding those efforts.
Make the Masks
The Montana Mask is a 3D-printed mask initiative started by three medical professionals and tested at a clinic in Billings, Montana. The design includes a two-part reusable mask with a place for a filter insert.
Complex prints with overhangs and suspensions will be printed with scaffolding or support material (dissolvable or break-away). This mask design was clever in that it attempts to keep the angles shallow enough to prevent the need for support material, decreasing print times. Currently I’m at about 4 hrs to print each mask at a reasonable quality. I add window seal from MD Building Products, which is a super-awesome company - they donated two cases to me for this cause. Finally, I add in filter material: Flowmark Filters if you can get them. Blue shop towels or tripled up coffee filters can also work.


Stack o’ Completed Masks from Easter Afternoon
Other Opportunities to Help
In addition to masks there are clever initiatives for creating face-shields, respirator parts, ventilator valves and more.
It’ll be neat to get to work on the printer in the future for more entertaining purposes but for now, it whirls away 18 hours a day making stuff related to the pandemic, trying to show appreciation and aid protection for those who aren’t as fortunate as I am to be able to shelter in place and play on the computer all day.
If you know of any front-line medical workers or first-responders with a need for parts that I can print, reach out to me by email and I’ll get something sent your way.