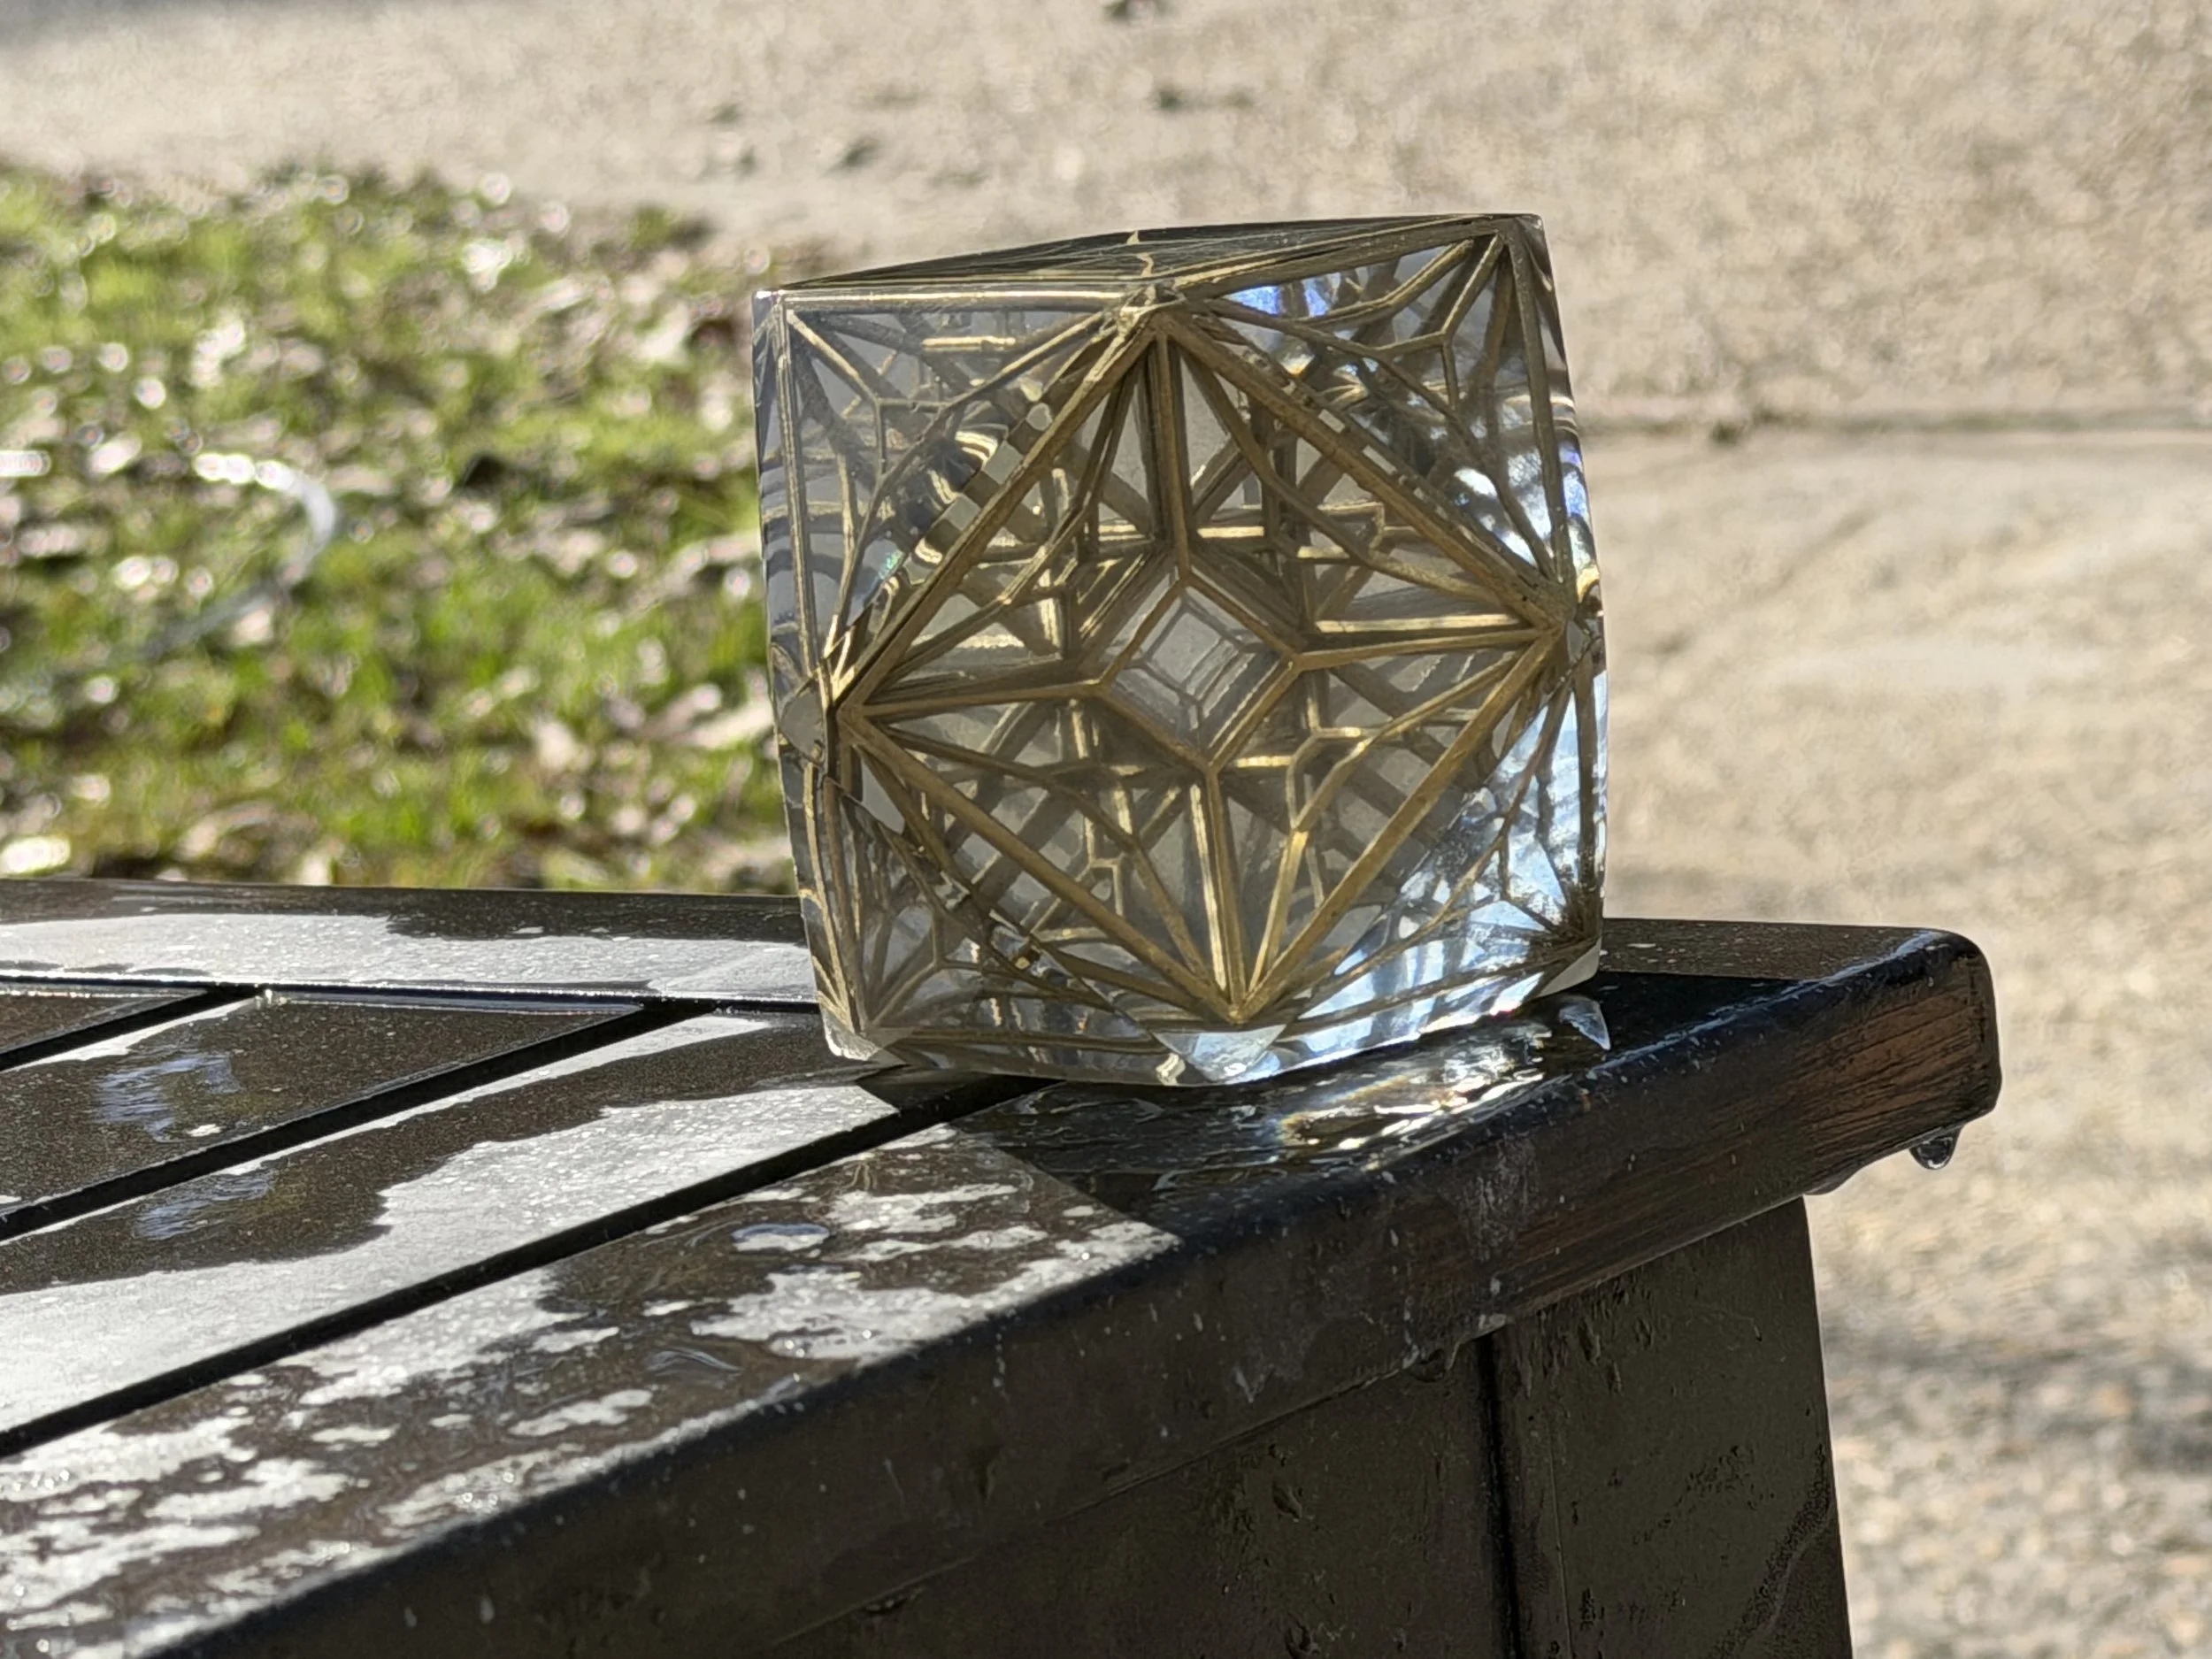
The Prime Radiant from AppleTV's Foundation Series.
The Prime Radiant:
An Archimedean solid, cuboctahedran made of six square faces and eight equilateral triangles.
The internal lattice is created by projecting the edges inward toward the center. A 3d lattice constructed from perspective shifted 2d projection. Thematically satisfying given that the Radiant is supposed to be third dimensional projection of a fourth dimensional quantum computer. Conceptually similar to a tesseract...
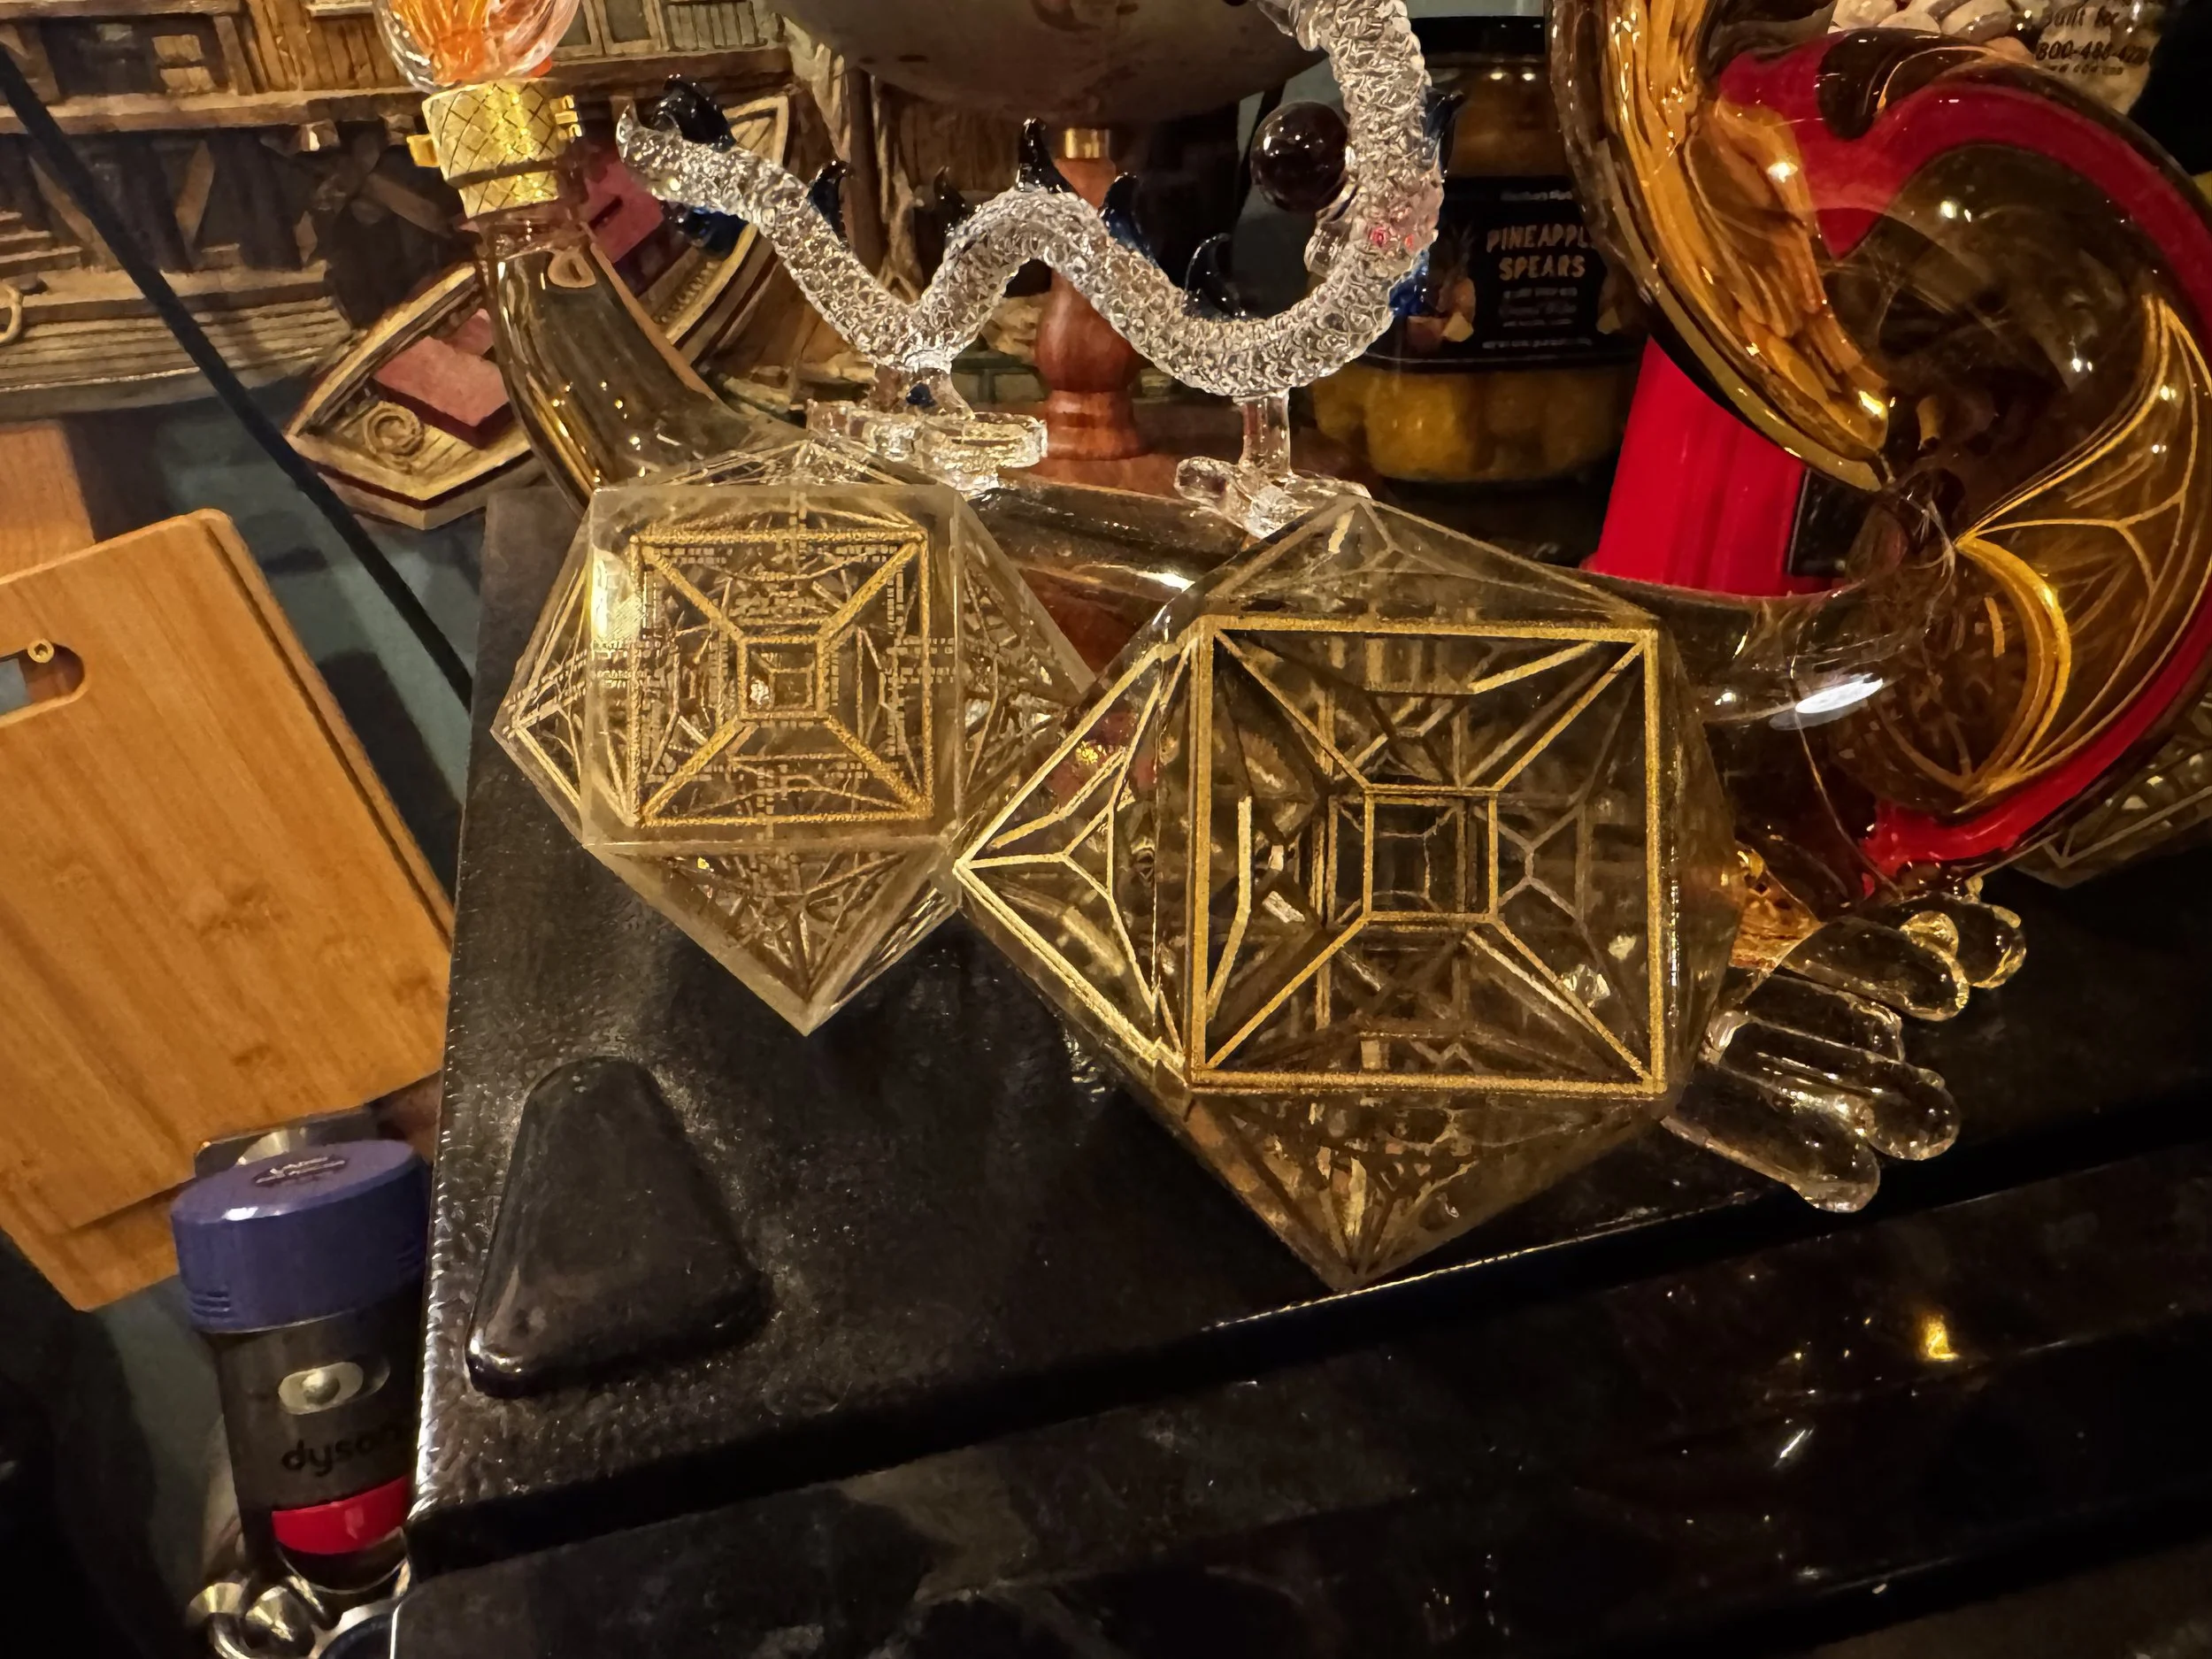
I know there are some other models out there but I really wanted to make my own, to explore the geometry a bit more and use it as an introduction to casting workflows.
Up front: this is a challenging build and a good example of a mixed-process make that blends 3d printing, post-processing and casting concepts.
You'll need:
Platinum Silicone, 15A or above; for example:
https://www.amazon.com/dp/B0CXTF535N?ref=ppx_yo2ov_dt_b_fed_asin_title
Transfer Tape:
https://a.co/d/bVCK6Oc
Duck Tape or really sticky packing tape:
https://a.co/d/b5ChHmL
Epoxy Resin, (Deep Pour advised); for example:
https://www.sunlu.com/products/crystal-clear-epoxy-resin-kit-48oz-resists-yellow-no-bubbles-perfect-for-diy-gifts-casting-coating-decorating-river-table-top
Primer:
https://www.hobbylobby.com/crafts-hobbies/craft-paint-stencils/spray-paint/krylon-colormaxx-spray-primer/p/81039819
Gloss Coat:
https://www.hobbylobby.com/crafts-hobbies/craft-paint-stencils/spray-paint/glossy-krylon-fusion-spray-paint-primer/p/81209783
Gold Leaf or Gold Metallic Paint of your Choice:
https://www.hobbylobby.com/crafts-hobbies/craft-paint-stencils/spray-paint/krylon-premium-metallic-spray-paint/p/1393?srsltid=AfmBOori83Wu446ze0DBsM4z1zQkIjzHimzLna9mDRAOoYvCSU8mDvMD
2k ClearCoat; for example:
https://www.amazon.com/dp/B00W2D83K2?ref_=ppx_hzsearch_conn_dt_b_fed_asin_title_1
3" Air Polisher; for example:
https://a.co/d/43a544K
A step-sanding / polishing kit; for example:
https://a.co/d/2dxSMZv
Epoxy Polishing Compound and Cleaner:
https://a.co/d/jbY99yW
Petroleum Jelly: https://a.co/d/dpQJICH
-or-
Mold Release spray: https://a.co/d/7lLczhP
Nitrile Gloves:
https://www.samsclub.com/ip/EQPT-Blue-Powder-Free-Nitrile-Gloves-2-pk-300-ct/13943808234?classType=REGULAR&from=/search
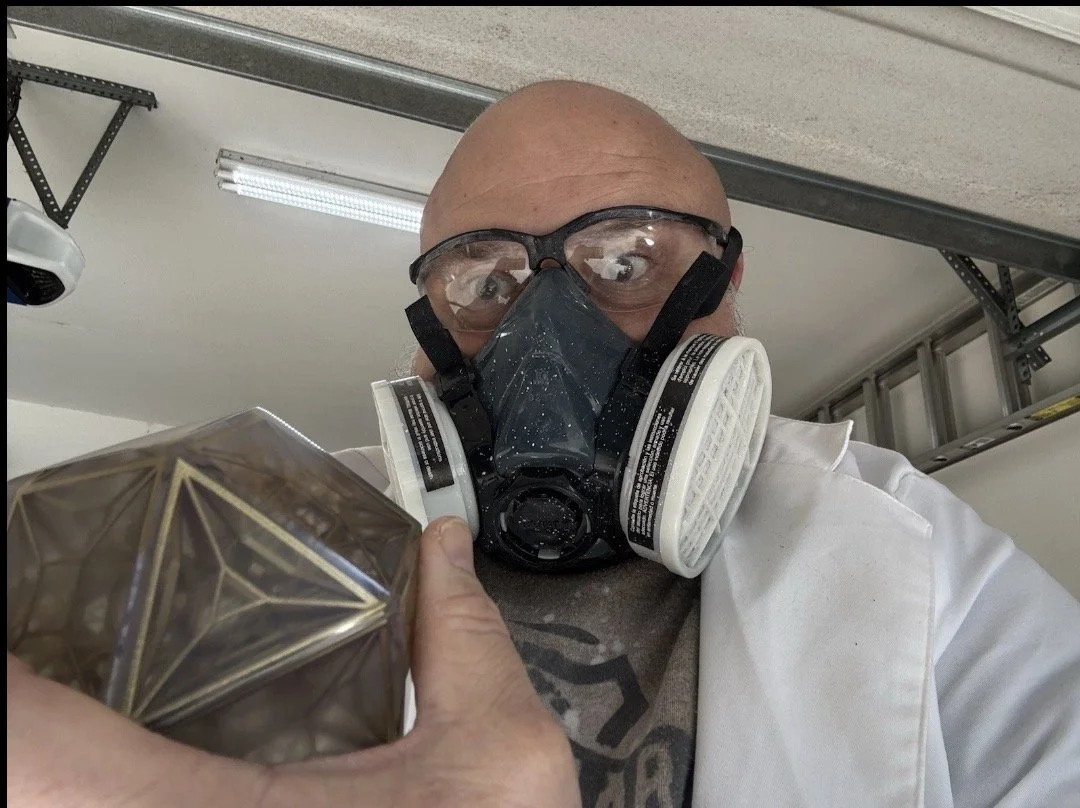
Paint and Body Respirator Kit:
https://www.harborfreight.com/paint-and-body-respirator-kit-large-56983.html
Safety Glasses or Goggles:
https://www.harborfreight.com/safety/vision-protection/safety-glasses/premium-safety-glasses-57503.html
Advised but not absolutely required:
A degassing solution, for example:
https://a.co/d/cKOB5KR
Make Process
The Shell
Print the shell to act as your casting mold master.
I printed mine in PETG.. If you have the ability to print it in resin you might be inclined to do so but just be aware that naked resin doesn't play well with Platinum Silicone and will (still) need to be covered with a high gloss finish first.
Sand, prime, paint your master.
This part is key:
The shinier and more mirror-like this master shape is, the clearer your casting(s) will be and the less post-processing they will require.
For mine… I printed it in PETG. Lightly flame polished with a hand torch, then sanded it lightly (800 grit) by hand, primed it, painted several coats of gloss paint, re-sanded until smooth and covered with several applications of the 2k Clear (Activated 2 part Clear Coat) and let it sit until hardened. .
Then I wet sanded from 800 grit → 1000 grit → 1500 grit →2000 grit →3000 grit →5000 grit → 7500 grit → 10,000 grit
Alternatively, you could print the outer tiles or cut (acryllic, glass) tiles using these as templates, then use the tile jig model to join the tiles. If you have access to a glass print bed based 3d printer (like an Ultimaker) you could print these tiles face down on the glass to reduce the amount of sanding before casting.
The Lattice
Print the lattice halves. Make some spares, they are fragile. If printing on FDM you will likely need to use dissolvable supports like PVA or have magic bridging capabilities on your printer. I printed mine directly on the build plate in Resin on a Jupiter 6k. Join the halves (glue them). Prime them, paint them, clearcoat them. I recommend the same 2k clear but you can probably get by with a automotive store brand 1k clear like Duplicolor.
TIP: If you don't let the lattice dry, cure and clear- the heat from the epoxy cure can ablate the finish off of the lattice, making the resin pour cloudy or even introducing gold flakes.
Making the Molds
Print some casting keys.
Print the half mold form. Print the full mold form.
I used 5" infill, gyroid fill and printed it in PETG but PLA is fine too.
A similar sized PVC pipe for the full mold is also completely doable.. You can also form PVC art sheets into a similar sized tube.
For the half mold, I recommend sticking to this half-mold form model though. It is sized so that you can hide any seams at the hemisphere of the model.
You could split the mold form halfway down the side to make it easier to demold but… the Platinum Silicone is the most expensive ingredient in the make. Anything that might make it leak seems not worth trying to preserve a $0.20 print :)
I printed some petg platters for the following step but you can use anything really, a crawfish platter, a plate - doesn't really matter it just needs to be level and flat. The silicone is typically food safe and will come off when it dries.
Onto your plate, platter, whatever you chose: Lay out the transfer tape, sticky side up. Push the half mold form onto the tape. Try to make a good seal. I recommend that you cut corner slits into the excess tape and fold it upwards onto the outside of the mold form and then wrap the whole thing in a loop of duck tape.
At this point you will have the half mold with a transfer tape bottom and the top is wide open.
Stick two of the key prints to the transfer tape bottom, near the inner wall of the mold form. Place your master model (triangle tile down) into the half mold. The triangle side that you stick to the transfer tape here will end up being your top after the second silicone pour is complete.
Mix your silicone according to instructions.. Pour around the master until the half mold is full, even overflowing a bit. You can add more 3d printed keys in at the edges on this side, floating at the top or you can cut some later.
Place it on a level surface for 5-7 hours, according to your silicone instructions.
After it sets… cut the mold form print off the side of the half mold. Leave the master in the half mold.
Coat the inside of your full mold with petroleum jelly or a mold release spray.
(Petroleum Jelly is perfectly fine for this step.)
With the half-mold laying on a flat surface, if you didn't already add 3d printed keys to this side in the previous step you can add them now:
Use a hobby knife to cut a couple triangle or square chunks in the outer edge, maybe ½" into the half mold and ½ to ¾" deep. Just be careful not to go to deep towards the center so as to cut your master.
If you had added keys to this side (the halfway point of the mold) you can remove them now. Use a gloved finger or swab you can now coat the surface around your protruding model with more petroleum jelly. Get it into those key holes too.
Then, add this petroleum-jelly lubricated half-mold into your full-mold form. Mix up another batch of silicone and pour over top until the model is covered sufficiently.