

Dial of Destiny, A Year Later

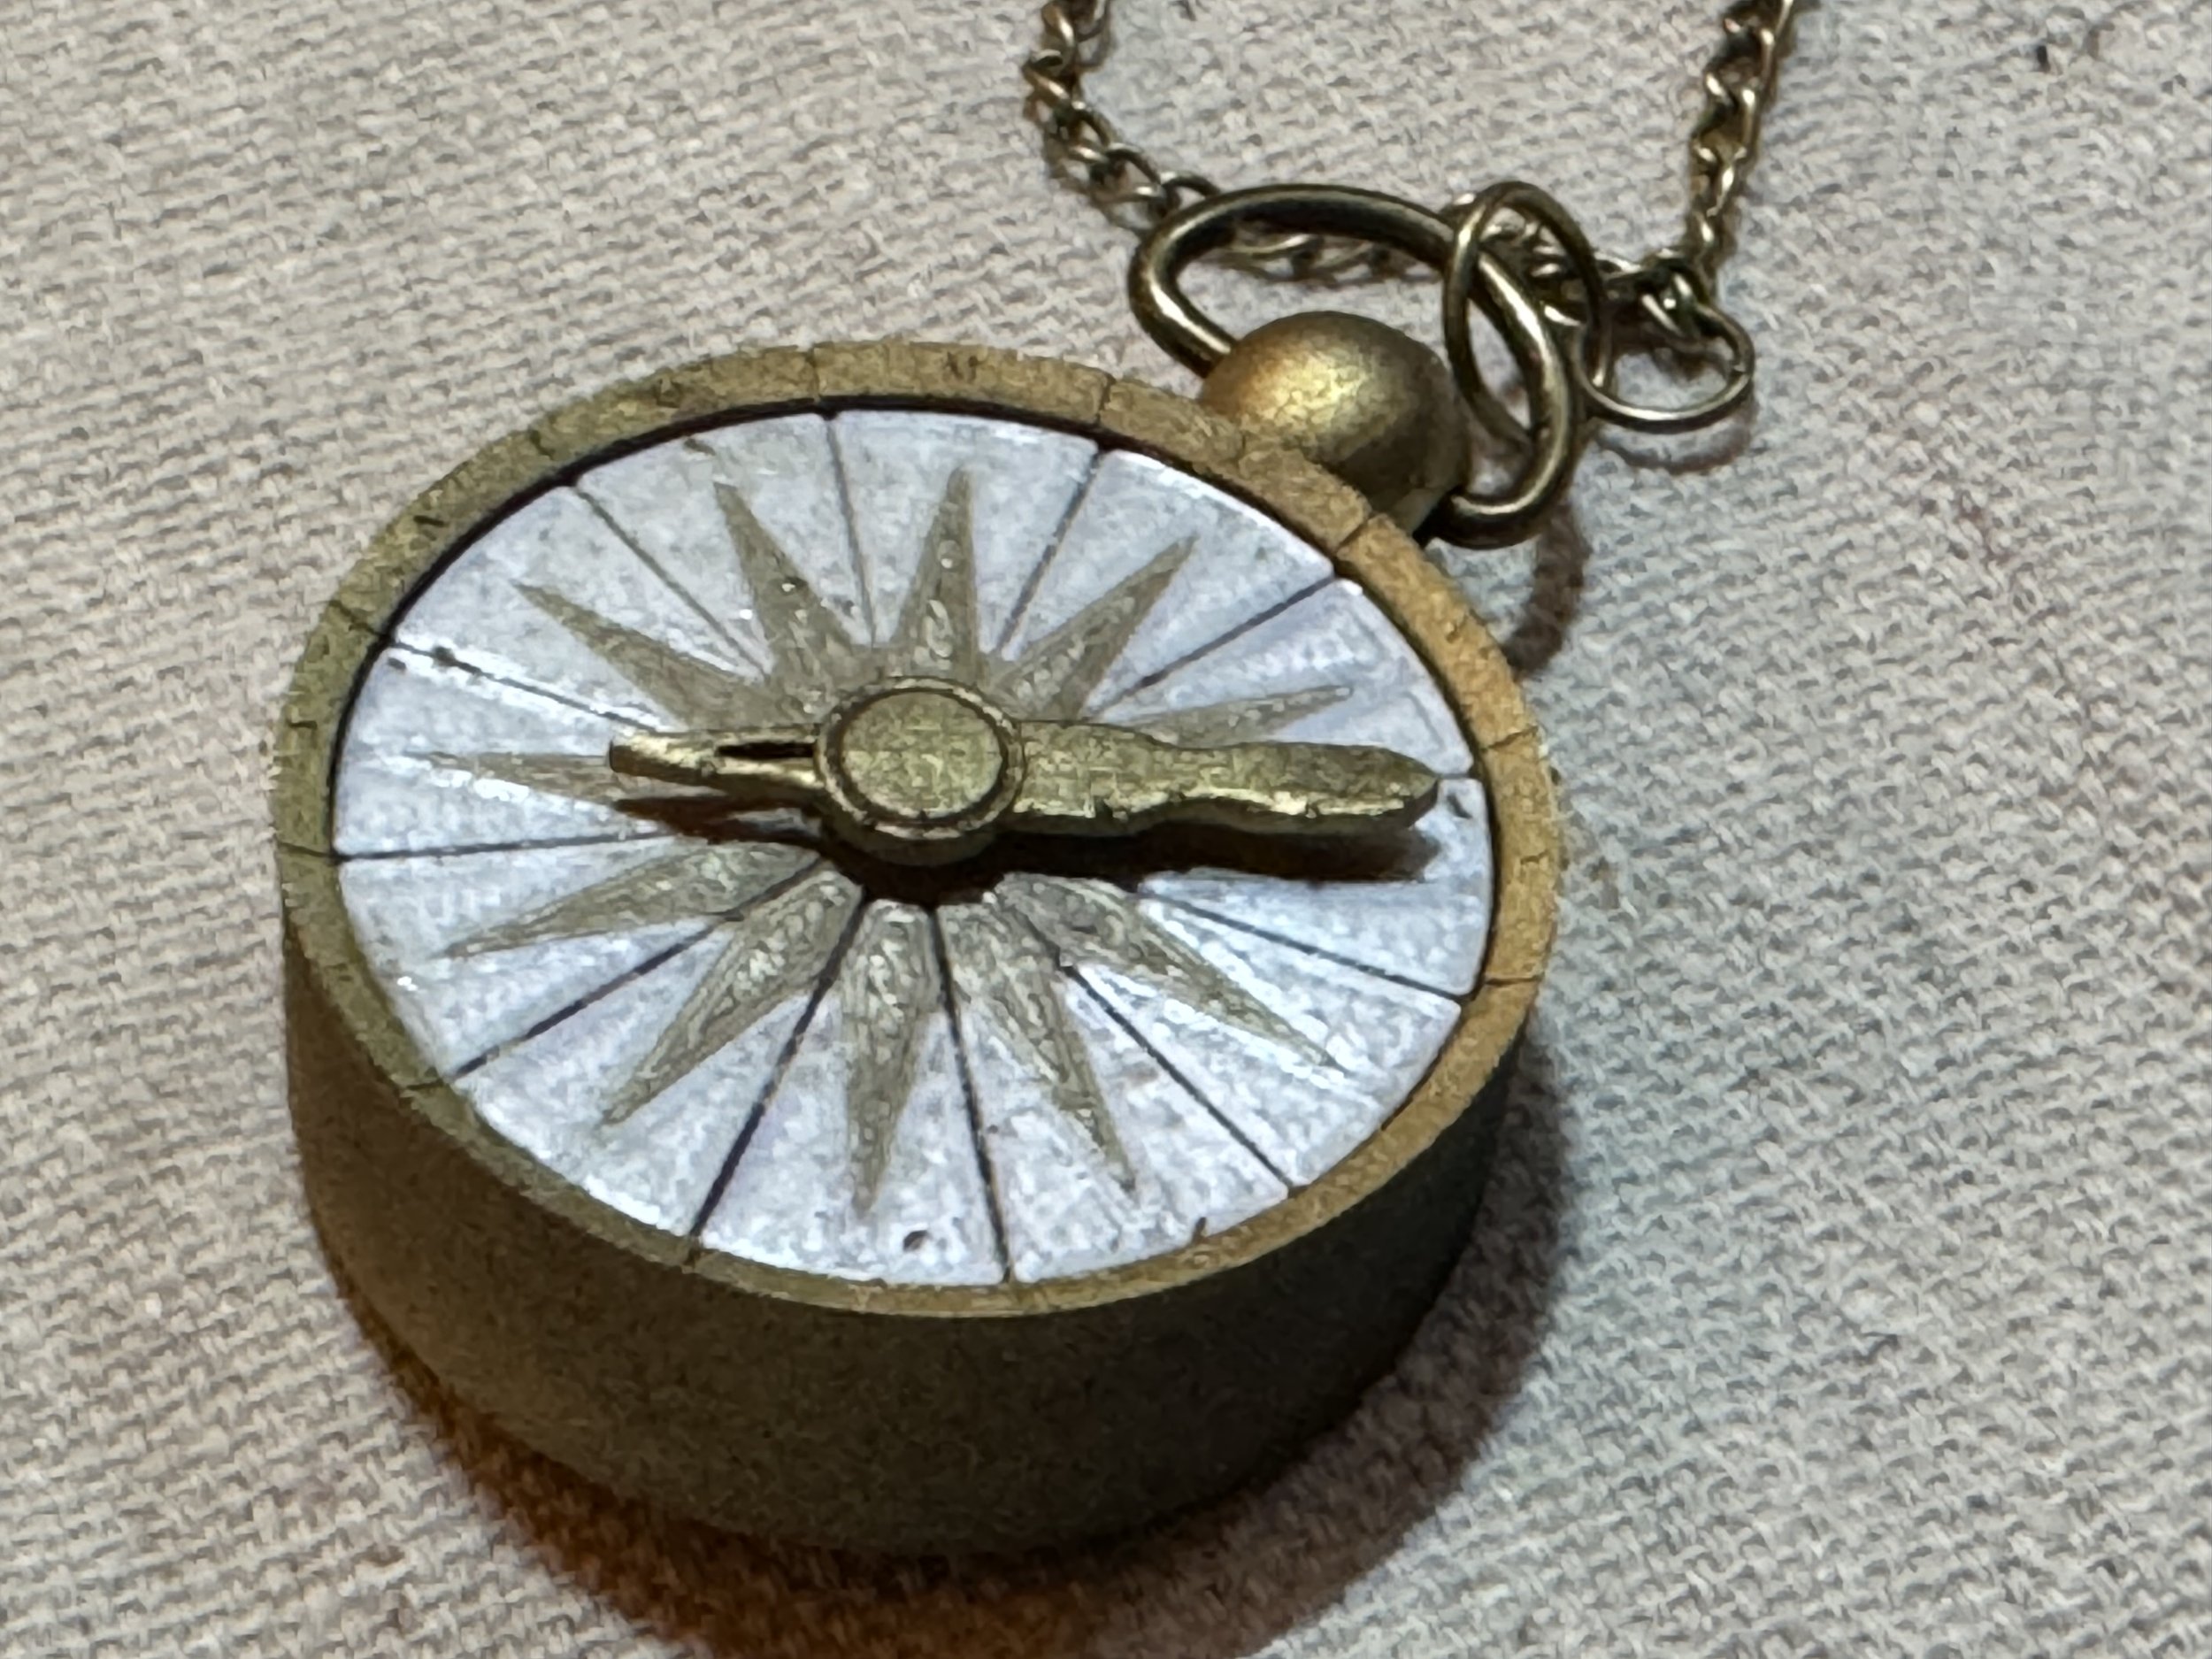
My final-state Dial of Destiny
As a recap: last year I converted a portion of our basement game room into an Indy Themed Bar and fell down an obsessive rabbit hole building Indy props that would have made Alice proud.
In the process I met some really awesome Indiana Jones fans, raised a little money for charity, picked up some CAD design skills and significantly upgraded my at-home manufacturing capabilities to include 3 fdm and 2 resin printers. I also added a ton of top-tier Indy props to our bar through trades and other shenanigans.
Mark XLII
No, I didn’t actually make 41 other designs though sometimes it feels like that many. In MCU Iron Man Tony Stark builder-parlance Mk42 was the result of a particularly obsessive period of focus following Tony’s experience at the Battle of New York. If you are superstitious, the naming has a pseudo-cursed connotation. I’m not superstitious and 42 is an awesome number.
In the time that I started making these Dial props, I’ve been careful to not call them replicas. There were a few incorrect initial guesses in my design and certain aspects of the original film models that my models didn’t even attempt to address. Also, I’m still an amateur at painting details and weathering.
Using the photo below, I revisited the designs in hopes of closing the gap towards replica-status.

This brilliant photo of the original hero film prop has been my sole design-update inspiration.
After spent a few months of on and off staring at the photo above, I started to make notes on design corrections that would make my model more accurate.
The glyph bowl angle of my previous build was too steep. This changed the depth of placement of center components and increased the size of the white glyph rings. The typeface of those glyphs was closer to the Disney World prop than the film prop. The original design had incomplete inset inscriptions on the sawblade gear and gold viewfinder disc. In fact, the viewfinder disc should act more like viewfinder floor. The large side was missing additional gear-teeth details. The way that my original model split using a center threaded retention plug was annoying. The placement of that split was a little off the mark.
I’ve also encountered a slew of issues related to my CAD environment. Shapr3D, being a parametric modeler isn’t well suited for sculpting like a direct modeler. It is outright hostile to handling mesh files, particularly where mesh files and parametric-modeled bodies influence one another. For example: I used adobe tools to make the glyphs themselves. These svg paths aren’t directly supported by Shapr3d and get converted into stl-like meshes as part of the import process. Anything that uses these meshes also get converted to meshes. So by using meshes as cutouts I limited my ability to go back and edit parts of the model later. This project is not well aligned Shapr3D’s capabilities.
Thankfully, a year after the film release and after a few weeks of renewed interest and tinkering I think I finally rounded home plate on a replica-grade Dial of Destiny prop, despite these challenges.


Ordering Info
I don’t expect a ton of interest and frankly I don’t plan on making that many of these. However, if there is interest I don’t mind making a few extras to sell. It will be more of a premium-priced project with any b-stock going to fleaBay. You can use the order link below to purchase a Dial based on these new designs.
I’ll also post a few on an Etsy store until they’ve all found homes.

Indiana Jones, Dial Of Destiny Prop Replica
Want one of these but feeling a little out of reach by price?
No worries - here are some free plans if you feel inclined to print one, yourself. You got this!
(The open source plans are slightly different than this prop replica)
The build is 240mm by 210m by 41mm. This is consistent with the size of the prop on display at Disney World and what you see on-screen. This build is made from a combination of materials, PLA+, PLACF (Carbon Fiber) but the majority of it is Resin. I intentionally built this one to be heavy, to feel realistic in the hand.
The hands move, it can be displayed assembled or in split-view similar to the film Premiere and includes a static compass for the center assembly that can be optionally installed. It does not facilitate travel through time but congratulations, you are already traveling forward in time at the rate of 1 second per second. :)
What’s included:
A Dial.
A Compass.
A DIY path to make your own lanyard like shown.
I [really-really] don't have the aptitude (or time) to make these lanyards right now.
Making the Spring Compass


This build assumes a conical / tapered spring. My early prototypes used the springs from mechanical pencils but they do not compress flat enough to be effective. The valve springs that come with a Delta Faucet RP4933 repair kit work reasonably well too but could be a little longer and Ace sold them for $7/pair. Ultimately, I settled on guitar pickup springs.

I designed the compass around the Hillman 903 1/4 x 1-1/2inch fender washer. Metal, because: thinness, resiliency and weight. I briefly tumbled these washers in a coarse media to lightly rough them up but I made 24 of them. Sandpaper works too. I printed and glued a PLA+ pad to act as a dial receiver and spring mount. I clip a small portion (1 loop) of the pickup spring to shorten it. Heat it with a torch and push it into the PLA+ to seat it. Don’t breath that in, btw. Then I add a little glue to reinforce the spring-pla mating surface.


The inside of the compass foot is a two stage pattern that locks into the Dial. I built slide grooves into the compass body and grooves and a catch into the big + small foot assembly. The center spring pushes on the center small foot which creates tension for the locking pin, slides downward in the groove to the point of the catch, which pulls the larger foot out of the body. The locking pin is steel cut from landscape pins and edge glued into 3d printed resin head-beads with a D-Ring hole.

Making the Lanyard
I won’t be making lanyards for people. The hourly rate would be in the “I hate doing this” price point. Making Dials can be pretty fun. Making the lanyard is not my thing. This lanyard took me a couple hours of eyestrain and mild frustration and it shouldn’t have. There is probably an easier way. Admittedly I watched 1/2 of a non-english muted youtube video about spacer beads and bracelets and the Squirrel that controls my attention span said “Nope.” As I said, probably a better way to do this but in the interest of sharing:
DIY Path:
- For people that buy Dials from me I will include the painted, resin spacer beads that I used and I'll share the model shortly, though it is nothing special.
Eye Pins:
Amazon.com
Jump Ring Kit:
Amazon.com
Chain and Lobster Clasp Kit:
Amazon.com

I'll shoot a quick video soon but essentially just using a cheap needle-nose plier, wire snips and super glue:
I put an open super-glue tube (the kind with the plastic applicator funnel) on a paper plate. I trimmed the eye pins, shove the the eye-pin wire into the applicator tip of the super glue to very-lightly coat it and then using the small needle-nose pliers, push it into the bead. You have to do it before the glue dries. Do this for both sides. If you are fast enough you will only have to actually apply glue to one eye pin wire per bead b/c they will glue together inside the spacer bead.
- I recommend using cheap pliers instead of your nice stuff so that if you get glue on it / who cares. Some of my time was spent cleaning glue off of nice tools.
(Did I mention?: I'm sure there is a better way to do this.)
Then, essentially just cut lengths of chain, open, apply and crimp the jump rings. Build out your segments as desired:
Jump Ring -> Chain -> [Eyepin + Spacer Bead + Eyepin] -> {repeat / alternate bead types}
Get to the length you want, add lobster clasps or rings. Each compass has a D-Ring installed.

Project retrospective
A Mild Bummer
The only negativity I experienced throughout this adventure was centered around a single individual who feels the need to slander or belittle other hobbyist prop-makers. He apparently likes to claim that my plans were derived or reverse engineered from his own. I typically don’t engage with other folks’ wrong-headed thinking and online drama. I’ll just address it directly and say that claim was bullshit and continues to be bullshit. The proof is on this blog and on youtube. I recorded the design sessions.
He likes to claim that I bought one of his Dials to reverse engineer it. In actuality, I did buy several Dials from other people, including his. One that was made for someone else, a cancelled order for someone that had medical bills to pay. I later Etsy-stalked someone matching that description and set them up with a Dial of their choice for free.
I sleep great at night.
Generally, Awesome
I had a great time making Dial props for people last summer and I wouldn’t trade the experience of commiserating online with other Indy fans for all of the ash and bone in Nurhaci’s urn.
I’ve had Dials go to museums, to archeology programs. I’ve enjoyed watching people use them cosplay events and as part of their Indy displays. I’ve seen them used in countless fundraisers and it never gets old to see a pay-it-forward chain that starts from a simple handmade gift to someone that could use a pick-me-up or individual validation. I have a stack of photos from other peoples’ displays that are destined to go around my bar.
I also learned a lot. I picked up some design and modeling skills that will be really handy moving forward.
I think this build will finally leave me satisfied that I did my best with it and ended up with a really nice one-of-a-kind prop.
Time to complete some other projects..
You’ll note this is a pinball and arcade blog, so I have some pinball and arcade-themed projects queued up for the next few months. One of them is a perfect segue in compliment to all of this Indy prop making that I did for a year.
Hint: my favorite pinball machine needs a topper.
Other hint: Decent whiskey-drinking weather is around the corner.
I’ll continue to post a blend of maker-stuff here, as well. This blog is primarily a way of organizing my thoughts.
Footnote: thoughts on Open Source
I opened sourced the original design efforts on the Dial of Destiny project from the beginning.
I was thinking of it like a software engineering project. Most of the Indy and Prop-related forums showed a fair amount of interest in the concept and included helpful posts of screen grabs and logical conjecture around the prop’s likely measurements and other characteristics. But it didn’t seem like anyone was actually doing anything about it. My hopes were to provide a starting point and lean on collaboration with more experienced designers to take my concepts, improve on them and share those improvements back with the main project. One designer engaged with the project in this way. ¯\_(ツ)_/¯
Want to make your own? The files are on printables and dropbox.
The instructions, are still locked up in my brain, unfortunately but I’ve started making an explainer video..
Tron Lightcycle Run

Finally got a chance to check out Tron LightCycle Run today. We rode it twice, one via a Lightning Lane (purchase) and one via a Virtual Queue. When this ride was first announced for Shanghai Disney, we seriously considered traveling over to ride it. The last time we were at Disney World, cast members and construction teams were getting preview rides. I tried everything shy of applying for a job to work at the part to get on during that preview event.
So, I was pretty excited for this.


Impressions

The theming of the queue area is incredibly well done. At night, especially you feel like you are standing in The Grid. The sail-like material covering the ride looks a little like a dead shrimp-analog from an alien world during the day and like a futuristic portal to another dimension at night. The queue instruction-tutorials are more repetitive than most rides. There are two-sided lockers enabling you to easily stow larger items before getting on the ride and that process is basically perfected.
The ride itself is really good. The design of the cycles do a great job of making you feel as if you are riding a futuristic crotch-rocket/sport bike.
There seem to be some design issues with the safety system that I can’t really pinpoint from what I observed. Coming off of a stressful series of events, I’m probably in the worst shape of my life. I had zero problems getting on and locking myself in. 1 or 2 riders per train did seem to have real problems getting locked into the bike seat. It seemed to be less about belly-fat and more about the ratio of chest size and calves. I didn’t try because I was comfortable (and wouldn’t want to be responsible for damaging or stretching a safety mechanism) but you can apparently bench-press your way out of the seating position like the funny guy in the above screen grab. The thinker. Nice. At least one train has a traditional coaster car for those who are unable to be seated on the bike seat.
The ride has great velocity and doesn’t jerk you around. The soundtrack and environmental effects around the entire ride are stellar. It is a short ride. Ultimately, I’m really glad I didn’t spring for tickets to China to ride this coaster. It is cool but not THAT cool. Tron Lightcycle Run is a top 5 ride for me but Guardians is a better coaster.
Captain Crazy's Paradise
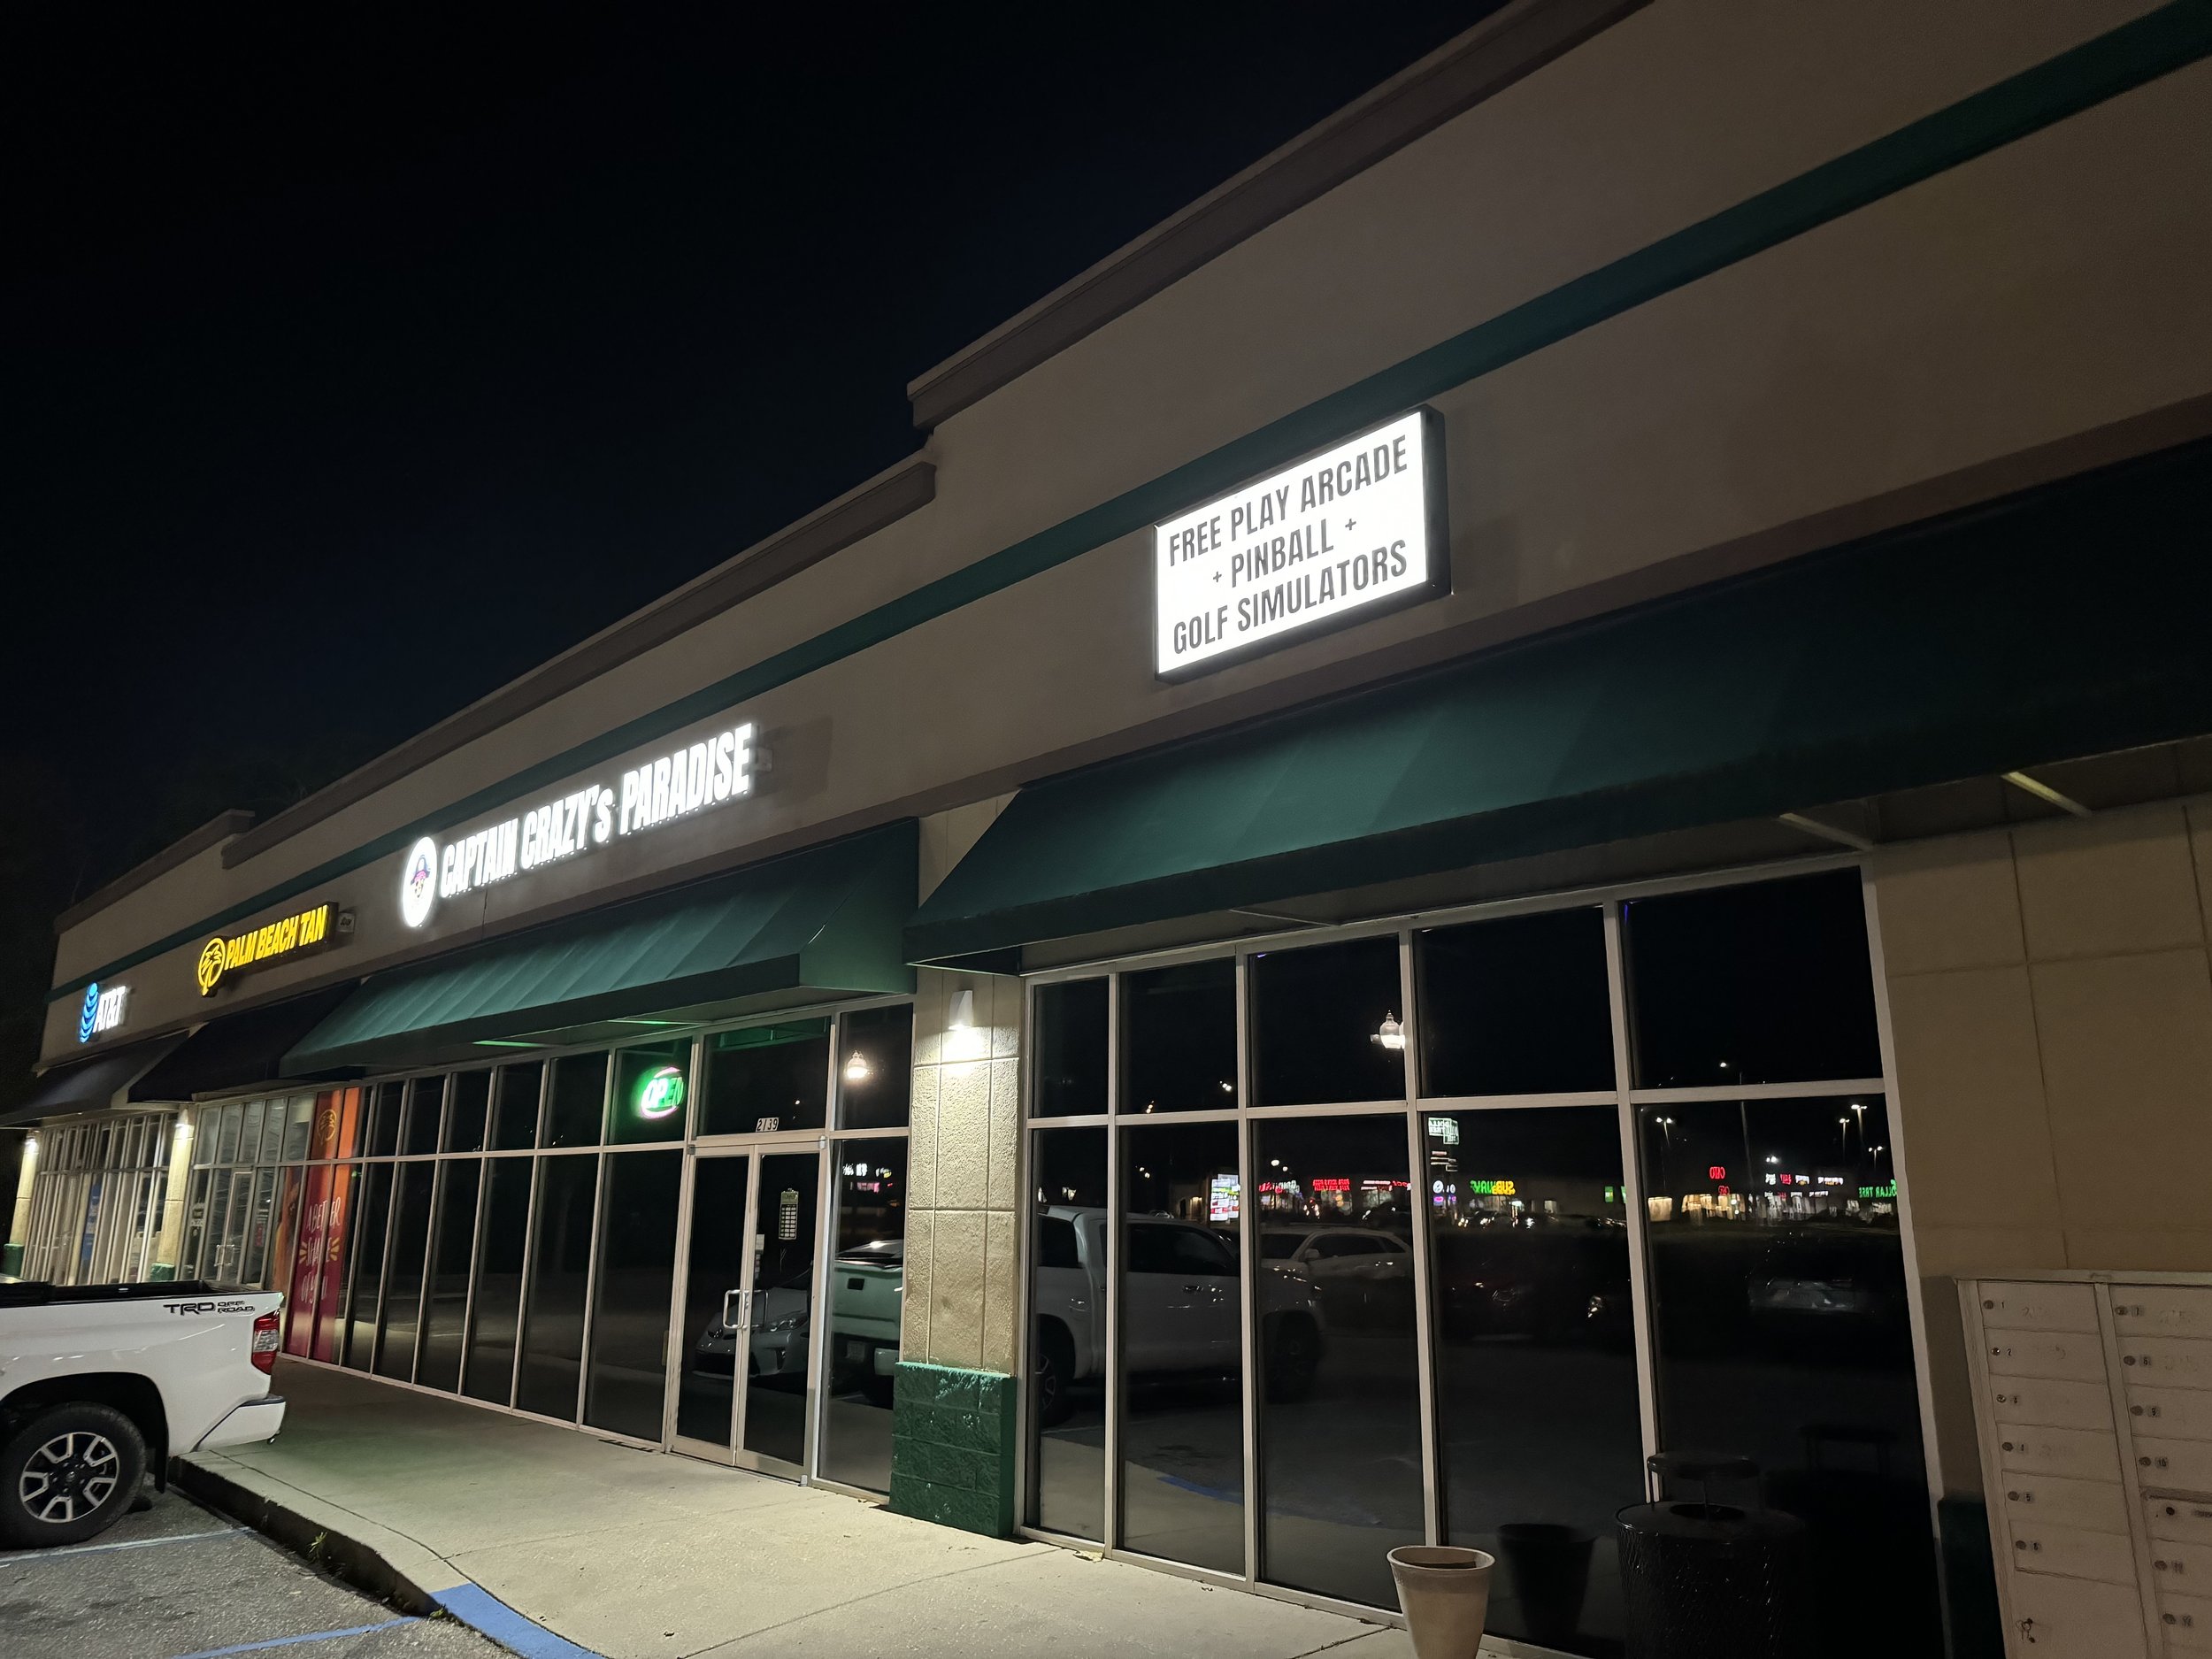
I might have grown a bit cynical about arcade and pinball spots near me. Mostly because i’ve been let down so many times by the same batch of unmaintained games from the same two Mobile Area huckster operators. Games with no GI, malfunctioning switches and other problems set up for split-take at a myriad of doomed-to-fail spots that decided to open an arcade, without actually having any arcades.
So, when I started to hear about Captain Crazy’s opening in Foley, Alabama I didn’t really have the emotional bandwidth to get excited. It is just going to be another tease, I thought. The universe will smite my excitement with some new rug-pull, I thought.
I was wrong. Captain Crazy’s is freakin awesome.

Plus.. I’ve been a little busy and haven’t had an abundance of playtime.. But this Saturday I found a window and popped down to Foley.
My quick takeaways from the excursion…
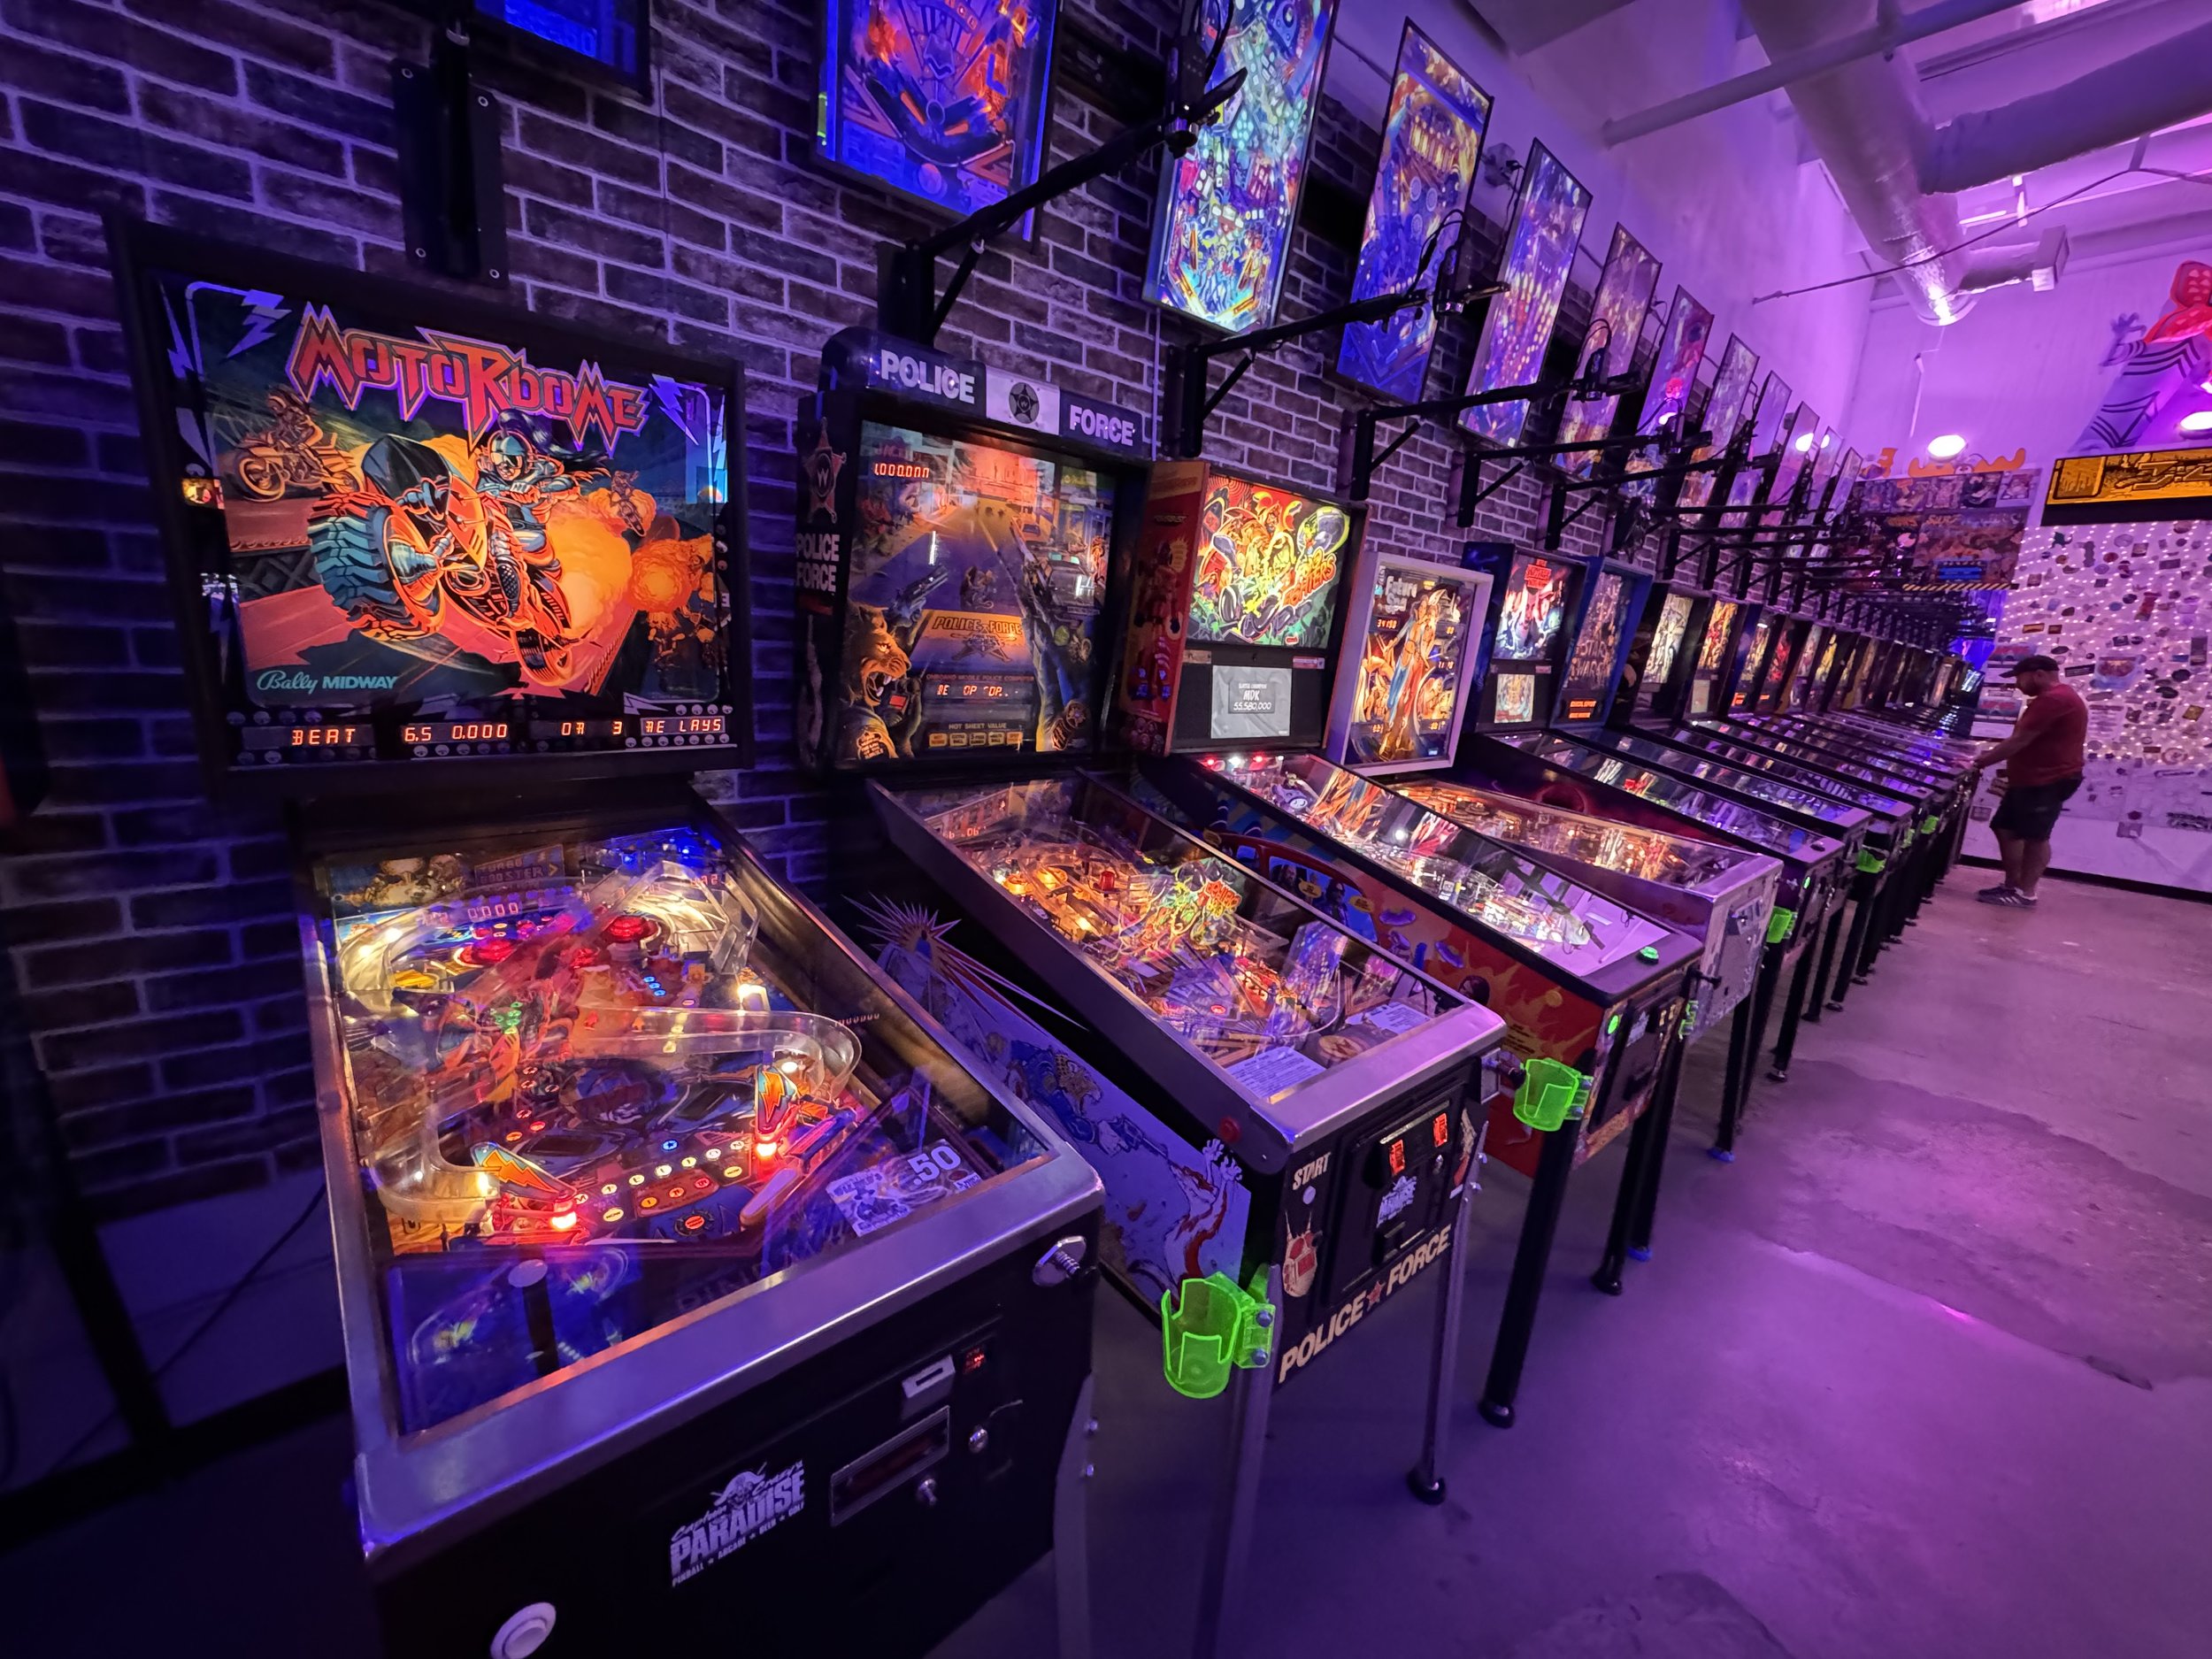
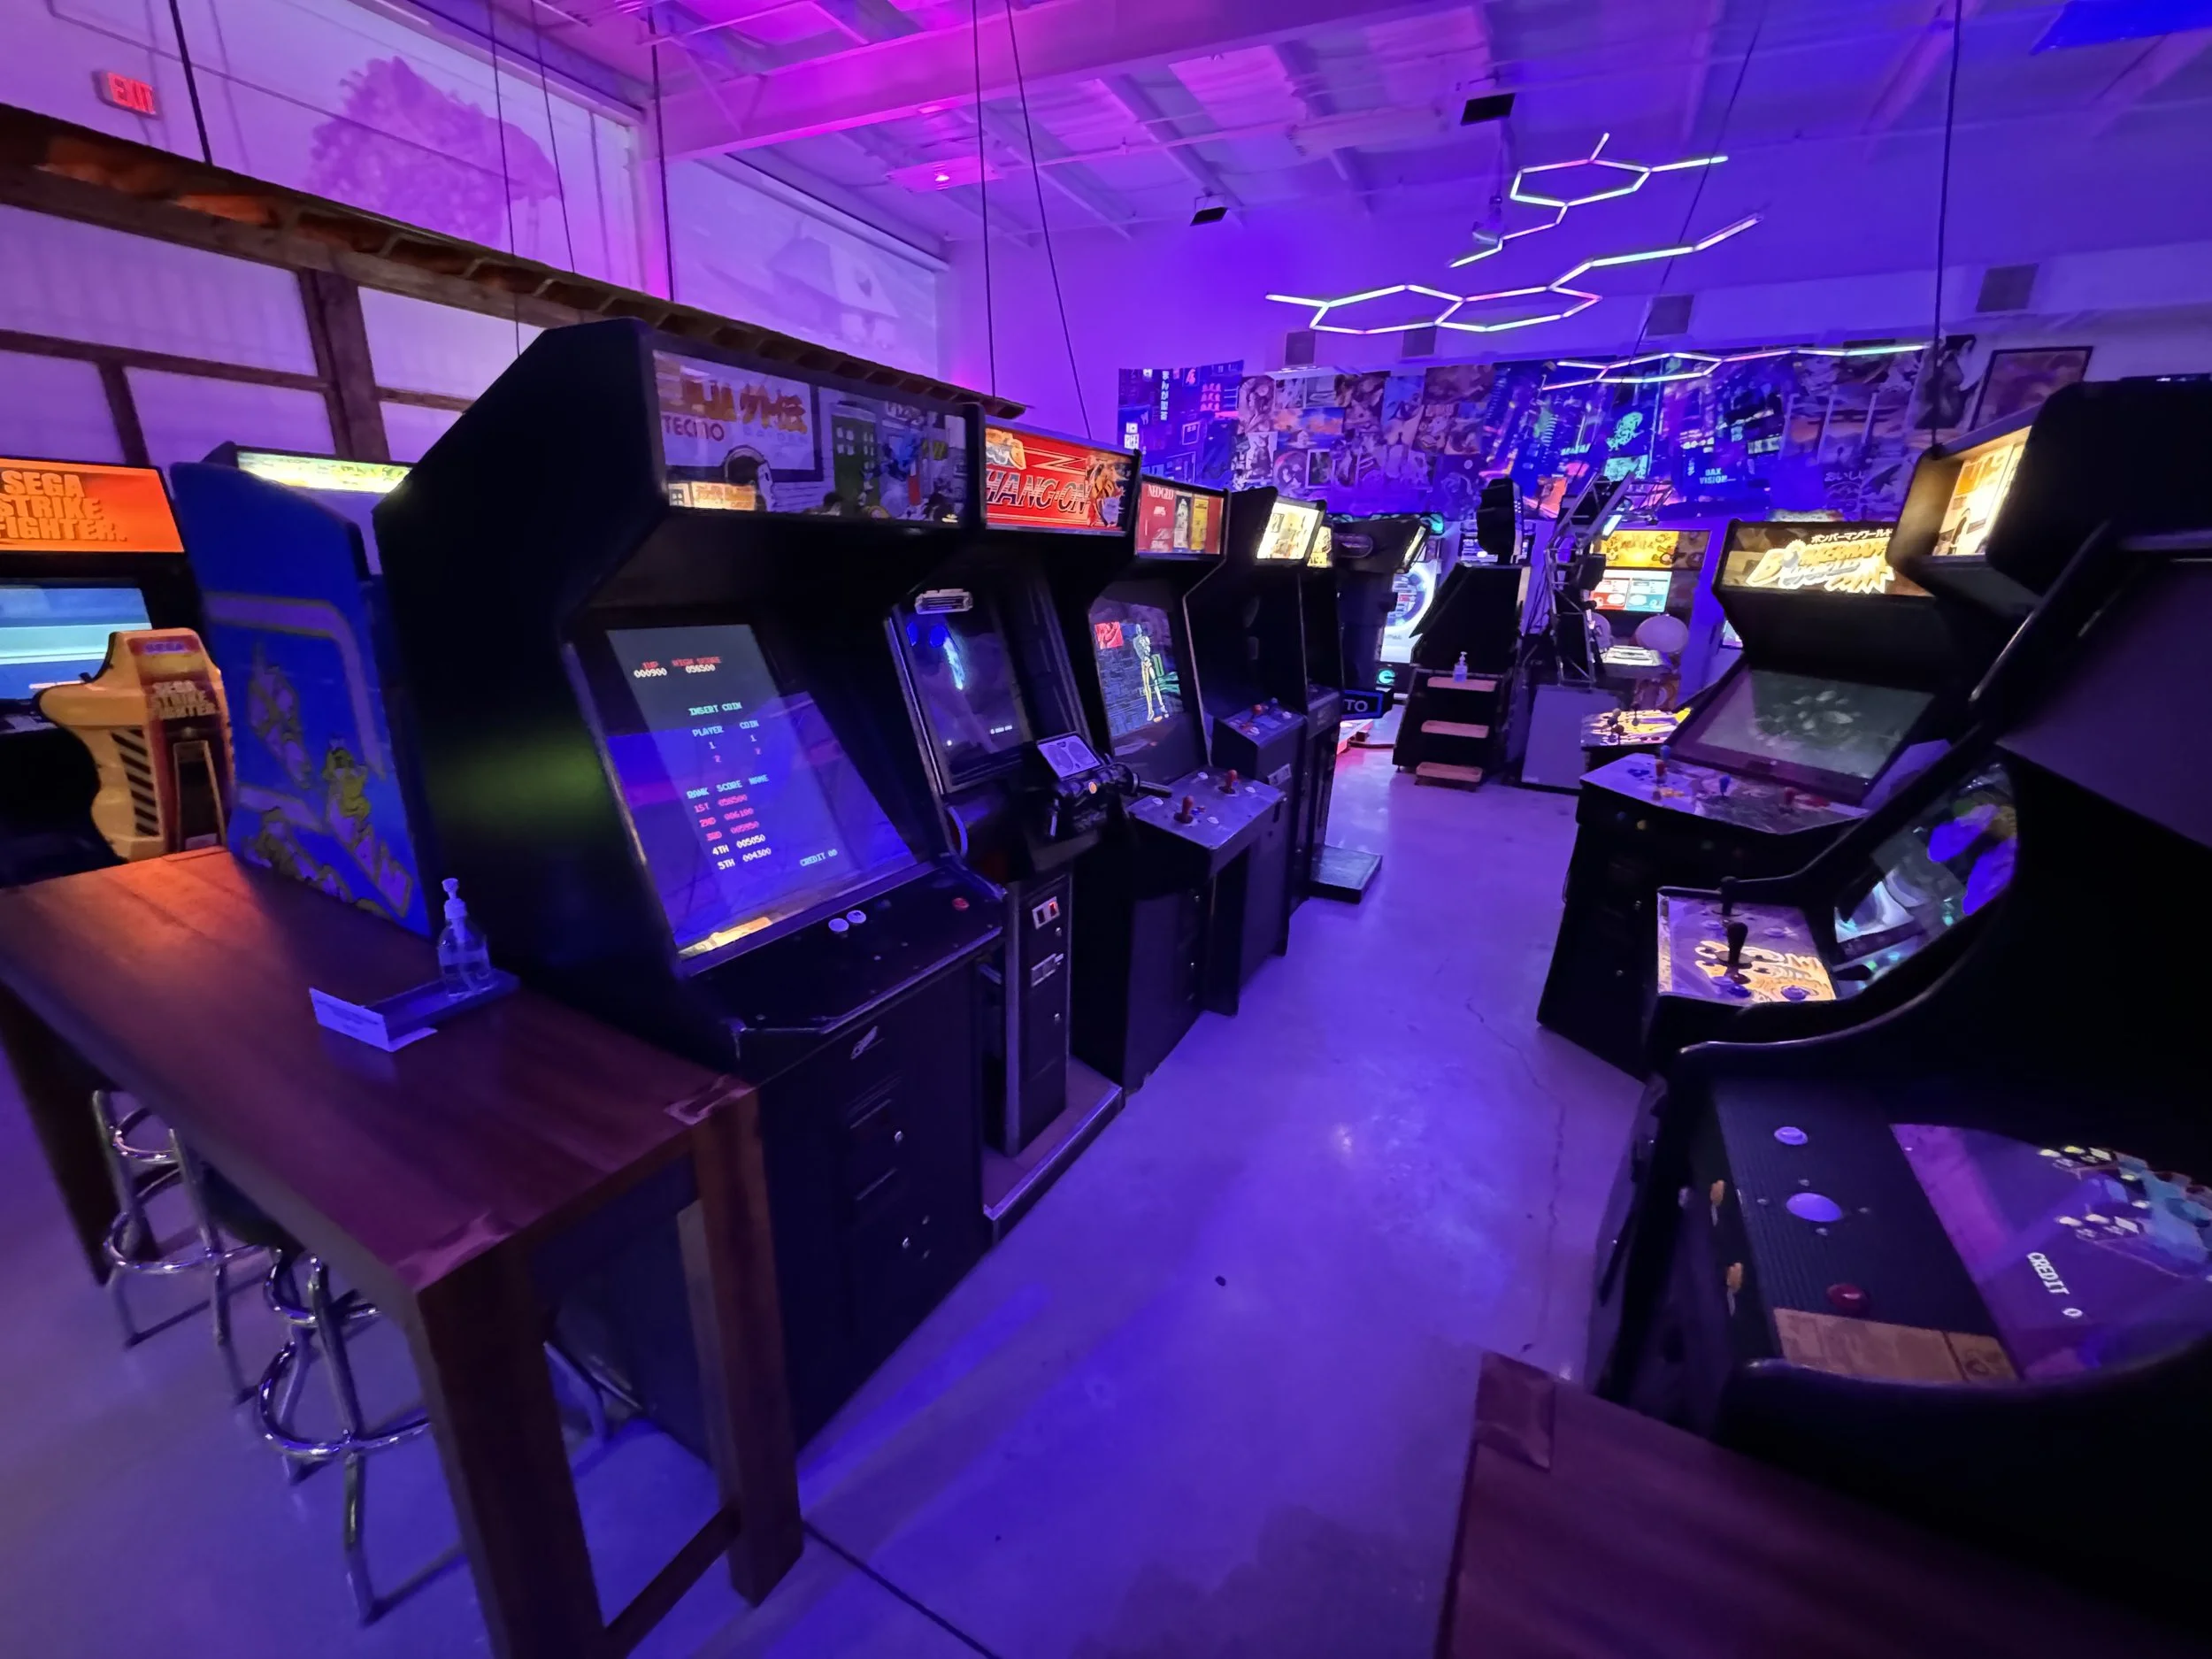
I really appreciated the balance of arcades and pinball.
I really appreciated that multiple eras and game types were represented.
I really appreciated that all games were functioning and well-maintained.
I really appreciated that this didn’t feel like a kiddy-gambling redemption arcade.
I really appreciated the vibes; a great balance where adults, kids and teens can all find something fun to do.
I really appreciated the people. The owners and staff are great!
I really appreciated the theming of the space. There are some subtle touches that really help make the space feel inviting.
I really appreciate that they engage with local players for tournaments and launch parties.
That’s it, for now. That’s my review. If you are in the area - go go go go…




Happy New Year!

From a certain perspective, Avengers: Infinity War is the story of that nice Josh Brolin fellow trying to make traffic better for all us and being foiled by a group of billionaire-backed cheaters in tights. Perspective is important, so lets look back at 2023.
In 2023, I knew that I wanted to refactor a portion of the gameroom around an Indy-Tiki Bar Concept. That part more or less went as intended. A few weekends getting the Mario Karts ready for their new home and a few weekends of measuring, cutting and fastening. The detour came later as I started making film prop replicas for the space and eventually the new bar doubled as a maker-space for assembling Dial of Destiny props. The self-realization here is that I’m at my best when building things and to a lesser extent fixing things.
I started 2023 with a single Ultimaker 3 printer. It was originally used during pandemic times for pandemic things and as a handy local fab unit to reduce our trips to the store. Later it was used to print and design difficult-to-find arcade and pinball parts, which is why I included it within the narrative of this blog.
I ended 2023 with (2) Bambu Lab X1C’s, (1) Bambu Lab P1S, (2) Elegoo Saturn 3 Ultras and (1) Elegoo Jupiter. My daughter also has a P1S as a sneaky introduction to engineering skills and maker concepts.
From 1 printer to 6 printers, I spent much of 2023 making film props instead of doing arcade-y things.
Partly as an exercise in tchotchke making in order to fill in the eyeball overload / Planet Hollywood ADHD aesthetic of the game room. The primary objective though is by learning to make common film props, I picked up techniques and references that can be applied later in other ways. Pinball mods, in particular.
I built:
Chachapoyan Fertility Idol and Base
multiple NCC-1701-D’s
an NCC-1701-E
an NCC-1701-G
multiple Rocinantes (from the Expanse)
an Iron Man Helmet and Mask
a civilian FTL ship from Foundation
multiple Prime Radiants
Eyepiece of Ra / Medallion
a Dune Crysknife
an Iron Man Arc Reactor
a BTTF2 Hoverboard
an Infinity Gauntlet
Several Holy Grails
A few low-res, simple Johnny Fives
so very many-many Dial of Destiny’s
2024: Heeeeeeere’s Johnny

As we start into 2024, I’m about 80% complete with printing of a 26” Johnny Five robot.
It is going to act like a visual - design reference for a 2/3 scale build.
For the 2/3 scale build I’m trying to incorporate parts from two other designs. One is a full-scale build and then a smaller 1/3 scale R/C build. A Full-scale build won’t make it through some of our doorways. I’m hoping a 2/3 scale build will still carry the wow-factor with added portability. The 1/3 scale build is highly detailed and most of the parts will double-scale fine for printing. I’m expecting to have to make some design changes around weight and balance, parts at rest and to have to engineer solutions around practicality, strength and automation. This build is going to take awhile, with roughly 540 parts plus an equal number of fasteners and custom pieces along with various electronics components.
In order to keep it manageable I’m breaking it up into milestones and I’m not putting dates on these because I still have a time-thirsty real job and family obligations. This is supposed to be fun, afterall.
Milestone I: Mimir Needs Input
A functional head that can talk, emote through eyebrow motion and neck pitch and yaw.
Milestone II
Open AI and other frameworks, give it a personality and allow it to see through imaging sensors
Milestone III:
Build the drive system
Milestone IV:
Build the torso and arms
Milestone V:
Head, meet body. R/C Control and limited Macro Recording and Playback
Milestone VI:
Fully Autonomous Discovery and Operation
Arcade Stuff
In addition to the J5 build, which is more of a long-term project; I’m excited to get back into some arcade stuff. I’m planning on updating the Bitkit-cabinets in the gameroom, fixing Missile Command, turning Centipede into a Millipede-Multi cab, working on Battlezone.
Pinball Mods
I’ve been working on design and plans for some high end pinball mods for Indiana Jones, Medieval Madness & Tron for starters. More to come!
Merry Christmas
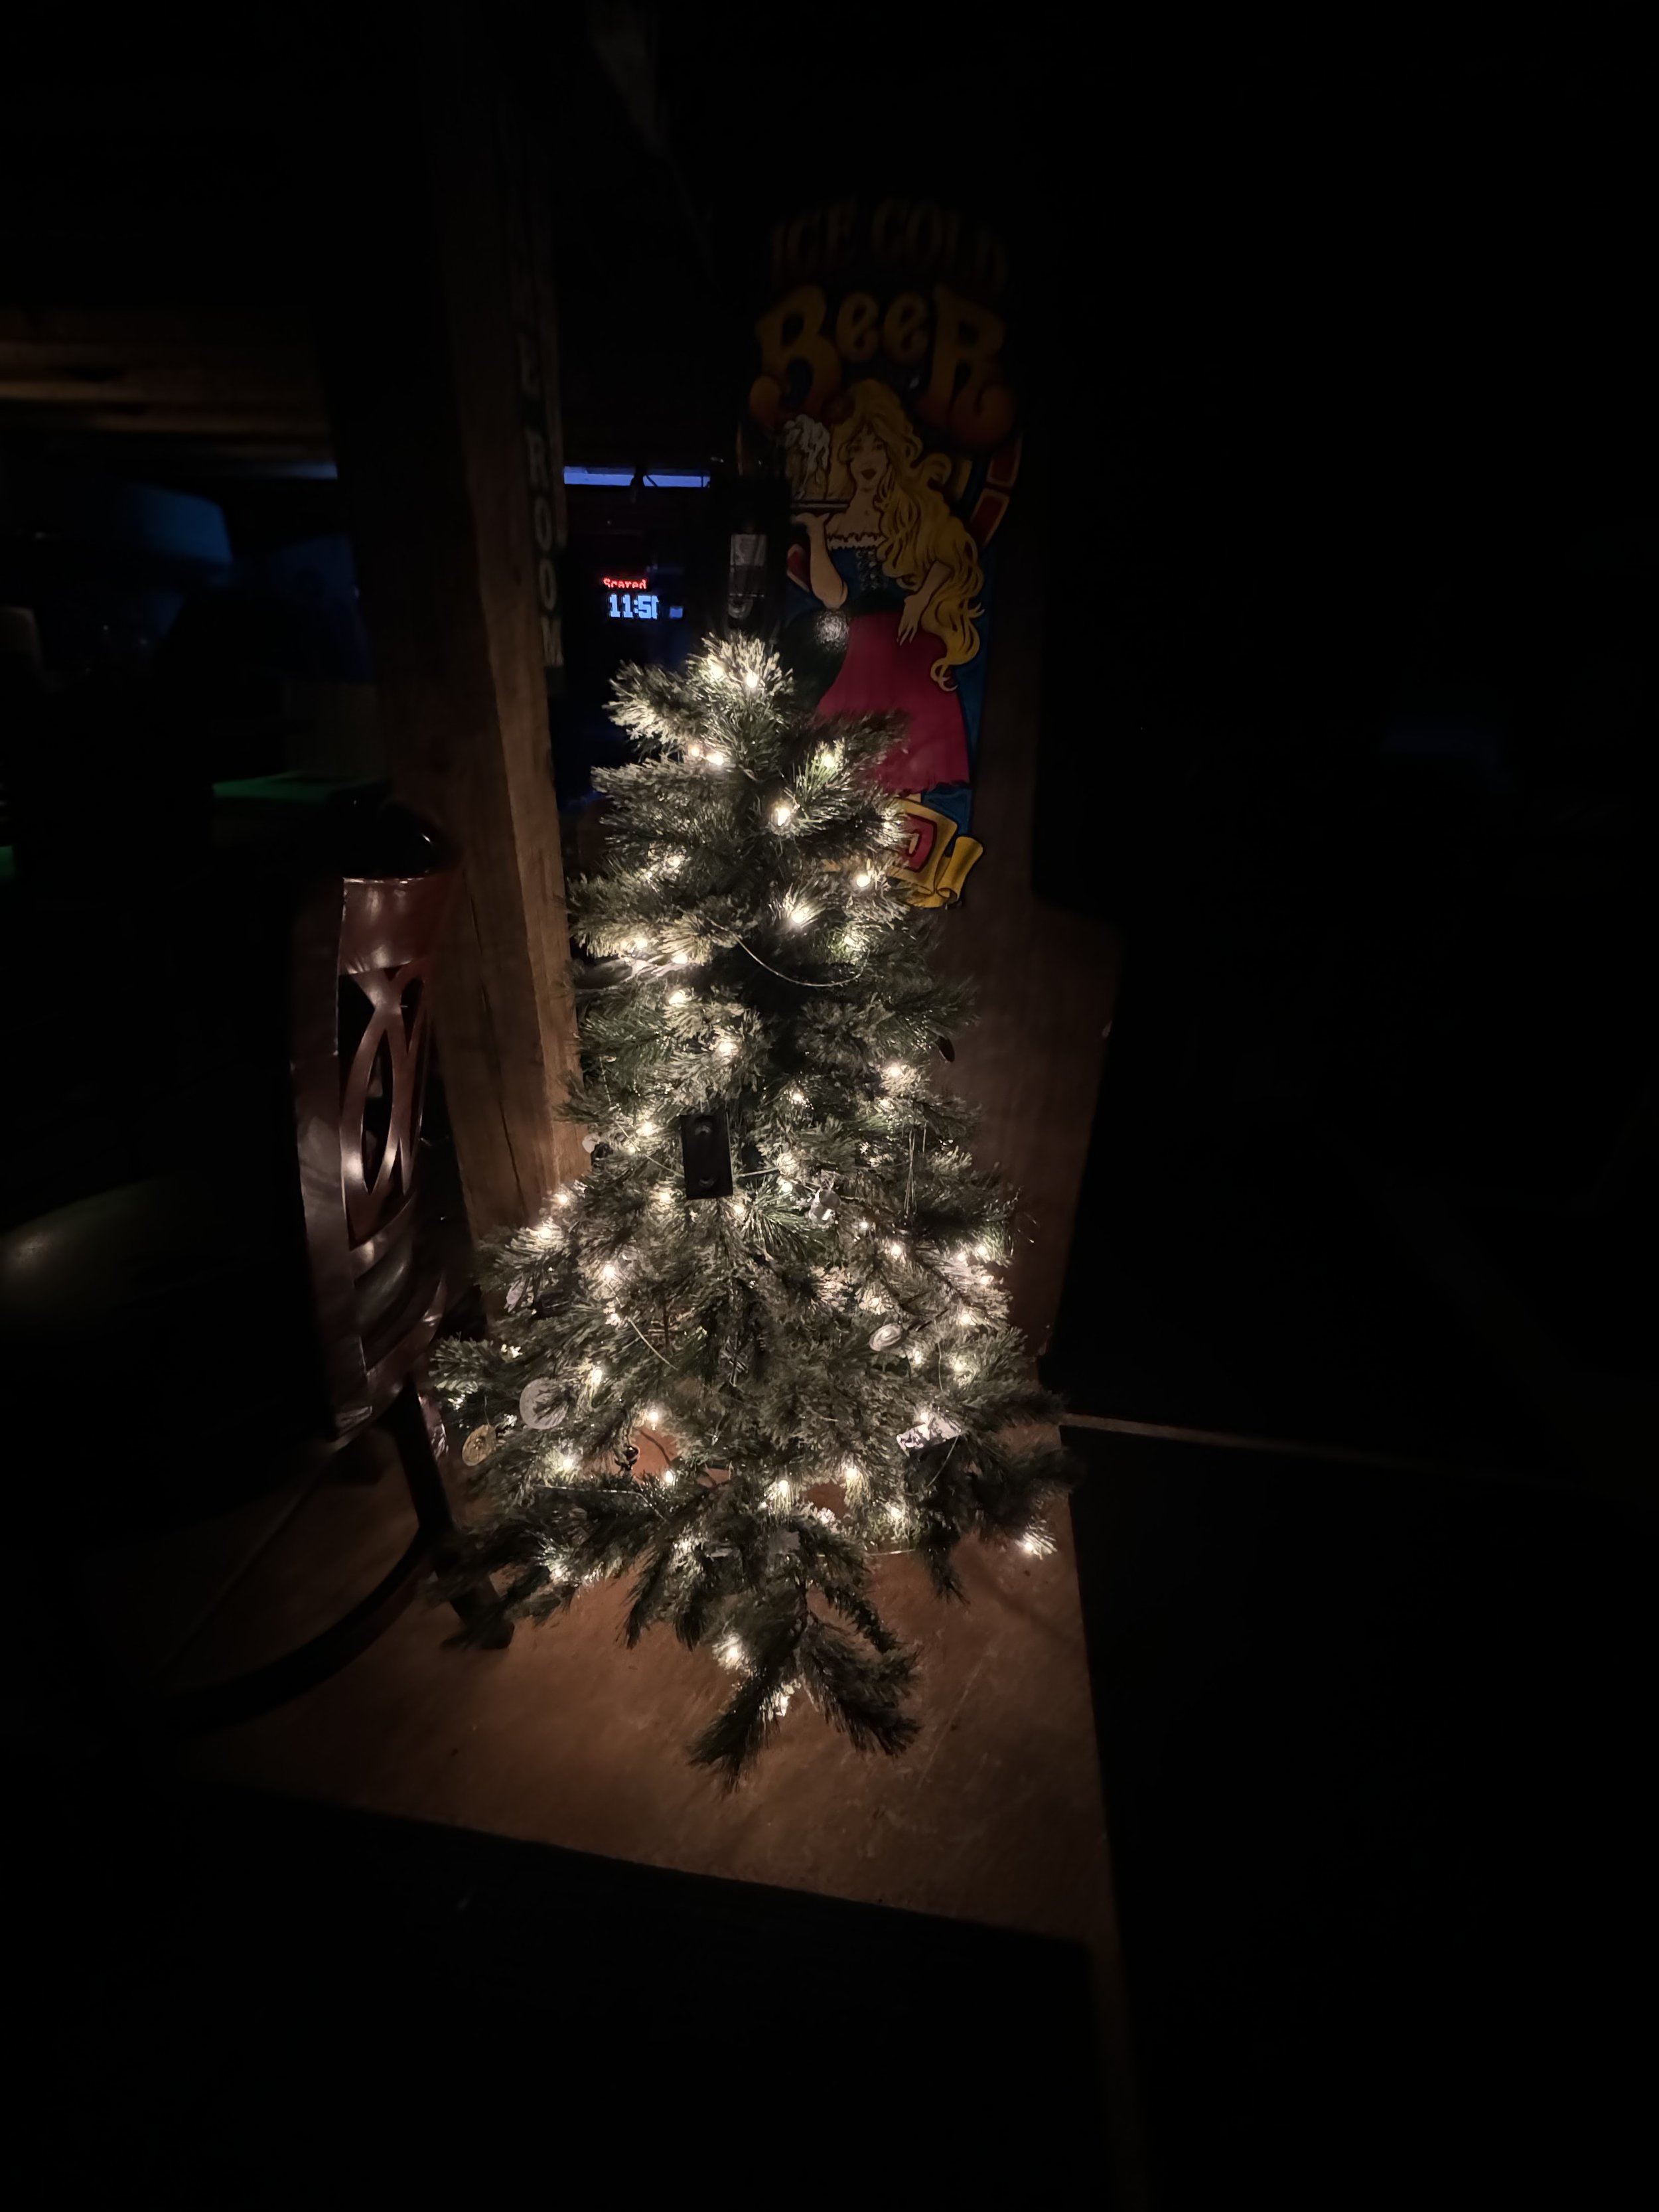
Looking back over the year, the arcade, pinball and retro-game hobbies took a bit of a back seat to my 3d Printing shenanigans. My plan for 2023 involved reworking parts of the game room for a hangout and bar space and focus more on time-with-friends than game collecting. I .. partly succeeded.
Building a welcoming hangout space was a successful project. Setting aside time to hang out, I could have improved upon.
If arcade collecting was a mental disorder, the psychological pathology of being a gameroom builder is probably rooted in a desire to assemble an epic hangout space and to share it with friends and family. A little bit of Willy Wonka meets Silver Spoons. Though, you may also find yourself in a friend group where everyone is expecting to be host and no one wants to be attendee. I’ve tried to be a better attendee this year.
There’s also the fact that arcade games themselves are often not exactly as social of an experience as you might remember. That time you mustered the nerve to ask that girl out at Aladdins’ Castle: It happened in an arcade but probably not at the control panel. With the exception of 2/4-up games like TMNT, Gauntlet, SmashTV, Joust, etc some of the best games are turn-based. This leaves 1-3 of your guests to twiddle their thumbs when not playing.
..That’s a long a reflective way of saying this year, I built a pretty cool bar and we made some memories around it but need to do more!
..I’ll be posting a look-back towards the end of the month but until then - hug your peeps, make time with friends and enjoy the season.
-BillD
Dial of Destiny Prop Info


In the fall, I switched the majority of parts from FDM to Resin. It saves me time in post-processing and not having to create fill channels for sand and quickcrete for weight and balance, the detail is nice and they feel more realistic.
Over the summer, I fell into some prop-building fun by way of creating a 3d printable Archimedes Dial prop based on Indiana Jones and the Dial of Destiny. I thought the movie was fun (though far from perfect) but I was really captivated by the prop and it seems plenty of others’ shared that sentiment. I made & sold a surprising number of them on eBay, participated in eBay Charities, donated quite a few of them and added some additional 3d print capabilities along the way.
The experience has been overall pretty rad and a bit redeeming on several fronts. For one, I had a mostly negative impression of eBay going into this having been ripped off as a seller many times in the not-so-distant past. Also, I’ve been surprised by the positive response from people that got them and made a few new friends along the way. Turns out, Indy people are cool.
Want to buy one?
I’m currently building “Anniversary Edition” dials that have more accurate dimensions and they separate in a more film-accurate manner. They also include a spring-loaded compass.
Sorry, the beaded lanyard is not included. I can walk you through making your own, though. It was just more time-consuming than I could commit to for any reasonable quantity.
Direct Order
Prices:
Small / Regular - $325USD (Sold Out)
Large -$650USD (Sold Out)
Anniversary Edition - $420USD (limited)
8/1/2024
I currently have a few of these (more or less) ready to ship minus any customization. Email me if you have questions or are interested but have a hardship situation, need a price cut to make it work out for you. You can also order from this site below.
Image below links to ordering page, if any are currently ready to go. ->
Indiana Jones, Dial Of Destiny Prop Replica
Want one of these but feeling a little out of reach by price?
No worries - here are some free plans if you feel inclined to print one, yourself. You got this!
(The open source plans are slightly different than this prop replica)
The build is 240mm by 210m by 41mm. This is consistent with the size of the prop on display at Disney World and what you see on-screen. This build is made from a combination of materials, PLA+, PLACF (Carbon Fiber) but the majority of it is Resin. I intentionally built this one to be heavy, to feel realistic in the hand.
The hands move, it can be displayed assembled or in split-view similar to the film Premiere and includes a static compass for the center assembly that can be optionally installed. It does not facilitate travel through time but congratulations, you are already traveling forward in time at the rate of 1 second per second. :)

F.A.Q.
Which is the screen accurate size?
- That’s debatable. If you watch the film and extra features, they made and used several different sizes during production. If you, person reading this, have the definitive (not Disney World prop) production sizes please send them to me and I will be forever in your debt.
Is it 100% screen accurate?
- It is pretty close. Some liberties were taken to facilitate printing. The screen-used props were expertly weathered and made from different materials.
Those prices seem steep. Why so much?
A few things went into my pricing considerations. First: I’m sort of a stickler on quality. My Dad drilled in me to work hard and over-deliver when possible and let the pricing reflect the work. I have spent some effort refining processes to try to bring prices into a more accessible range and my processes are pretty efficient. I like making these for people and these prices cover my maker supplies and parts.
Charities? How do we go about getting a Dial for Charity purposes?
No red tape. Just write up a few sentences on what you have in mind and we’ll work it out.
I heard something about a free-alternative?
My 3d Print model files up to Mark 5 are completely free and open source and I highly encourage folks to make the builds themselves, it is a gratifying project to complete. People even use them commercially and that’s cool. With the right tools (multi-color capable fdm printer, large resin printer) the build can even be pretty easy. It does involve about 30 parts, 50+ print hours, sanding, priming, paint, assembly, trimming, etc.
*the anniversary edition files are not available for download (not yet, anyway - I’m re-evaluating this)
Can you still make the FDM-style dials?
- Sure thing. Depending on my filament-stock-levels I may need to source the particular filament I used for the main body but the deliverable time should be about the same.
Do you sell kits?
- I have. It isn’t going to be any cheaper because I’l likely be printing extra parts for kit-builds but I certainly can send you an unpainted and unassembled kit-form of either build type.
Do you sell parts?
- Sure.
If you purchased a Dial from me and part of it broke, you have my contact info - just reach out and I’ll get you squared away; either with replacement parts or a complete replacement Dial. I’ll make every reasonable effort so long as I still have the parts, material and printers to do so.
If you are trying to print your own Dial and need the white parts printed, I’ve sent a few of those multicolor-parts-only kits out by request. There should be little or no charge for this outside of shipping & handling unless I get behind or inundated.
eBay Store
I may, from time-to-time have some pre-built and available for purchase on eBay - you can find that storefront here:
https://www.ebay.com/usr/visi0n9
Awesome / Humbling Buyer Feedback

Build Process Overview
Below is my general build process. I tend to have more than one dial in one of these phases at any given time and these days are not contiguous, they rely on my work schedule, humidity and other factors.
Day One
The printers print parts. For the main body I use an Elegoo Jupiter, for the compass assemblies I use an Elegoo Saturn 3 Ultra. For the remainder I use 2 Bambu X1Cs, and a Bambu P1S
Day Two
UV Curing for MSLA parts, additional printing for FDM parts.
Day Three
Prep. I remove supports, sand and clean parts and paint them with a Black Primer
Day Four
I paint the parts. The gold is a Krylon Gold Leaf, available in liquid and aerosol form from Hobby Lobby, Michaels, Lowes and Amazon. I use a mixture of airbrush, aerosol and physical brush.
Day Five
Assembly Day. More light sanding and surface prep, then I glue any parts that need to be glued, reprint anything that was missing, lost or doesn’t meet quality standards.
Day Six
I test them for loose parts, glue, fix, touch and photography the finished model. Since each model is a little different, I give the model an internal grade in terms of qualities and setbacks and I use this grade to pick a price from an established price-range.
Want to Make your Own?
Want one but would prefer to make it yourself? You got this!
You can find the model files on Printables and on Bambu Maker World
and an assembly video here: https://arcadeshenanigans.com/blog/2023/8/5/dial-of-destiny-mark-4-conversion-instructions
Quick Prop Build: IJ Antidote Vial
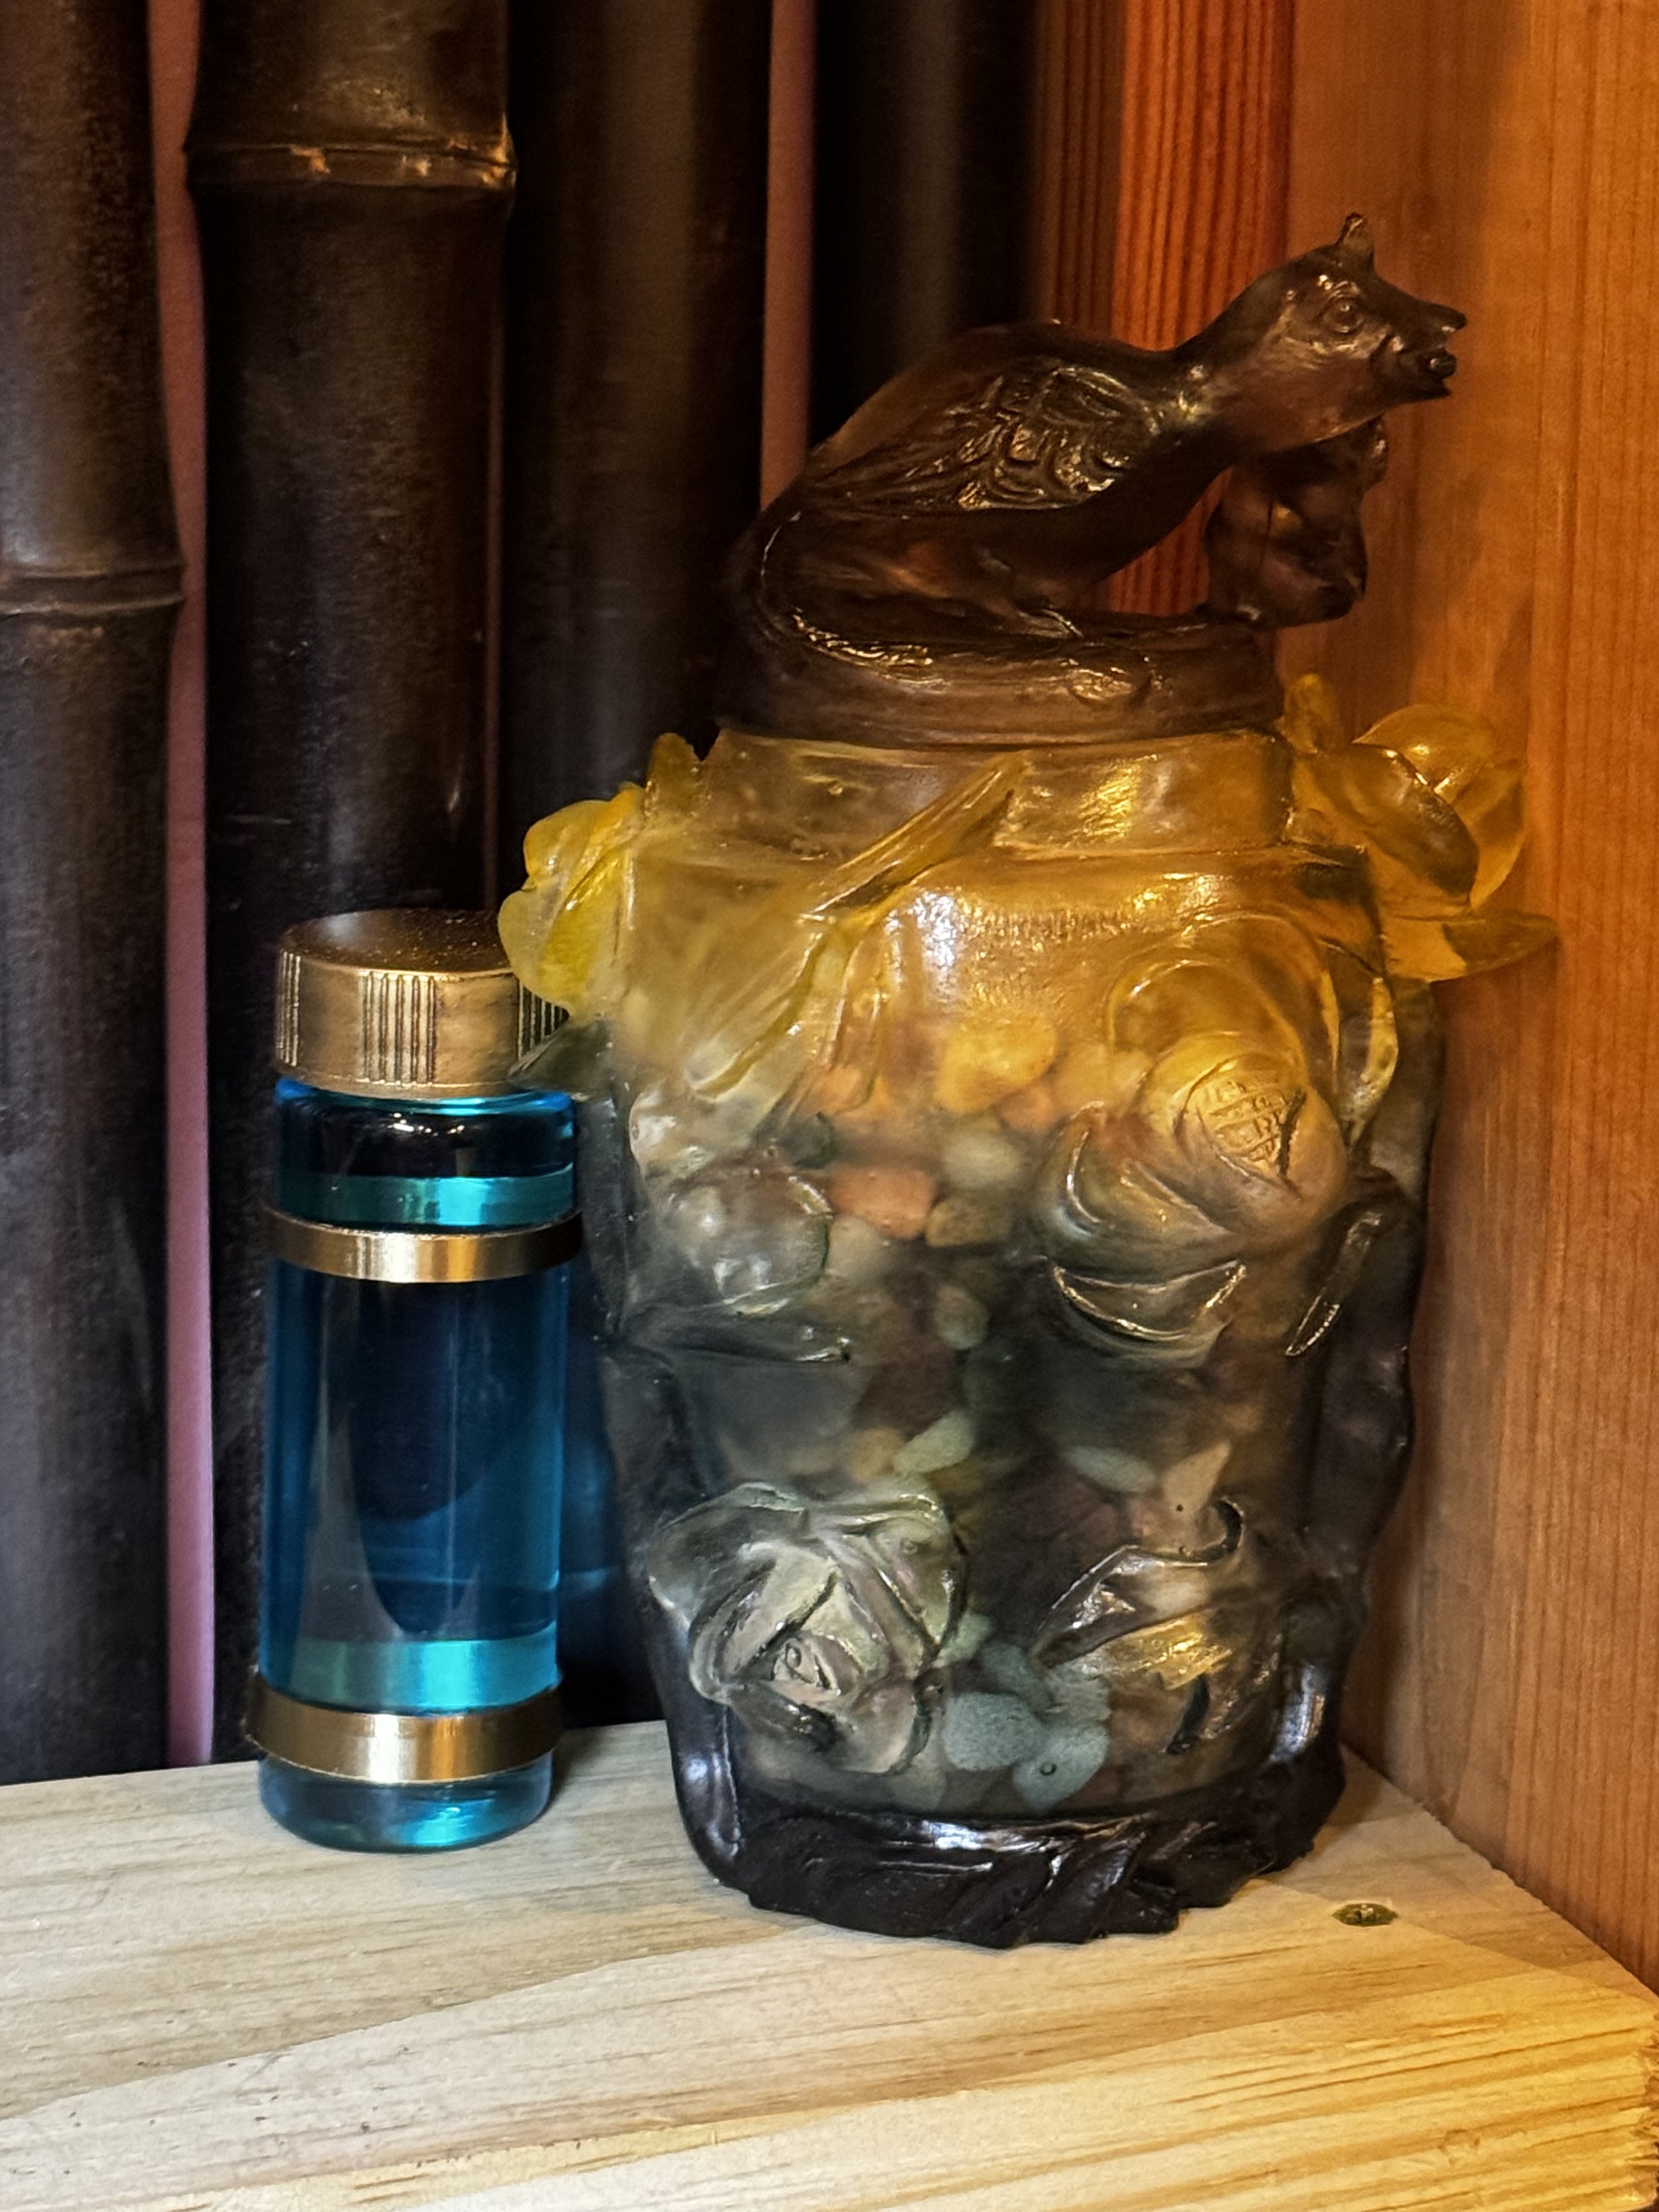
After picking up a nice version of the Nurhachi’s Urn, I also wanted one of the antidote vials but felt like the average going rate of $75.00 was a bit excessive for the vial.
I started by ordering these from Amazon: 30ml Clear Small Glass Vials

I used this for the blue liquid
For the blue liquid, I originally attempted a mixture of food dye and various clear liquids. Eventually I ended up with a $10 bottle of bottom-shelf vodka. I painted the lid with the same Krylon Gold Leaf spray paint I used for the Dial of Destiny.
Here are the print files for the gold rings:
https://www.dropbox.com/scl/fo/3aq2nl70qm3o8jup8vcel/h?rlkey=62lfizbud55nw61s6z7a23772&dl=0
Building a Prime Radiant
Foundation on AppleTV is an outstanding and wildly ambitious adaptation of Asimov’s books and stories. If you haven’t checked it out yet - go ahead and watch it. I’ll wait here.
Welcome back! Season 2 was a real banger and it is going to feel like a lifetime before Season 3 is available to be blasted into our eyeballs. So, maybe a cool prop can help the time go by more quickly?
While the pinball and arcade hobby already had me dabbling with 3D Printing, the Dial of Destiny Prop project really got me interested in building myself more film and television props.
I’ve started a few: An Iron Man Arc Reactor, a Johnny-Five SAINT robot, a few Halloween related things.
In this post we’re going to talk about The Prime Radiant from Apple TV’s Foundation.
The Prime Radiant

src: https://foundation.fandom.com/wiki/Prime_Radiant
In the Foundation Series, the Prime Radiant is an object built by Hari Seldon as part of his research in and development of Psychohistory. It gives people the ability to view the trajectory of cosmic-scale events in the past, present and future. A tool used to determine specific points in the timeline that can be influenced to drive humanity into a brighter future and shorten the dark ages that follow the fall of an Empire.
The book(s) make the object seem rather ordinary but the on-screen imagining of the Prime Radiant is something else entirely. Is it an atomic ash tray? Is it a quantum computer? Is it a tesseract? Maybe it is all of these things, I’m still not sure. I am sure, though - it is extremely cool looking.
Feeling a little bolstered from my Dial of Destiny experience, I set out in Shapr3d to start designing the Radiant.
About halfway to something close during a search session, I found a 3D model for sale that looks really good and is cheap. So $10 shortcut, engage!

I’ve had a few false starts at trying to design the model.
Resin Time
I attempted several FDM prints of the internal latticework using Bambu’s CF-PLA materials but the bridging work is extreme for that setup and the need for supports is going to introduce a challenge. Besides, the tetradecahedron outer shell needs to be clear, so I’m going to have to get into Resin for this project or get really good at cutting acrylics or outsource that part to a glassblower. For this project, I’m using an Elegoo Saturn 3 Ultra. For the clear acrylic, I’ve been seeing buzz regarding AnyCubic’s High Clear Resin, so I ordered a case of it work with.
Attempt Number One
This model is divided into the tri-lattice, the quad-lattice, a central core and two shell parts. The lattice is extremely delicate at 100% scale and support removal was a real P.I.T.A.

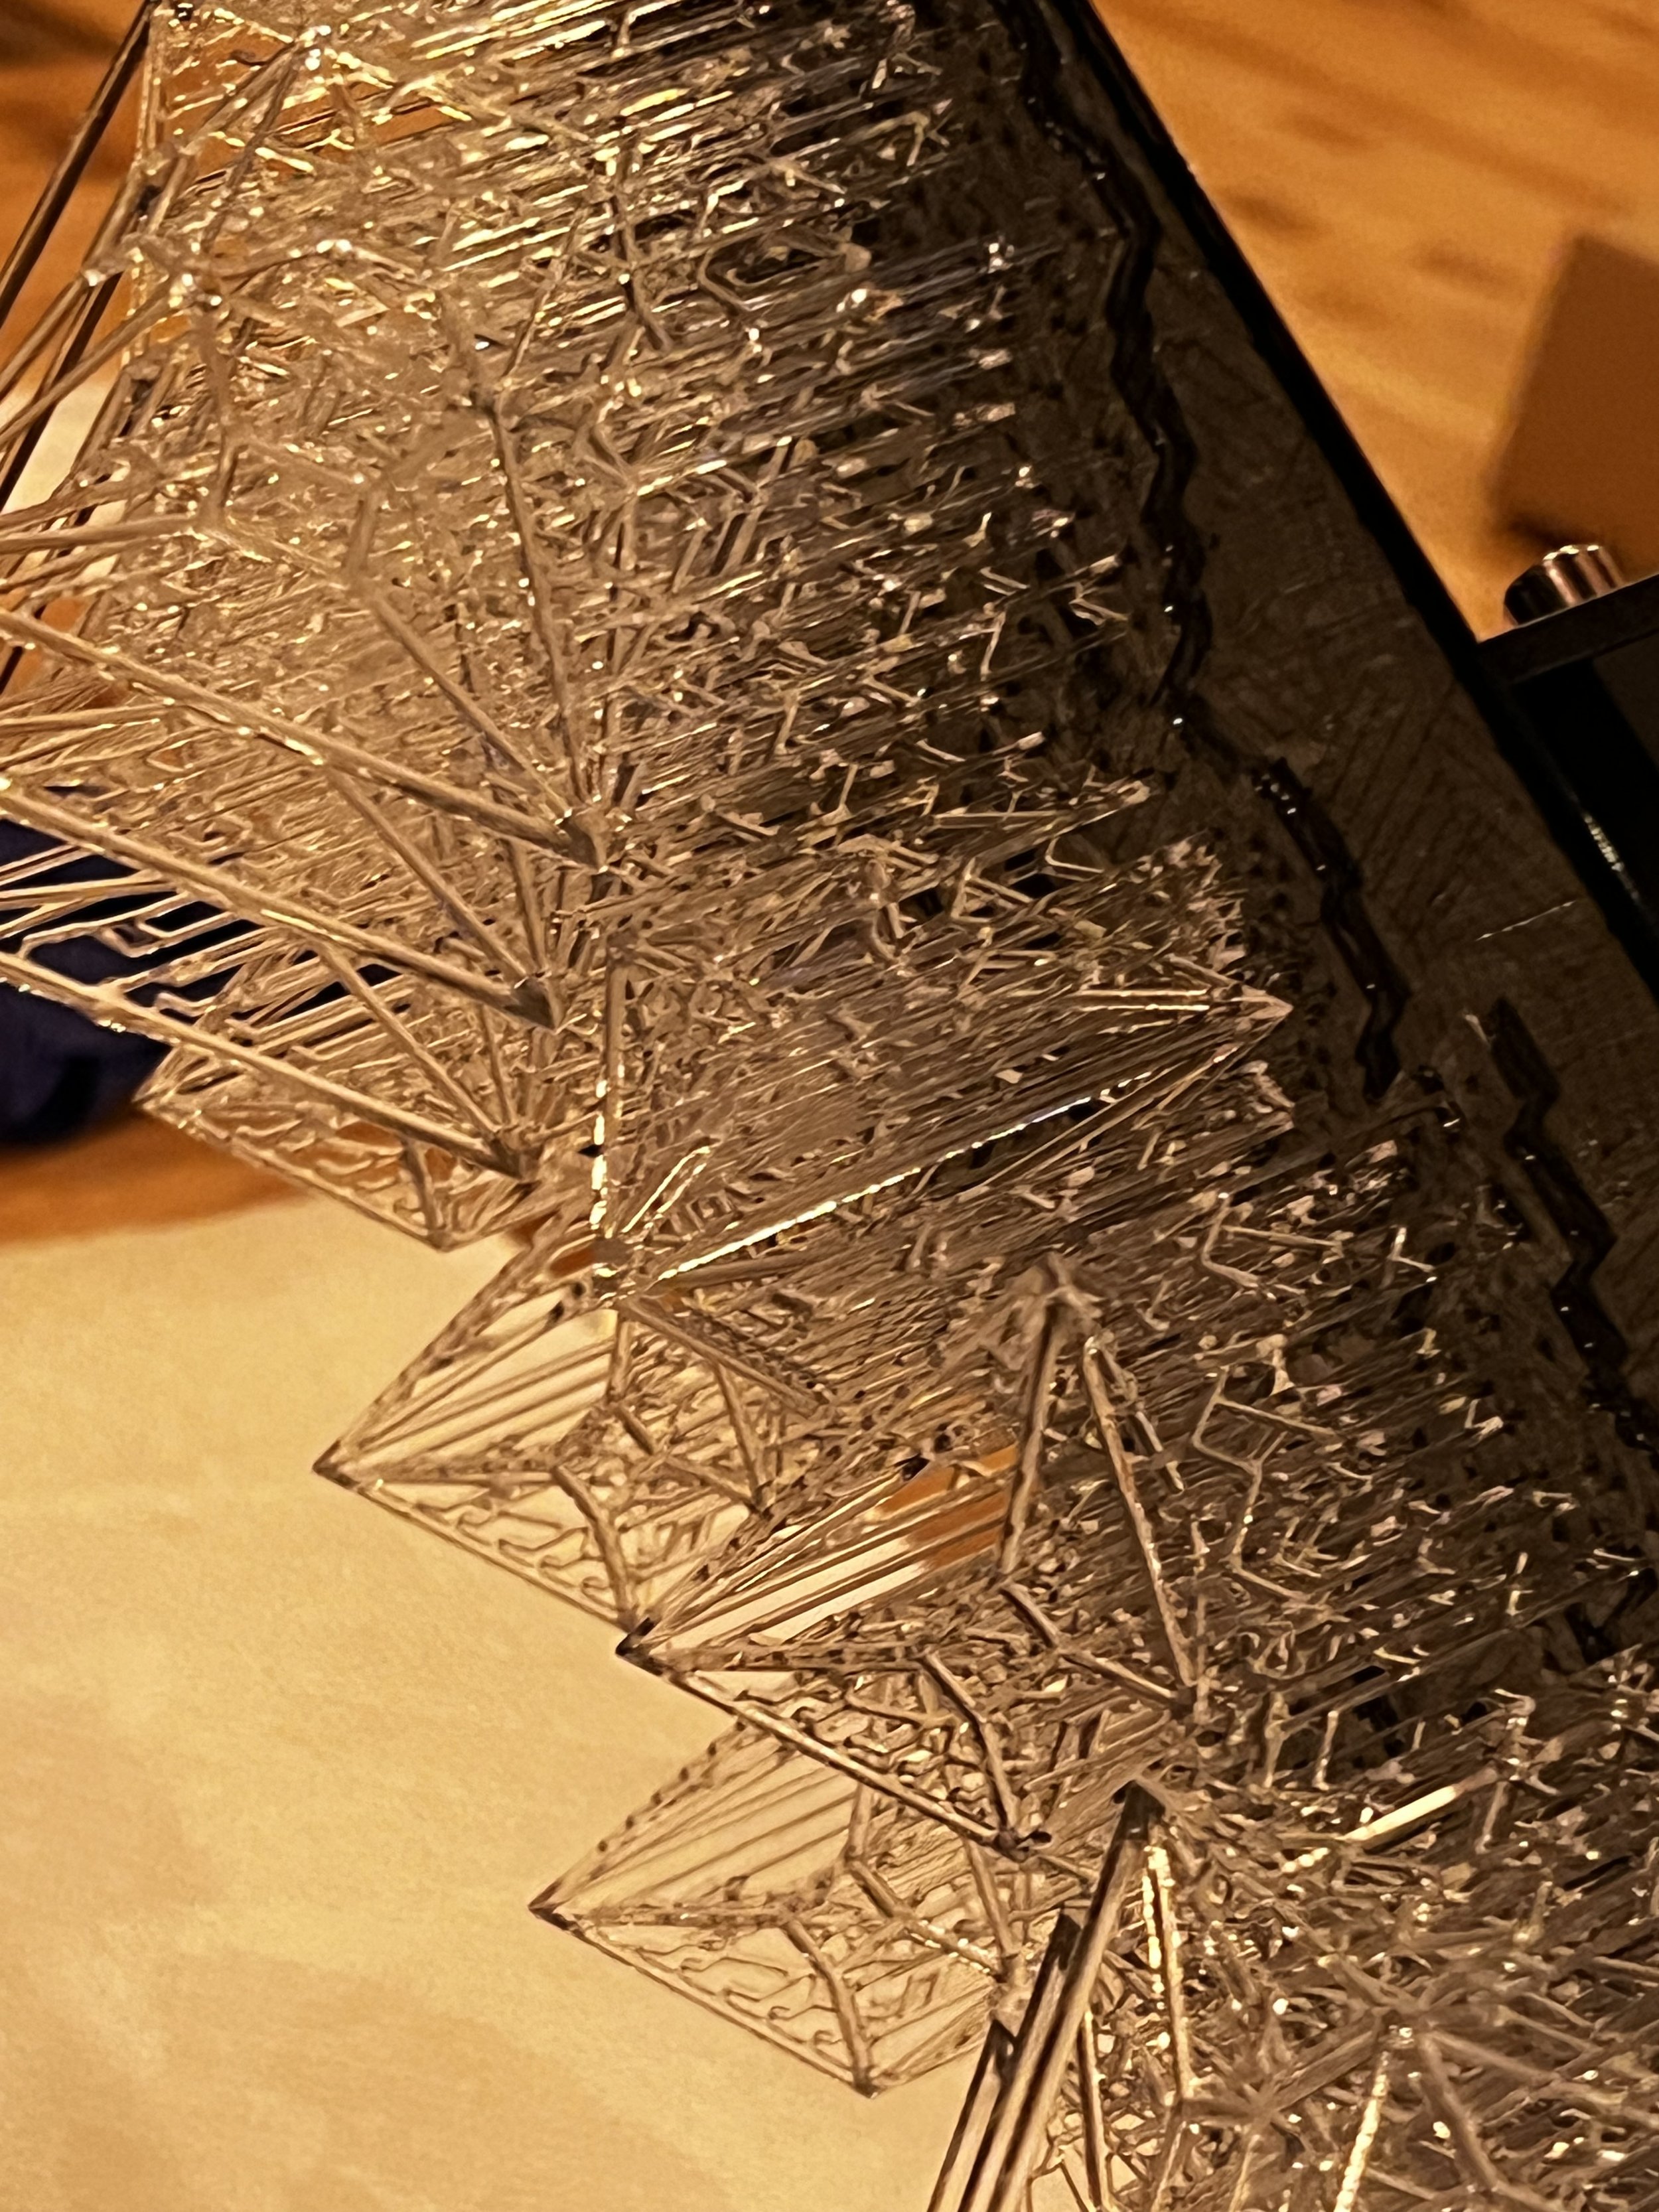

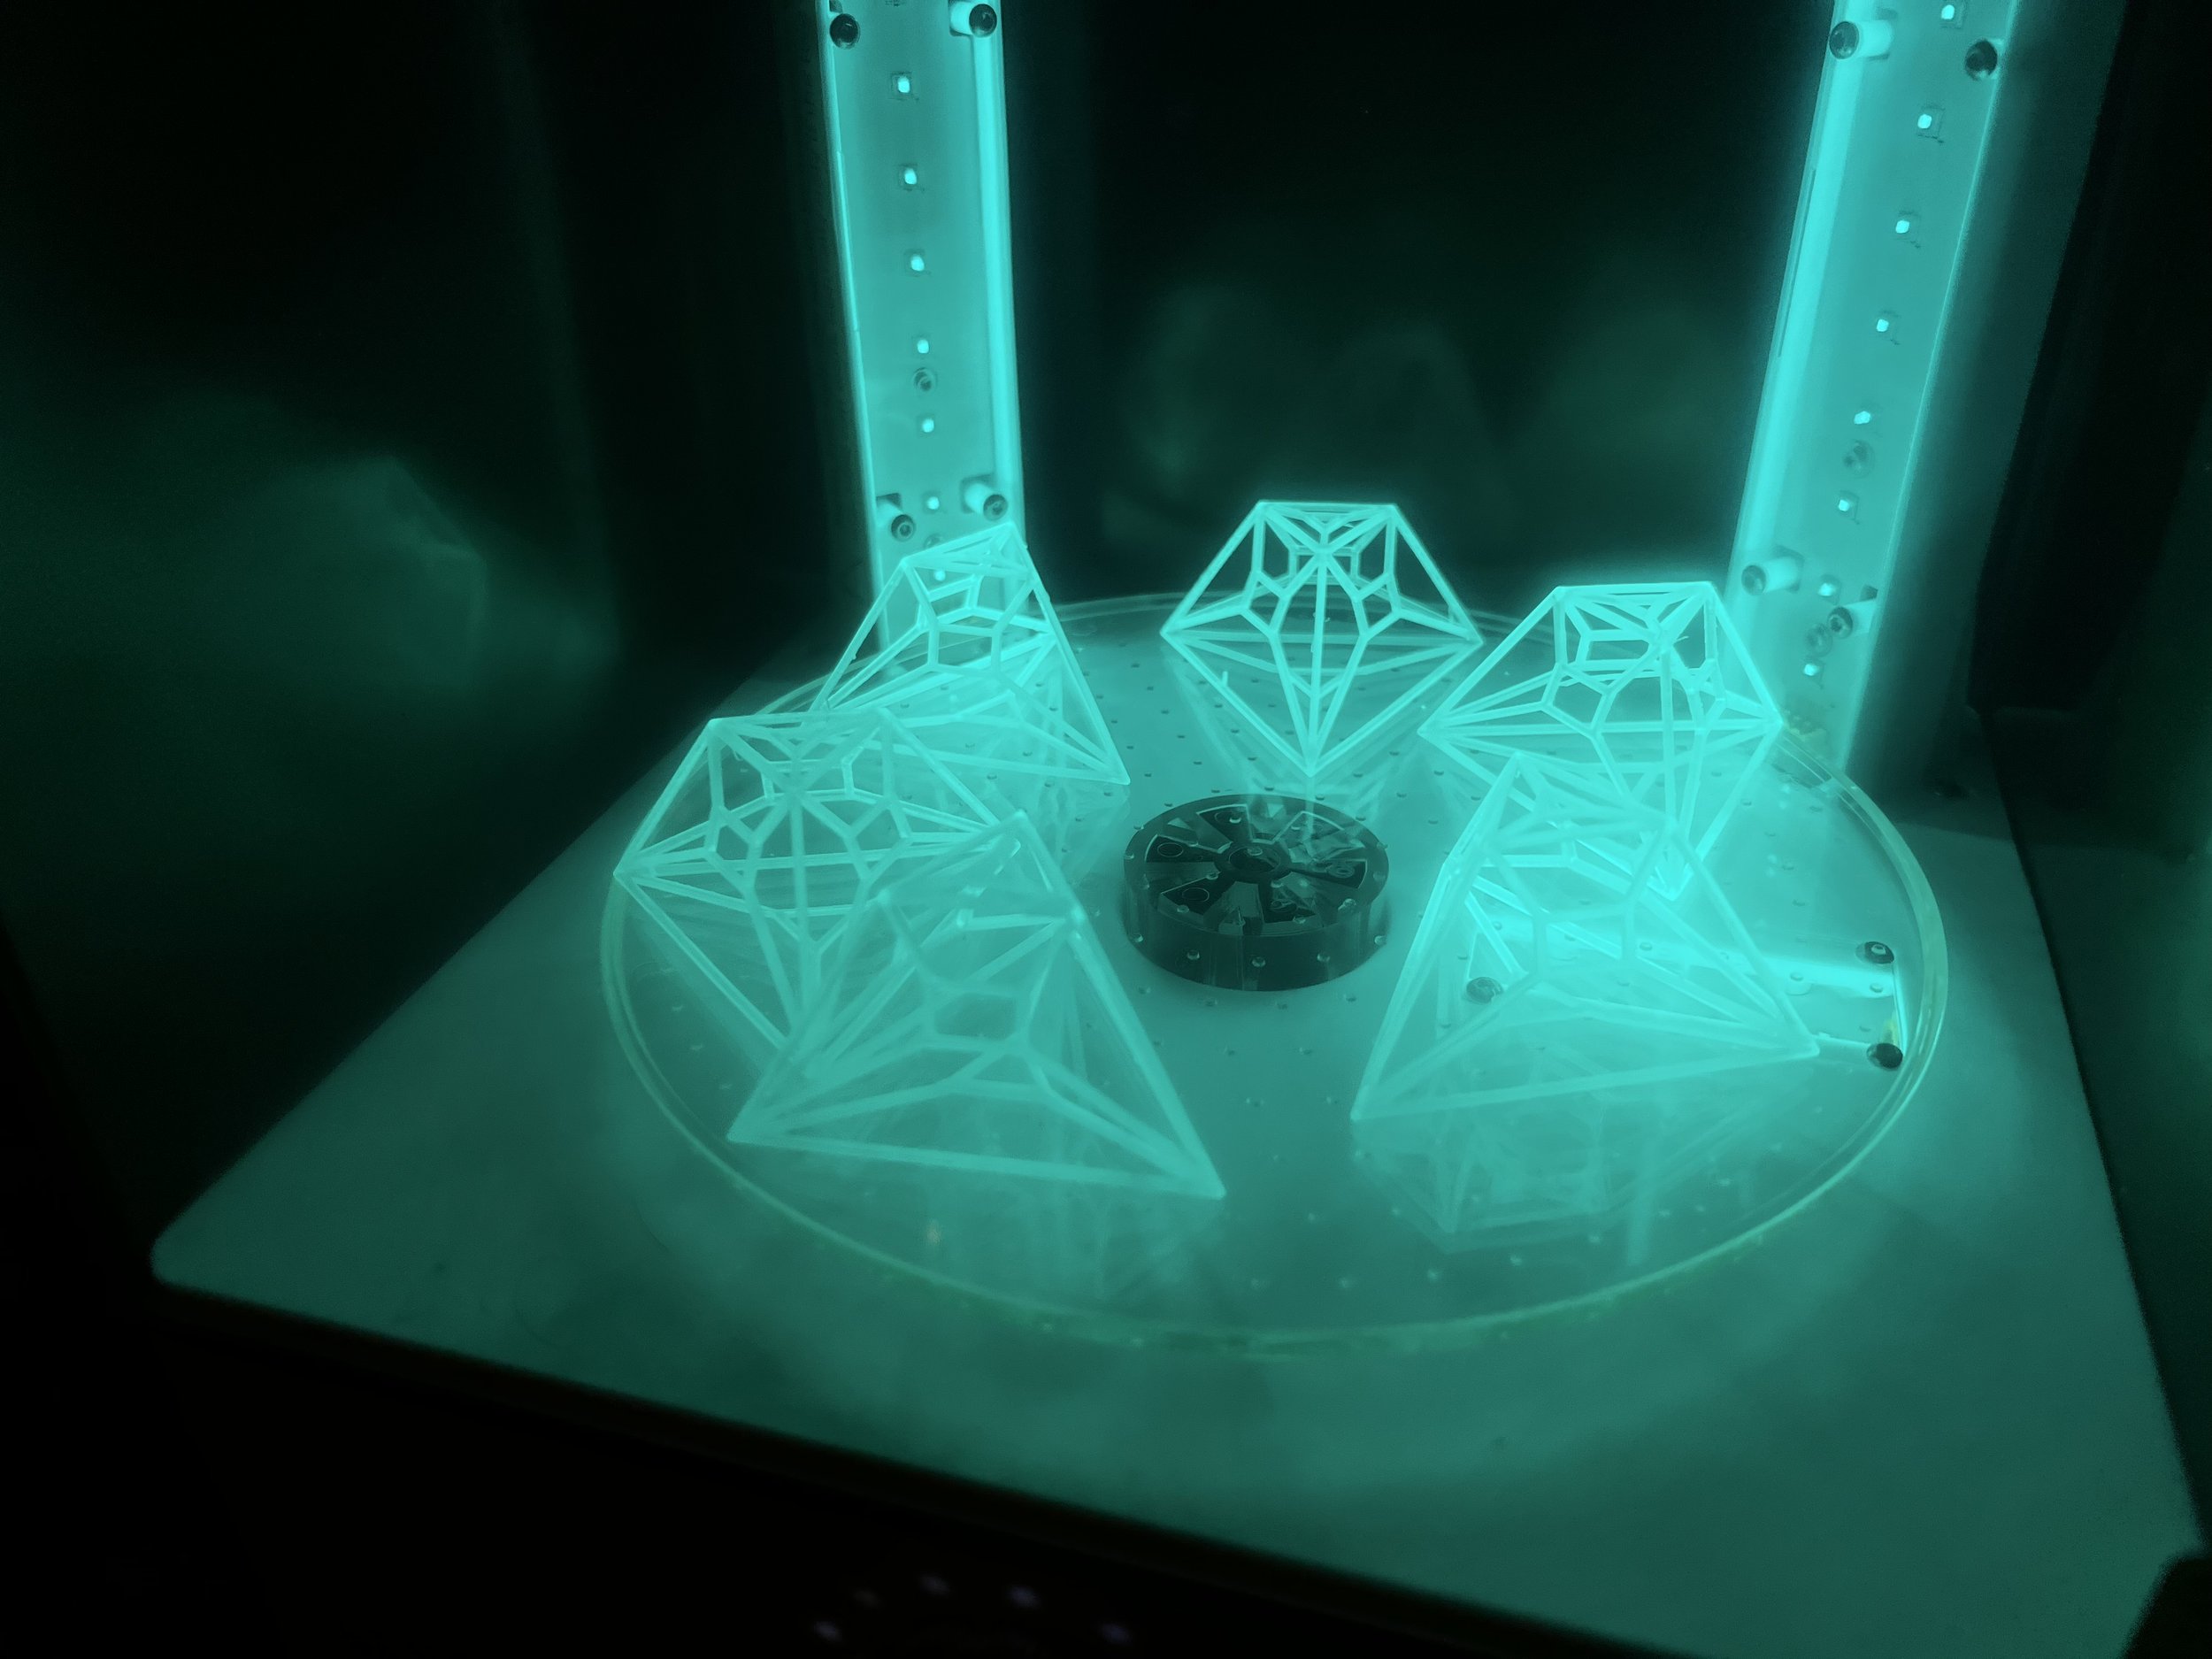
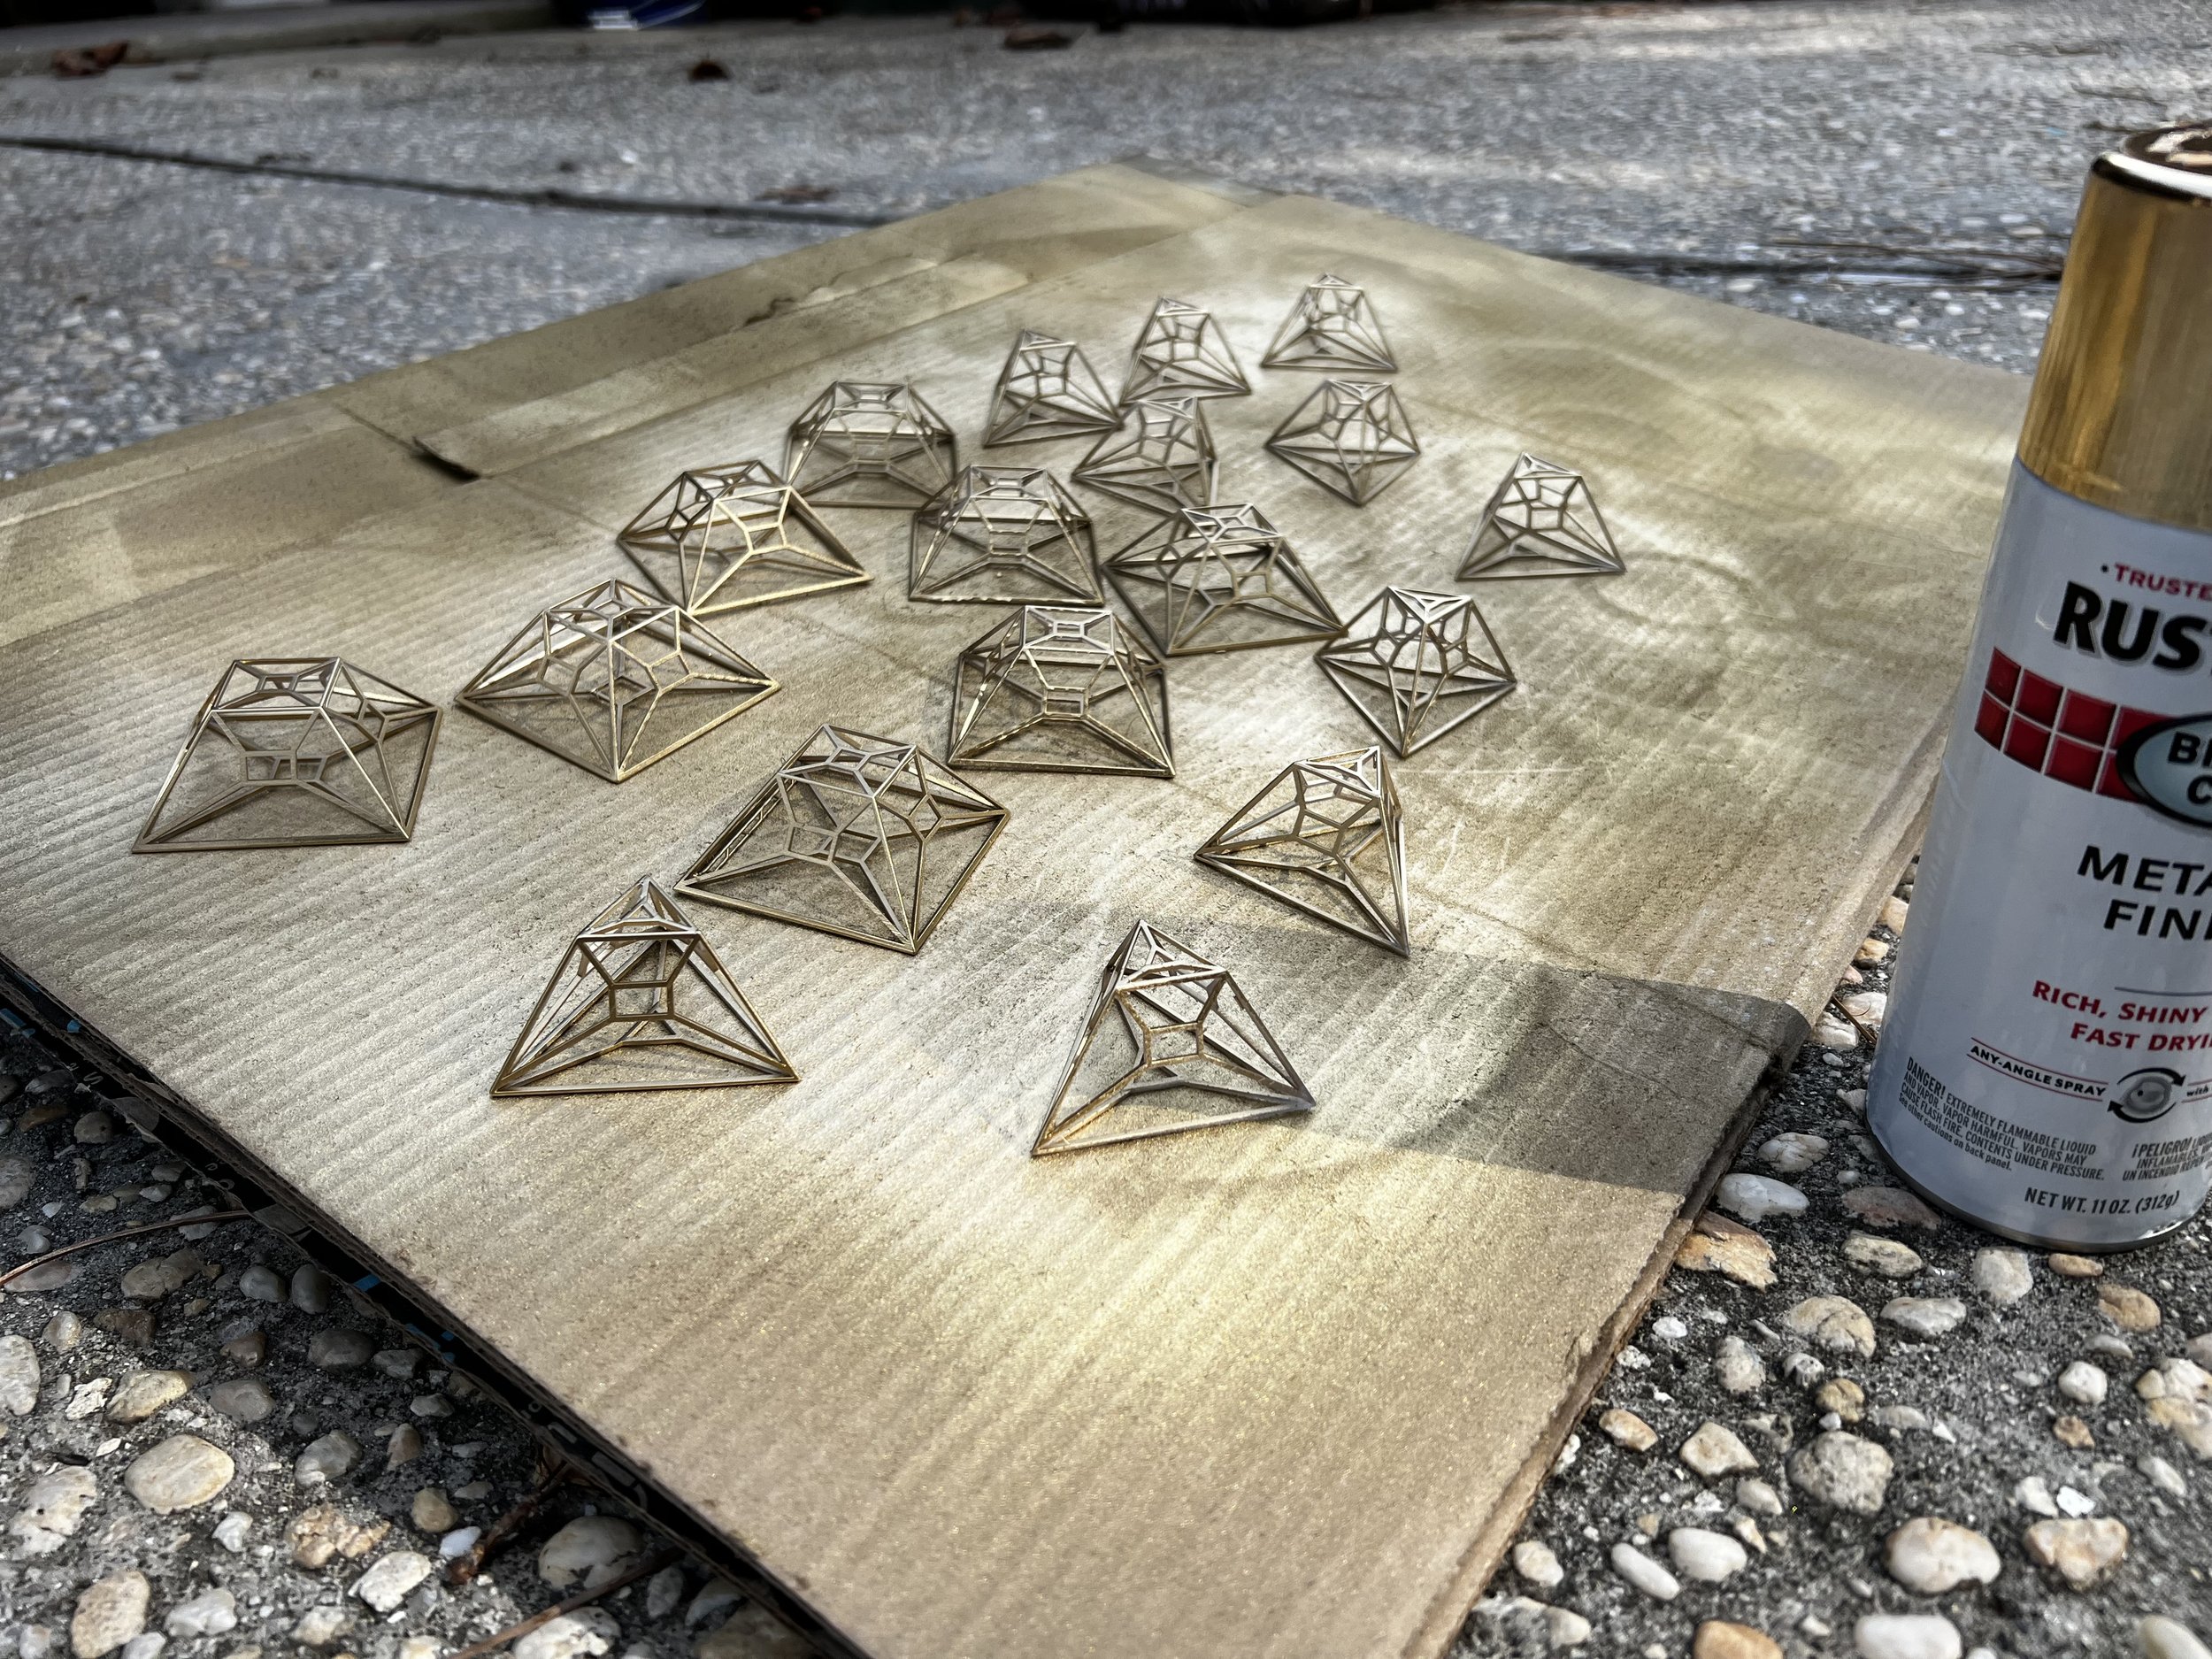
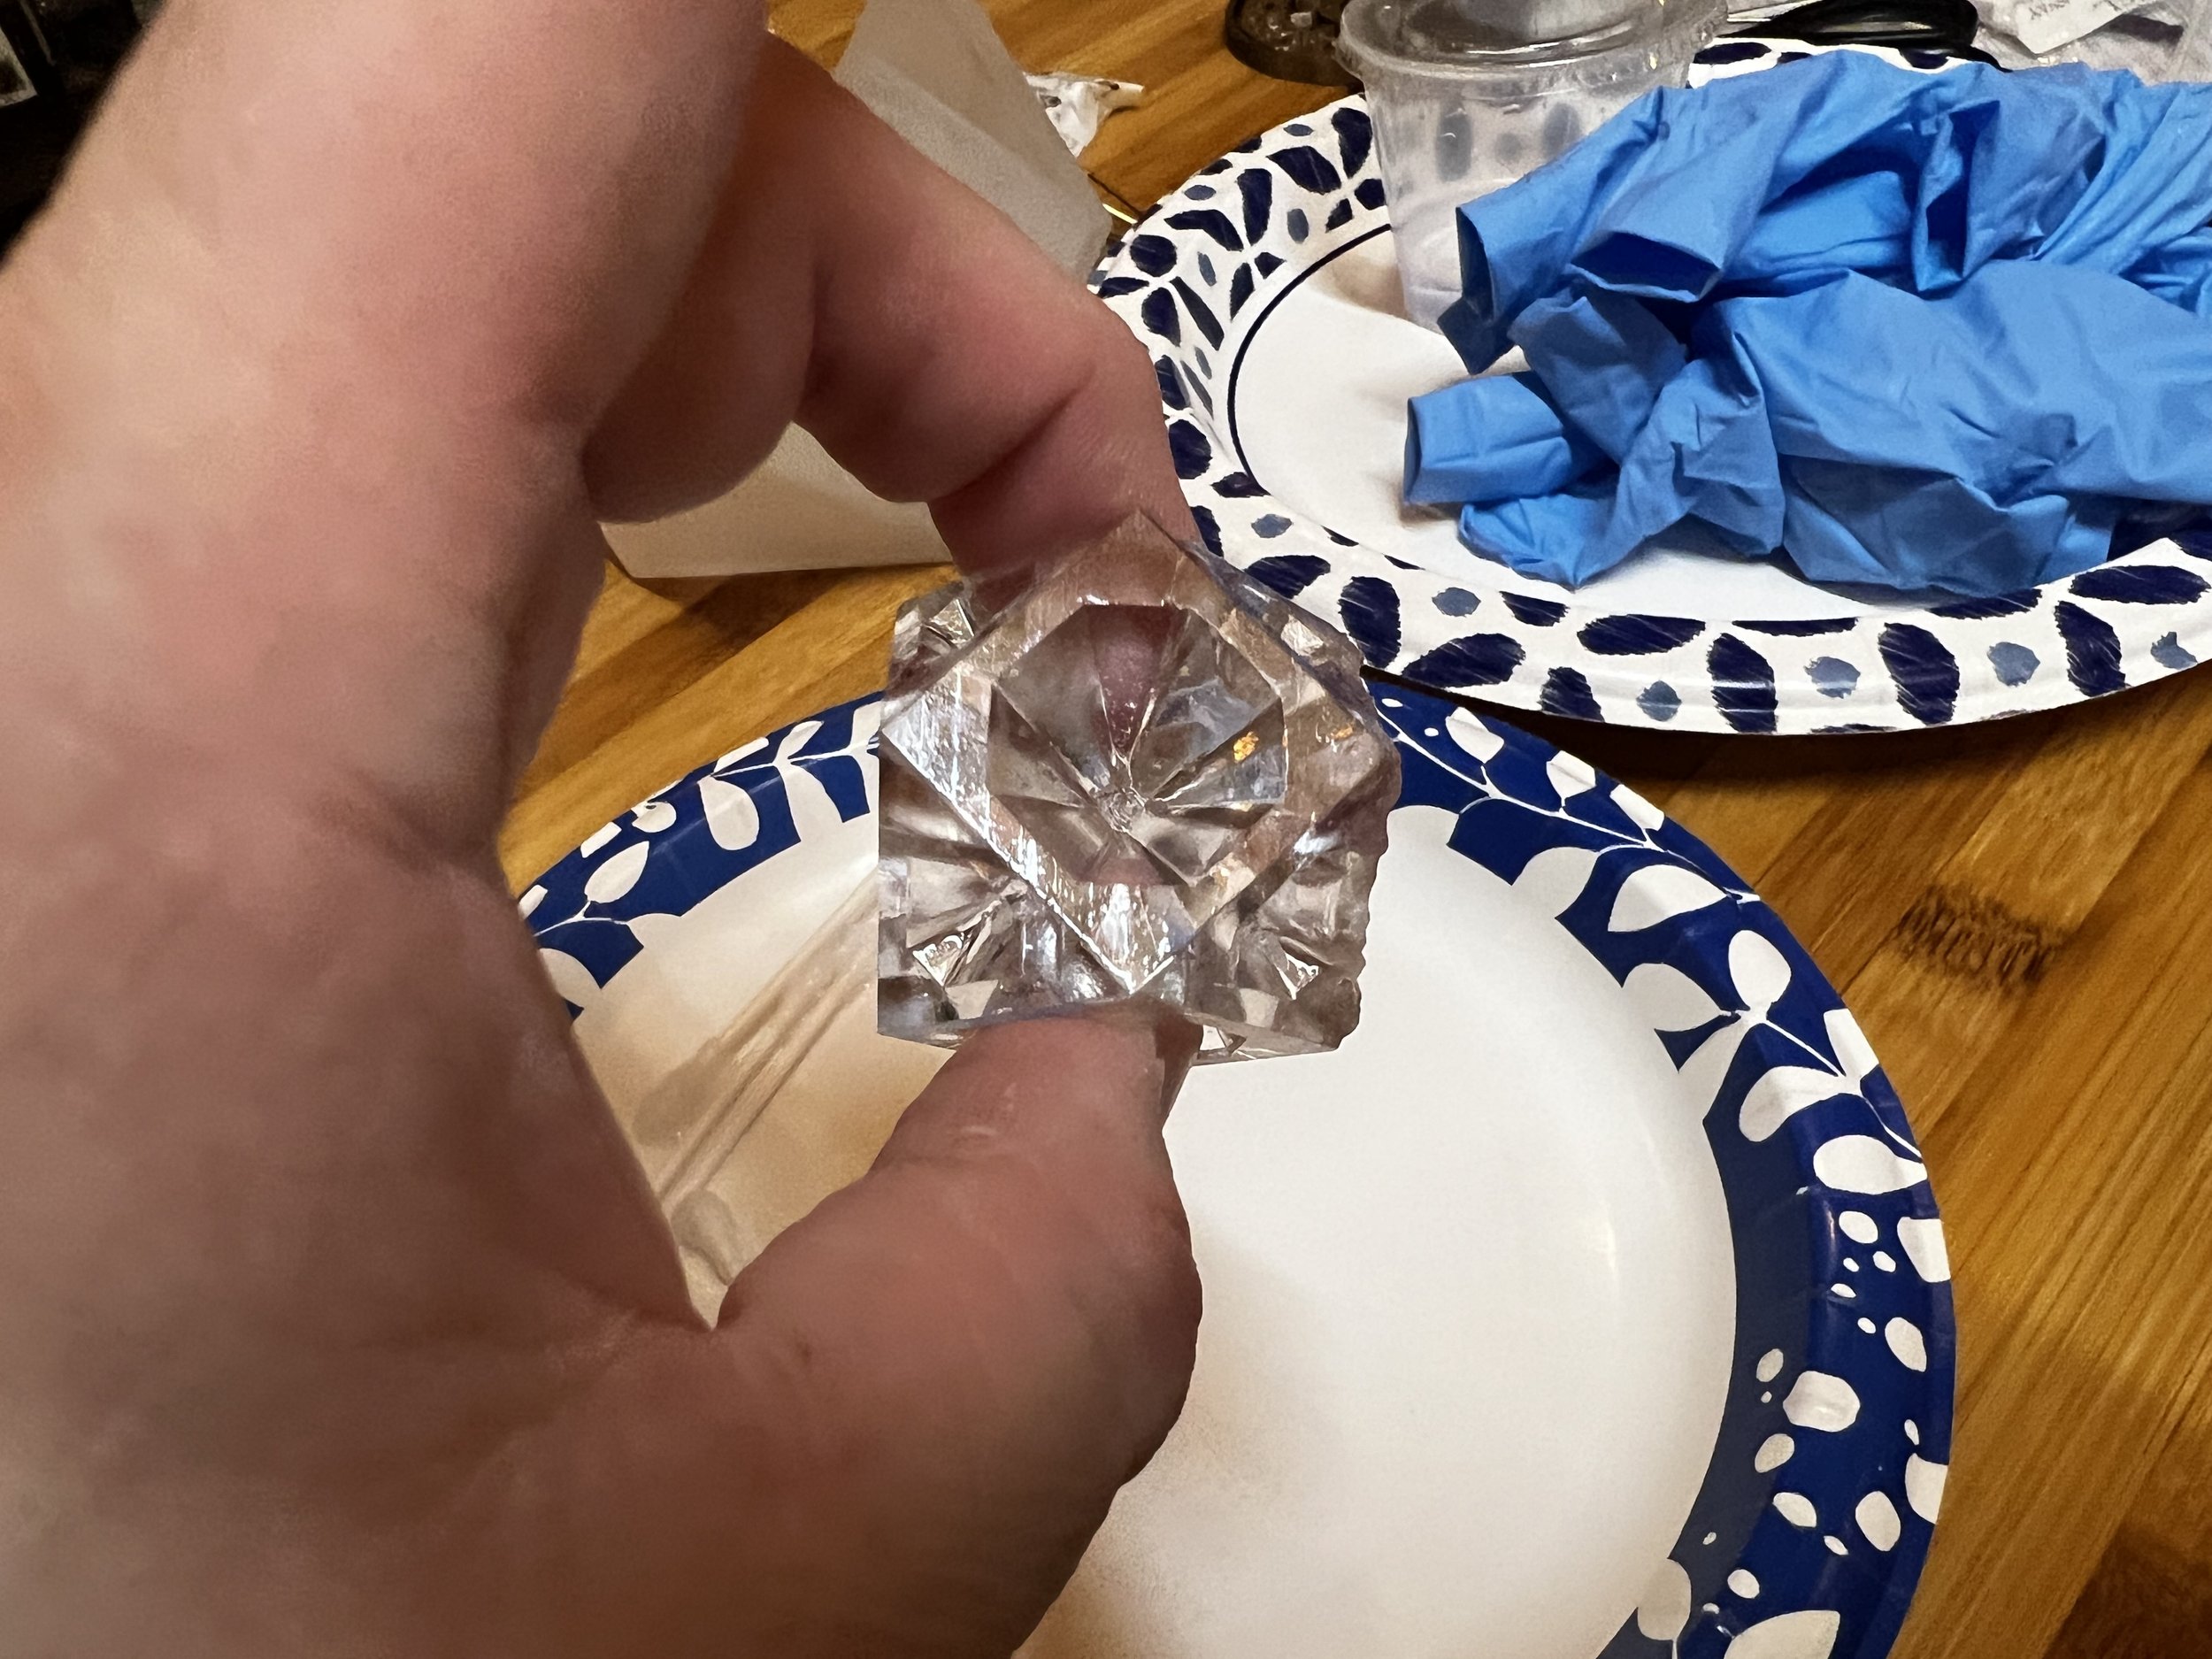

Attempt 1 Conclusion
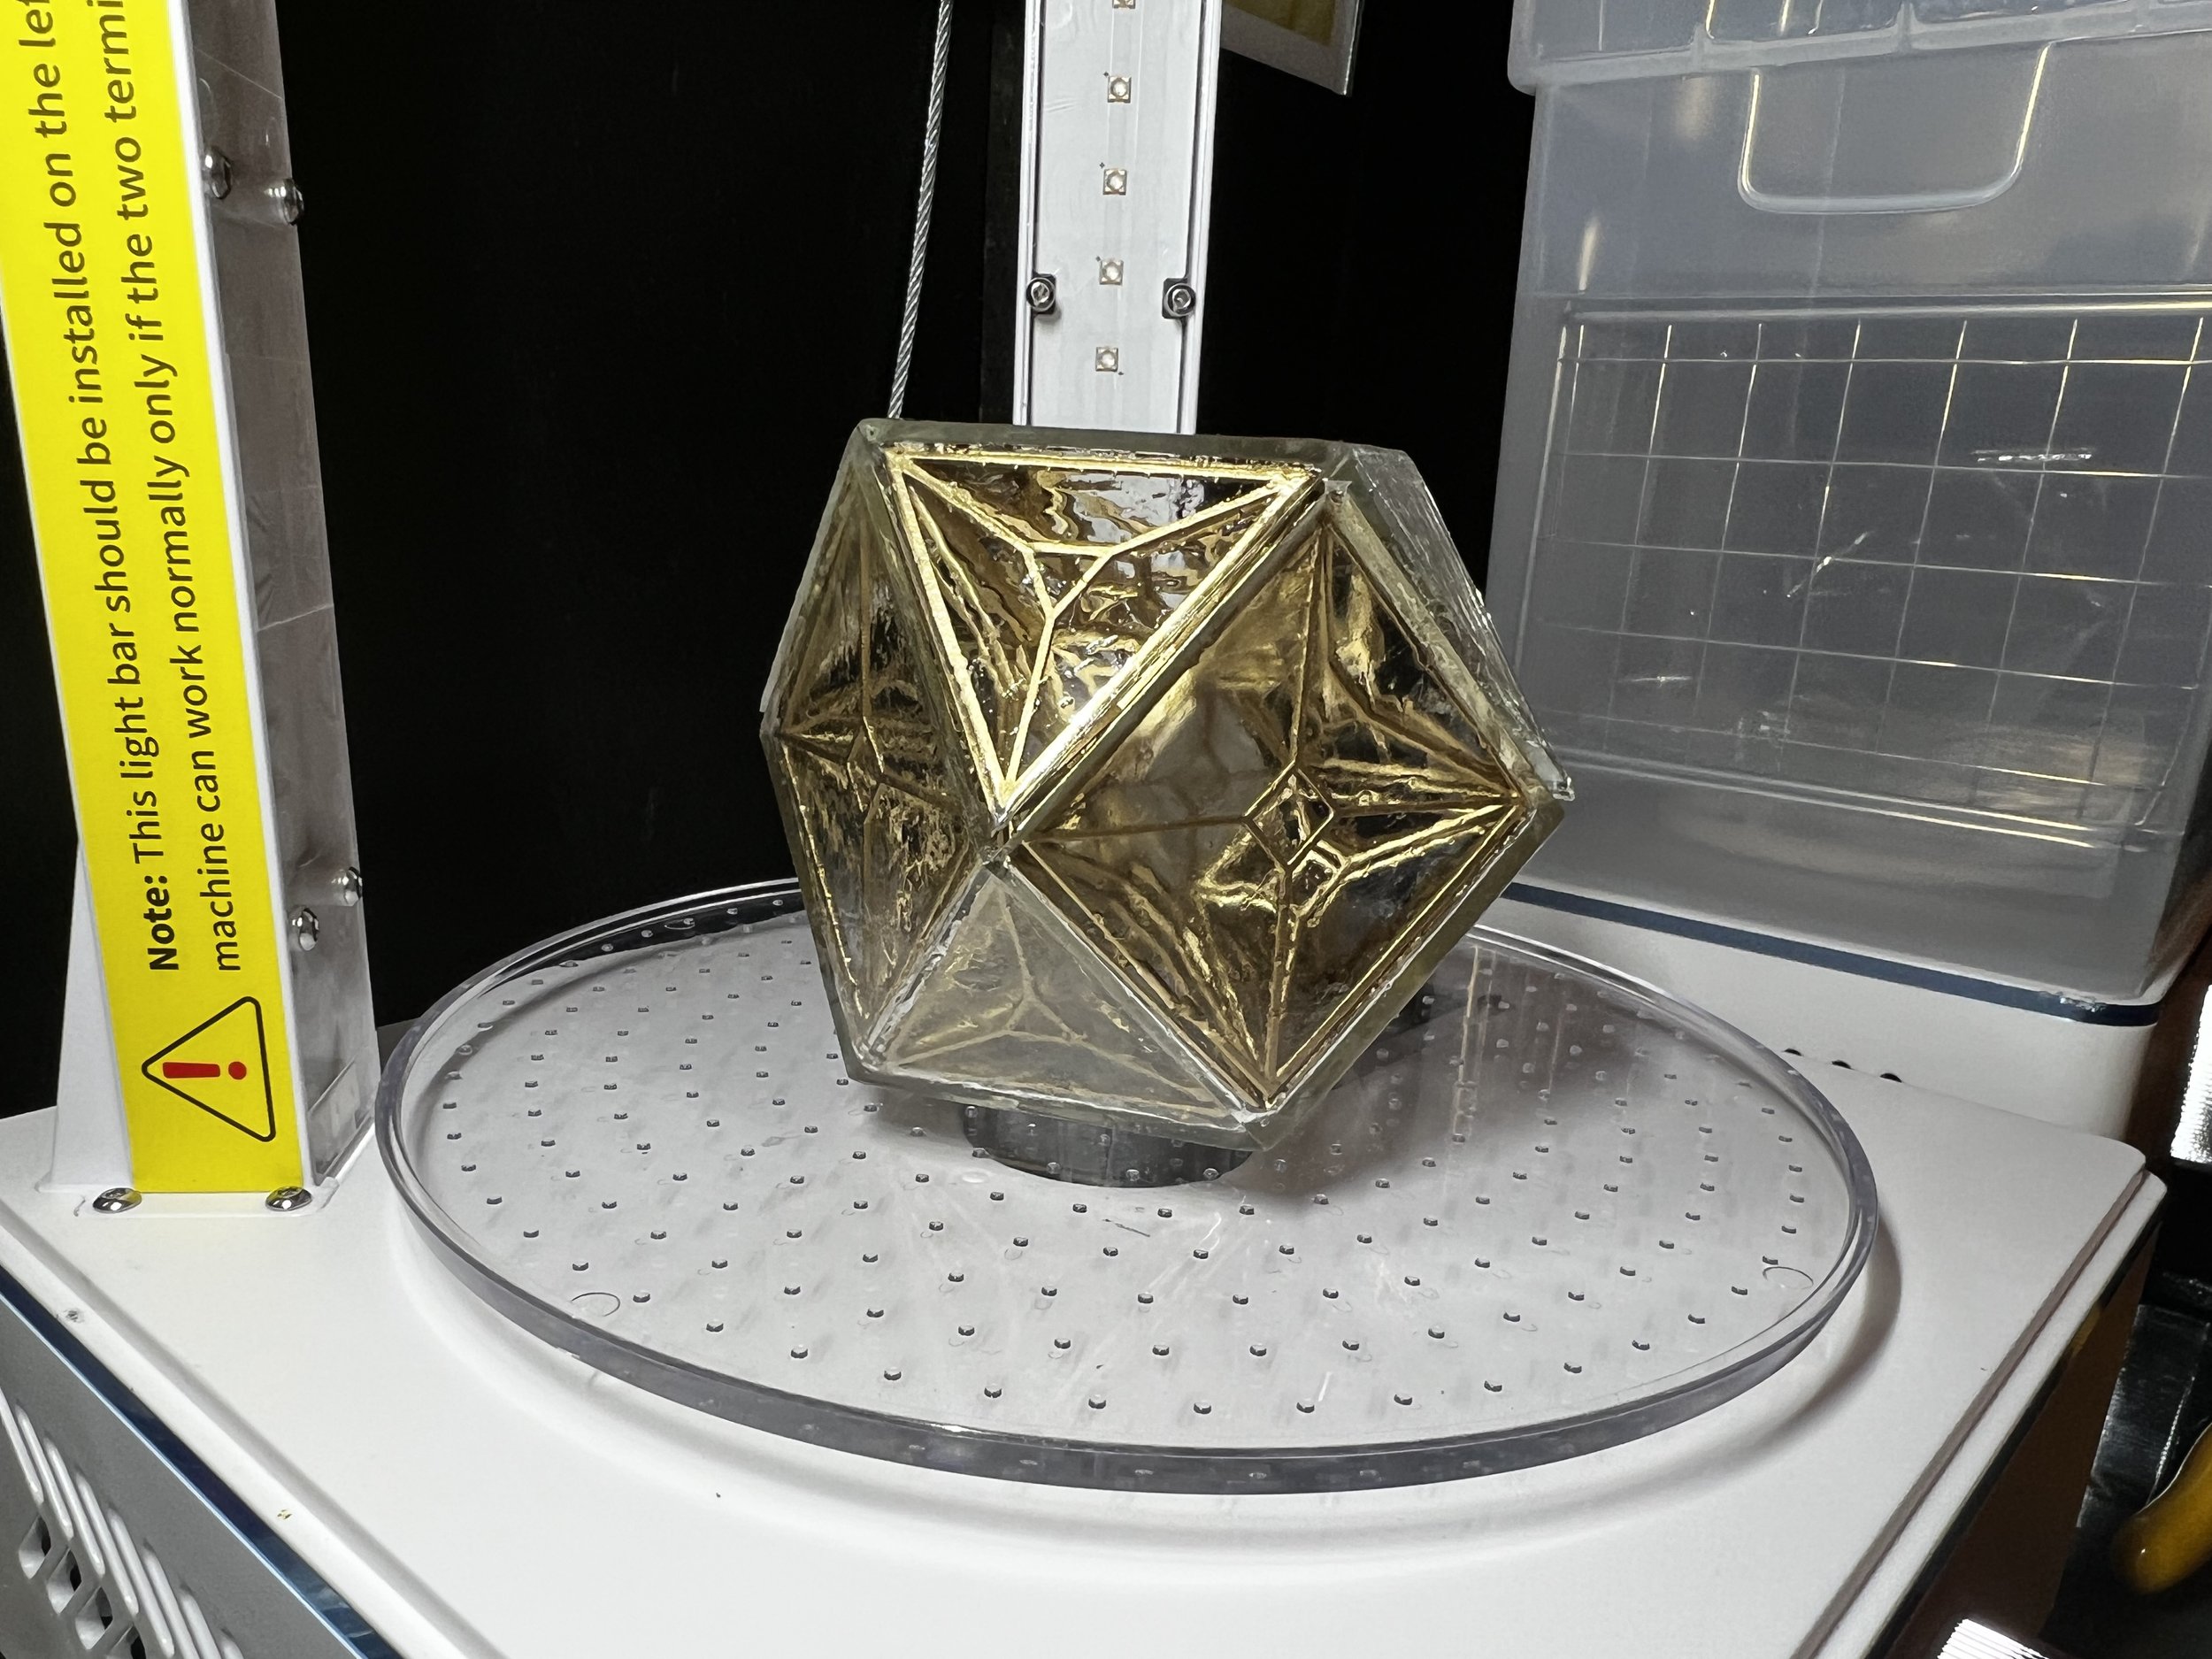
Attempt 1 was a 100% scale attempt using AnyCubic’s High Clear resin. It did indeed come out pretty clear following the manufacturer’s instructions but with one giant trade-off. You can never touch it. AnyCubic’s resin is indeed clear and the material properties are pretty good for this application. However, they instruct you to varnish the cleaned and cured model with their resin and a quick cure to bring back the clarity that is lost during cleaning. This varnish step makes the object EXTREMELY tacky and you basically can’t handle the model.
If you ask me that’s a pretty giant omission by all of the shill youtube and 3d print blogs out there gushing about this resin.
As for the $10 model files, it was nice though I’m still inclined to build my own to potentially give myself the chance of breaking the shell components up differently. Maybe in a future attempt as these files are good enough for now.
Attempt Two
In this attempt, I increased the scale of the model to simplify support removals from the lattice. I’m still using the AnyCubic High Clear Resin, I have ten bottles left after all. Instead of the resin-as-varnish process provided by the manufacturer I decided to post-process the shell components in a way that is similar to headlight restoration.

Stepped wet sanding from 200 up to 1500 grit, then automotive clear coat.
Attempt Three
On the third attempt, I scaled the model back down to 110% of the original model. The size gives the internal latticework more substance for easier support removal and feels good as a size. Still fighting clarity issues I thought it might be interesting to pour the model solid with clear resin. That was sort of a trainwreck, actually.

I drilled a small hole in the completed assembly, brushed on some resin and uv cleared it to fuse the shell halves together. I used a ketchup squeeze bottle and a process of fill-flash-fill-flash to try to pour the shell full of resin.
This resulted in a comedy of errors. First was that my resin-sealed shell seems leaked, creating a mess to clean up and borrowing future Dremel processing problems. The other issue was the heat exchange of the resin curing process blasted some of the latticework paint off the lattice.
Attempt Four
On attempt 4, I kept with the scale of above but opted for a different varnish solution. I think Automotive Clear Coat “should” be the best choice but the high humidity of the Alabama summer and doing this in my garage is making for poor results.
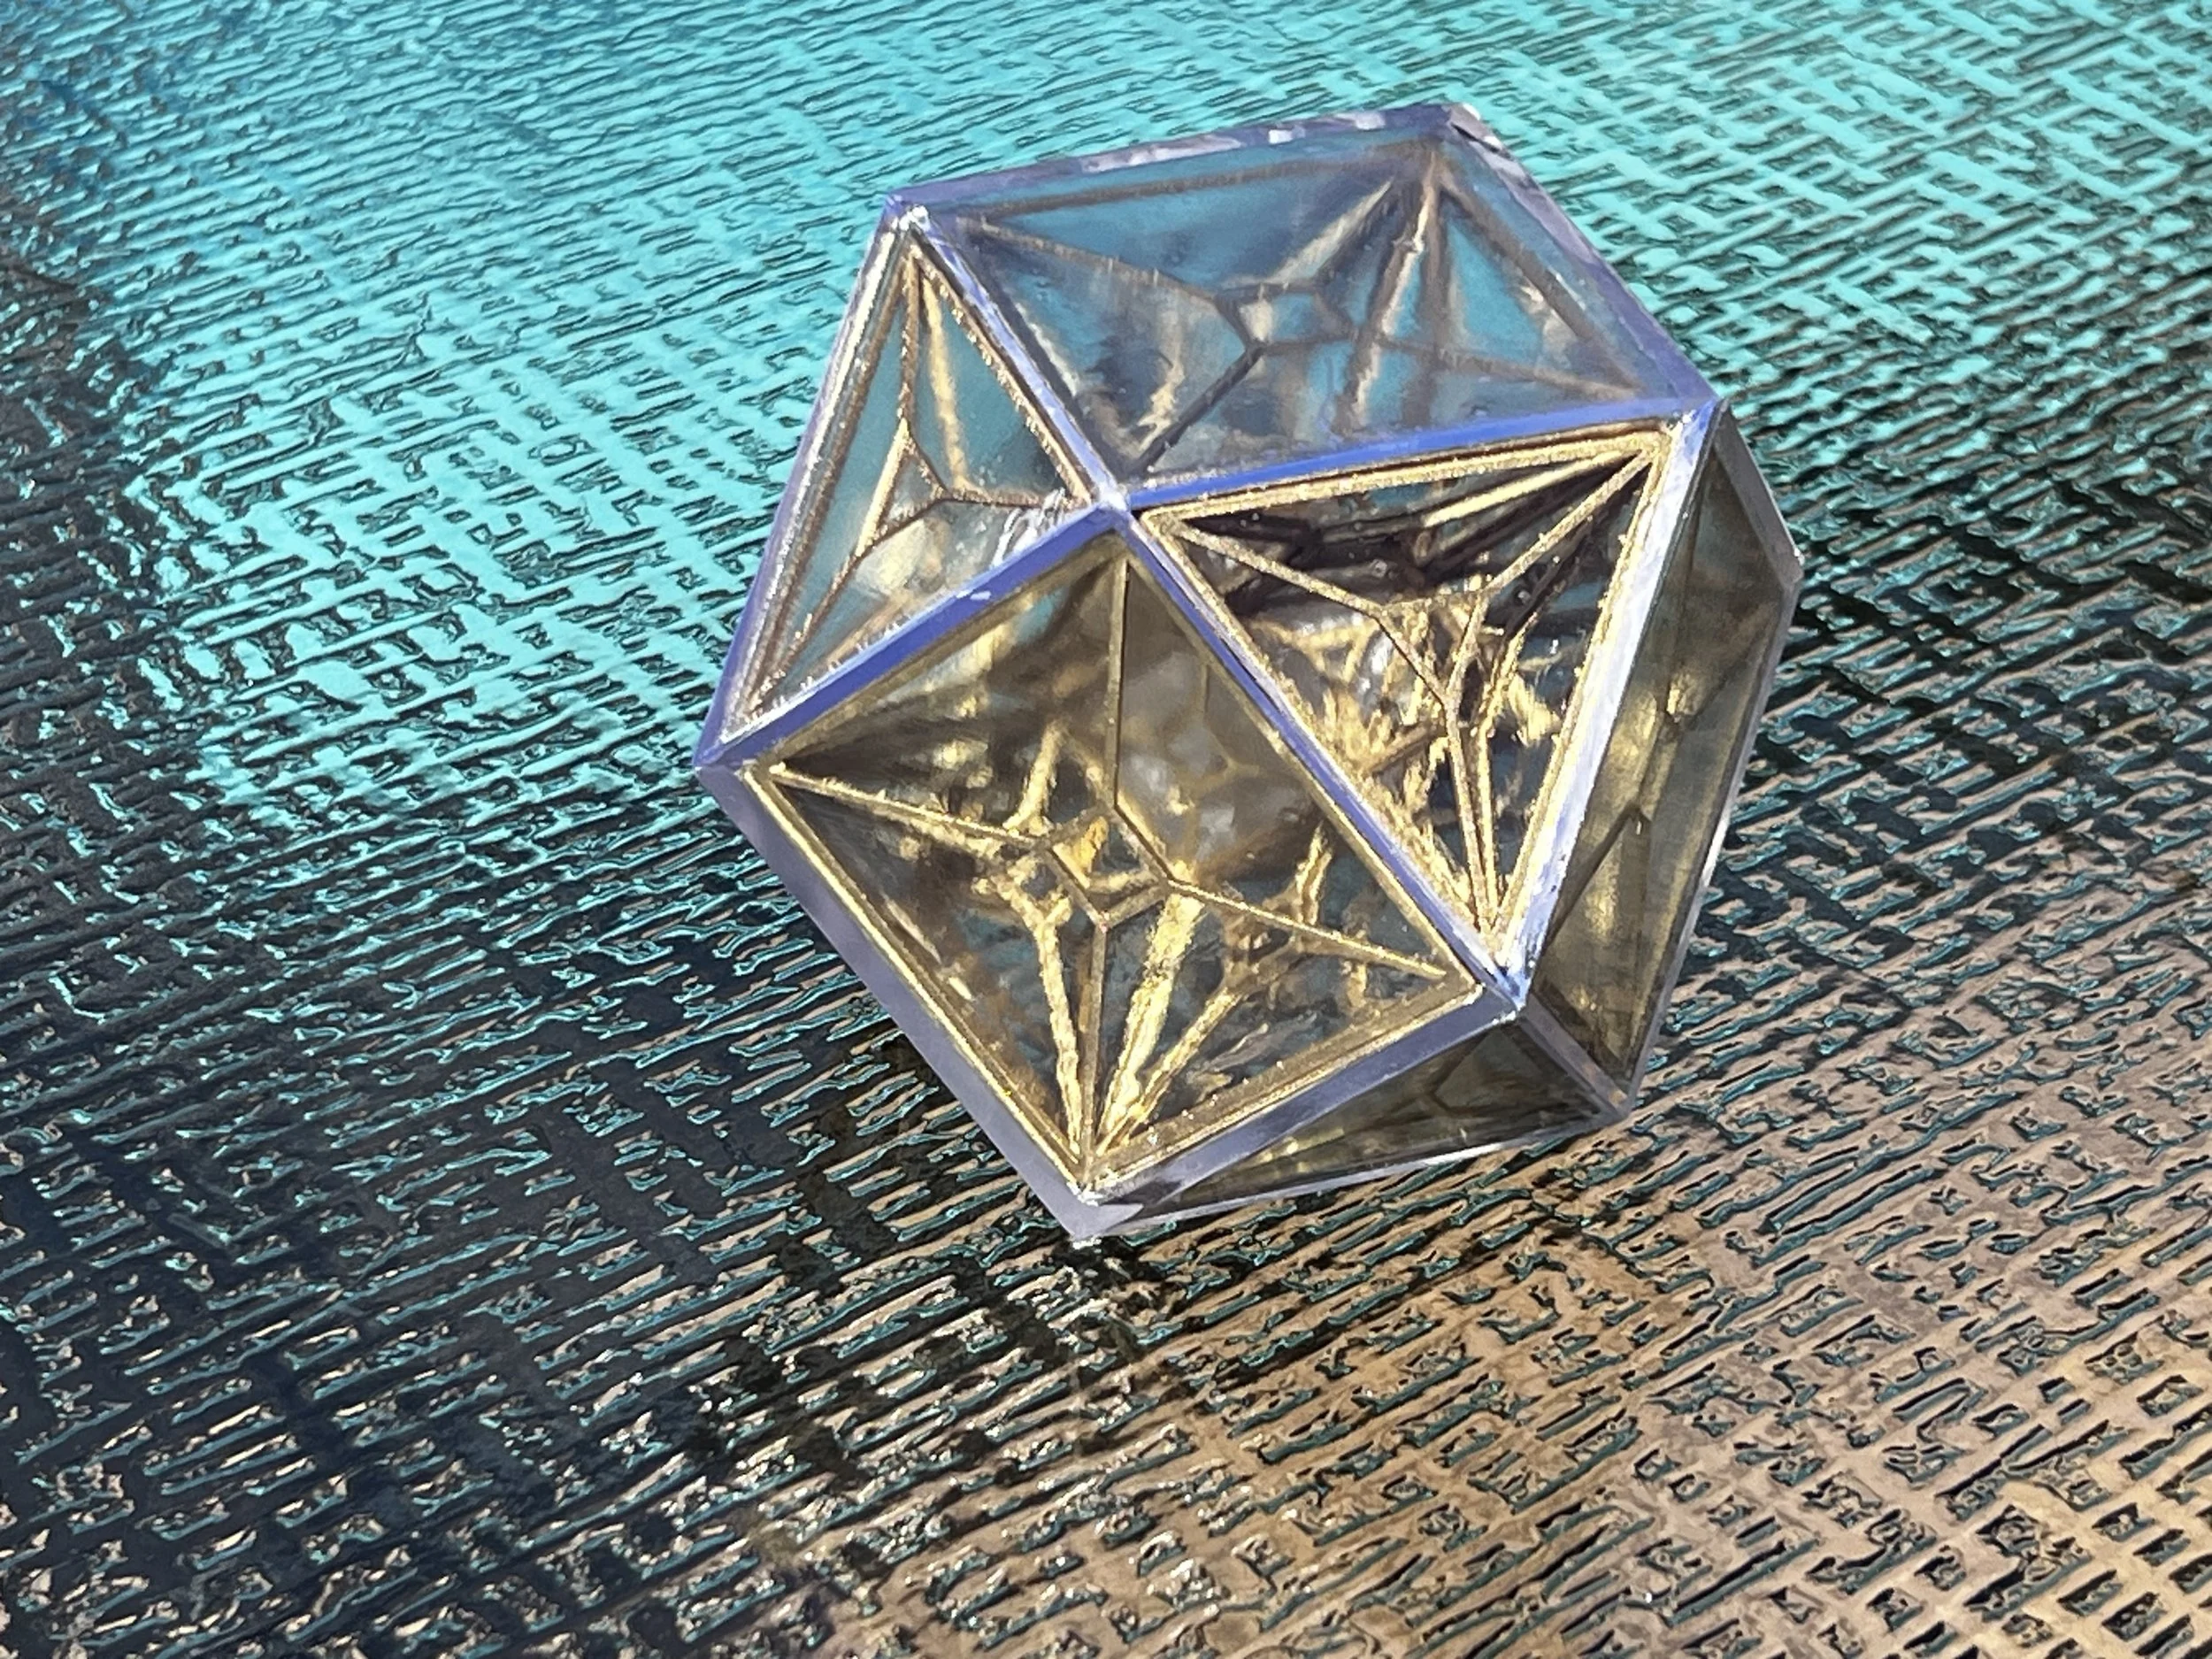
This time I used Liquitex Gloss Varnish, available from Amazon, Michaels and Hobby Lobby. It seemed to be a bit more forgiving when applying in multiple coats.
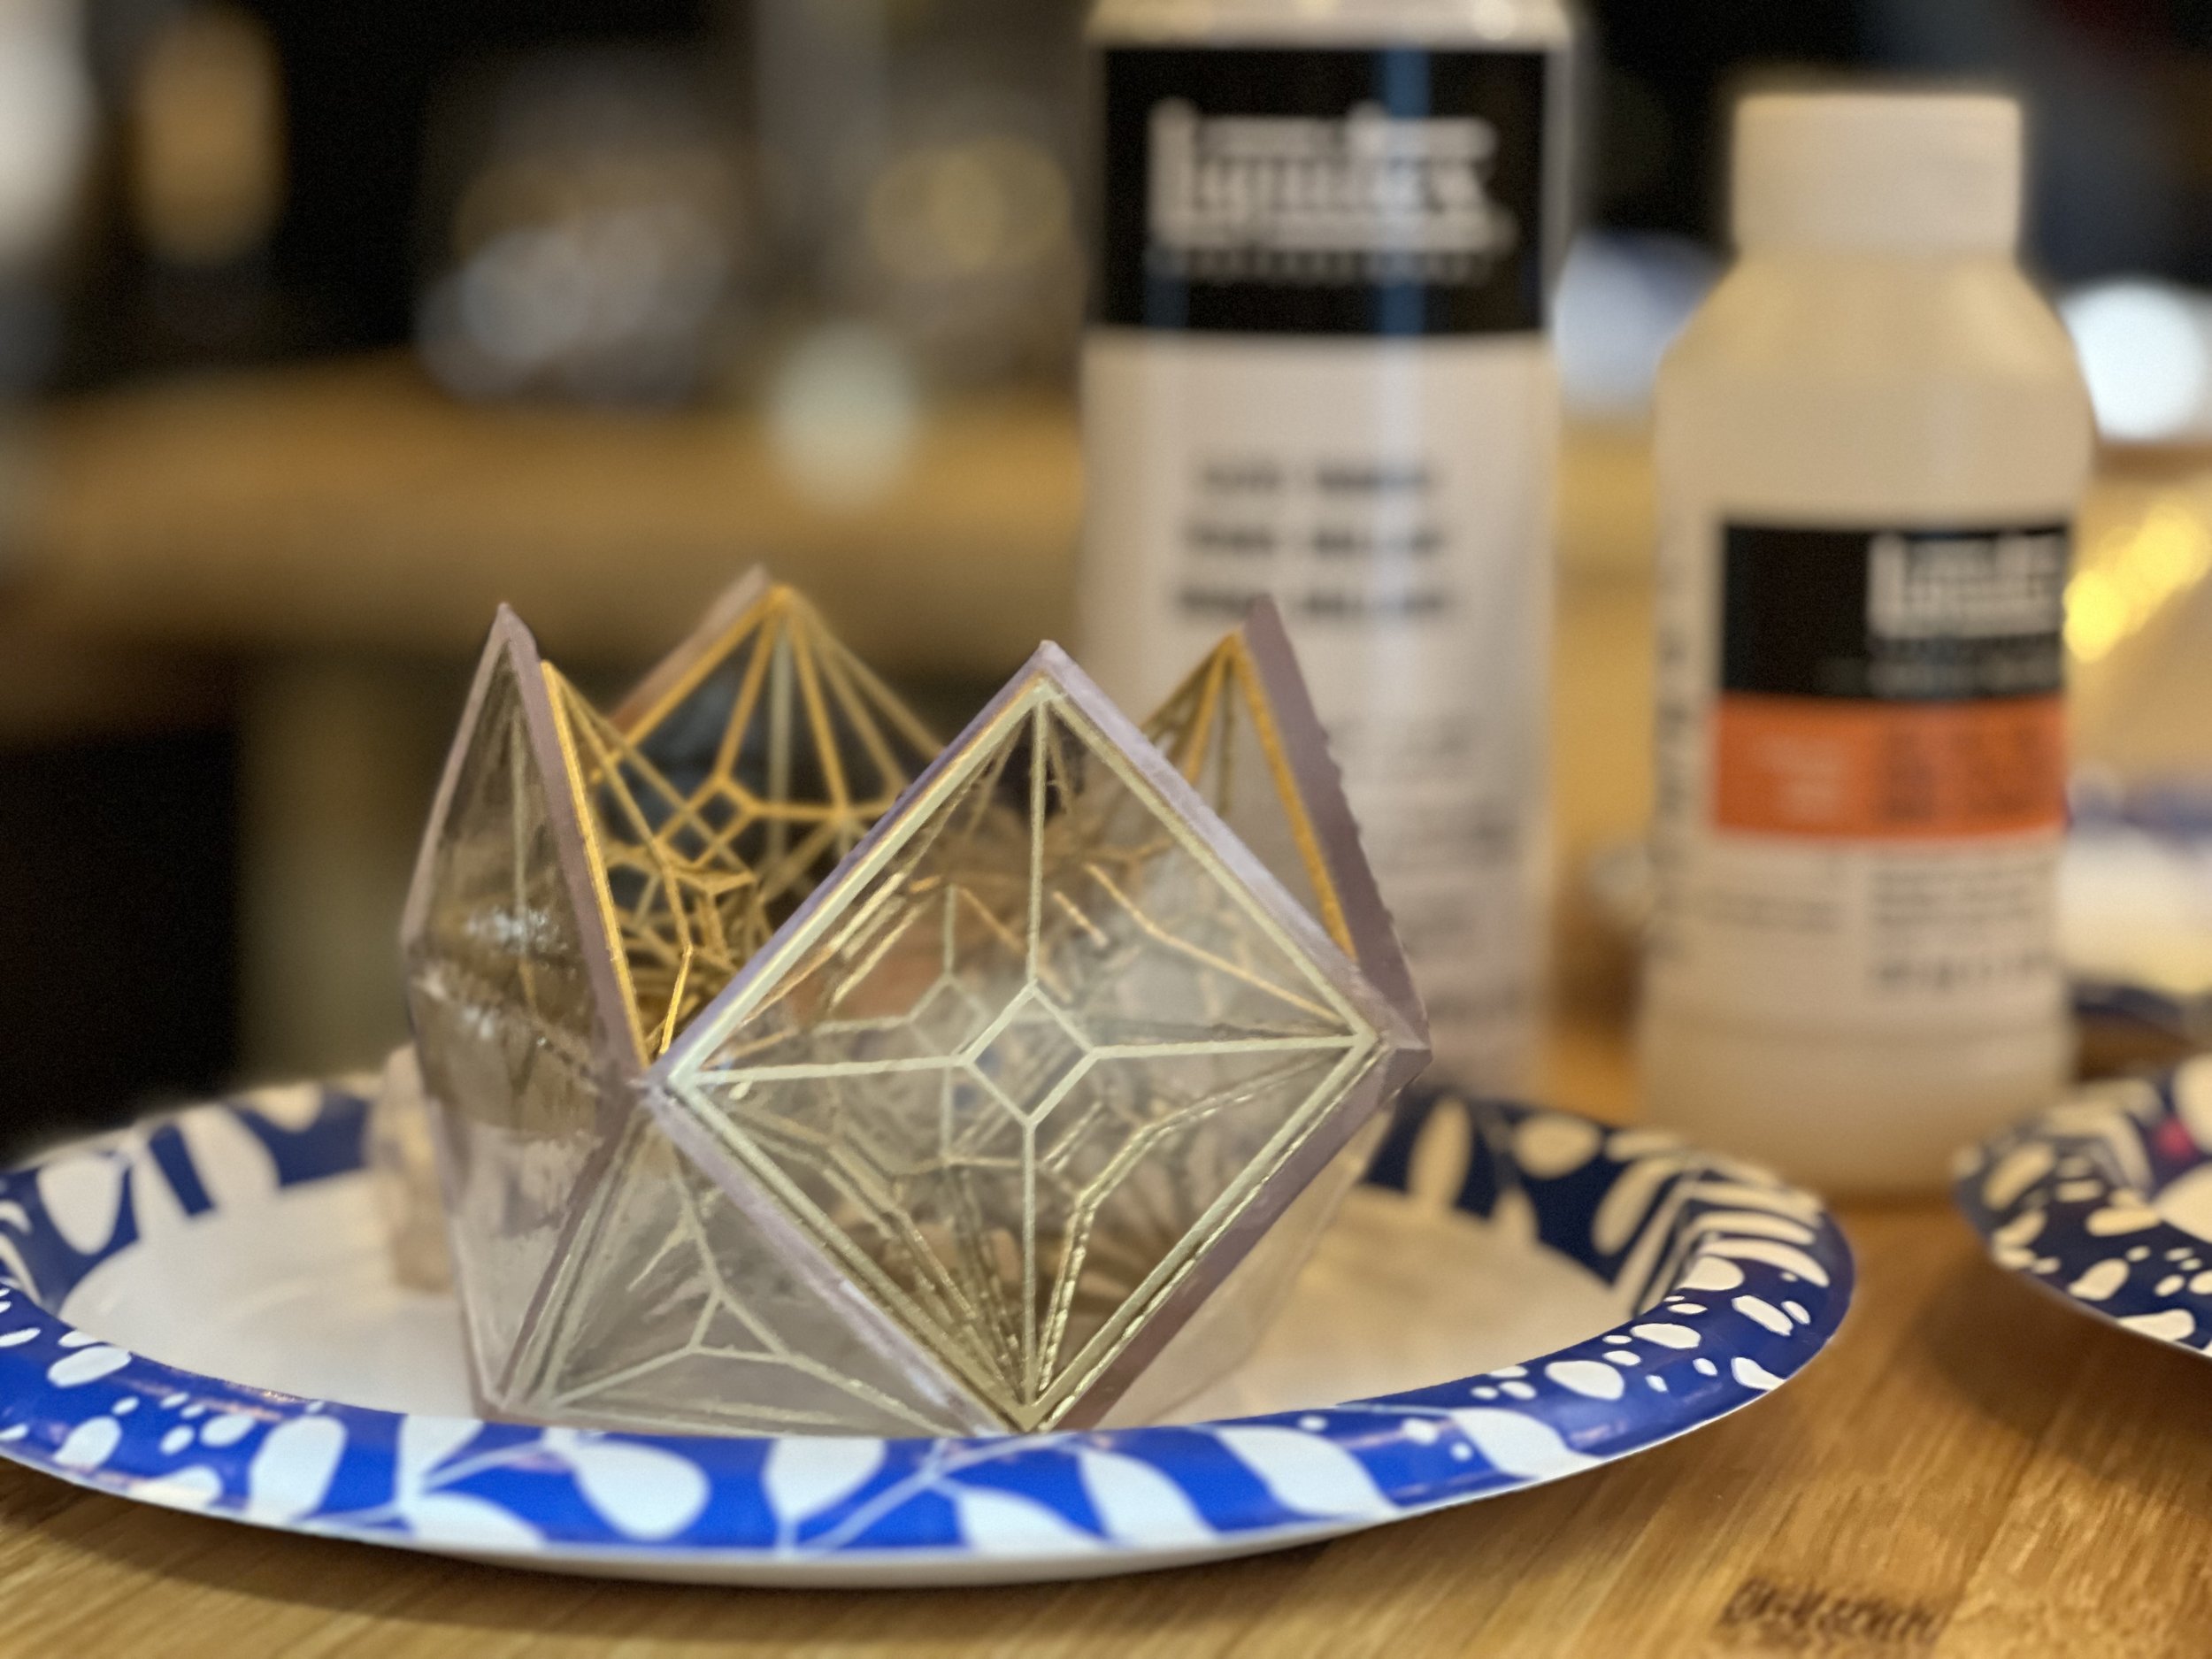
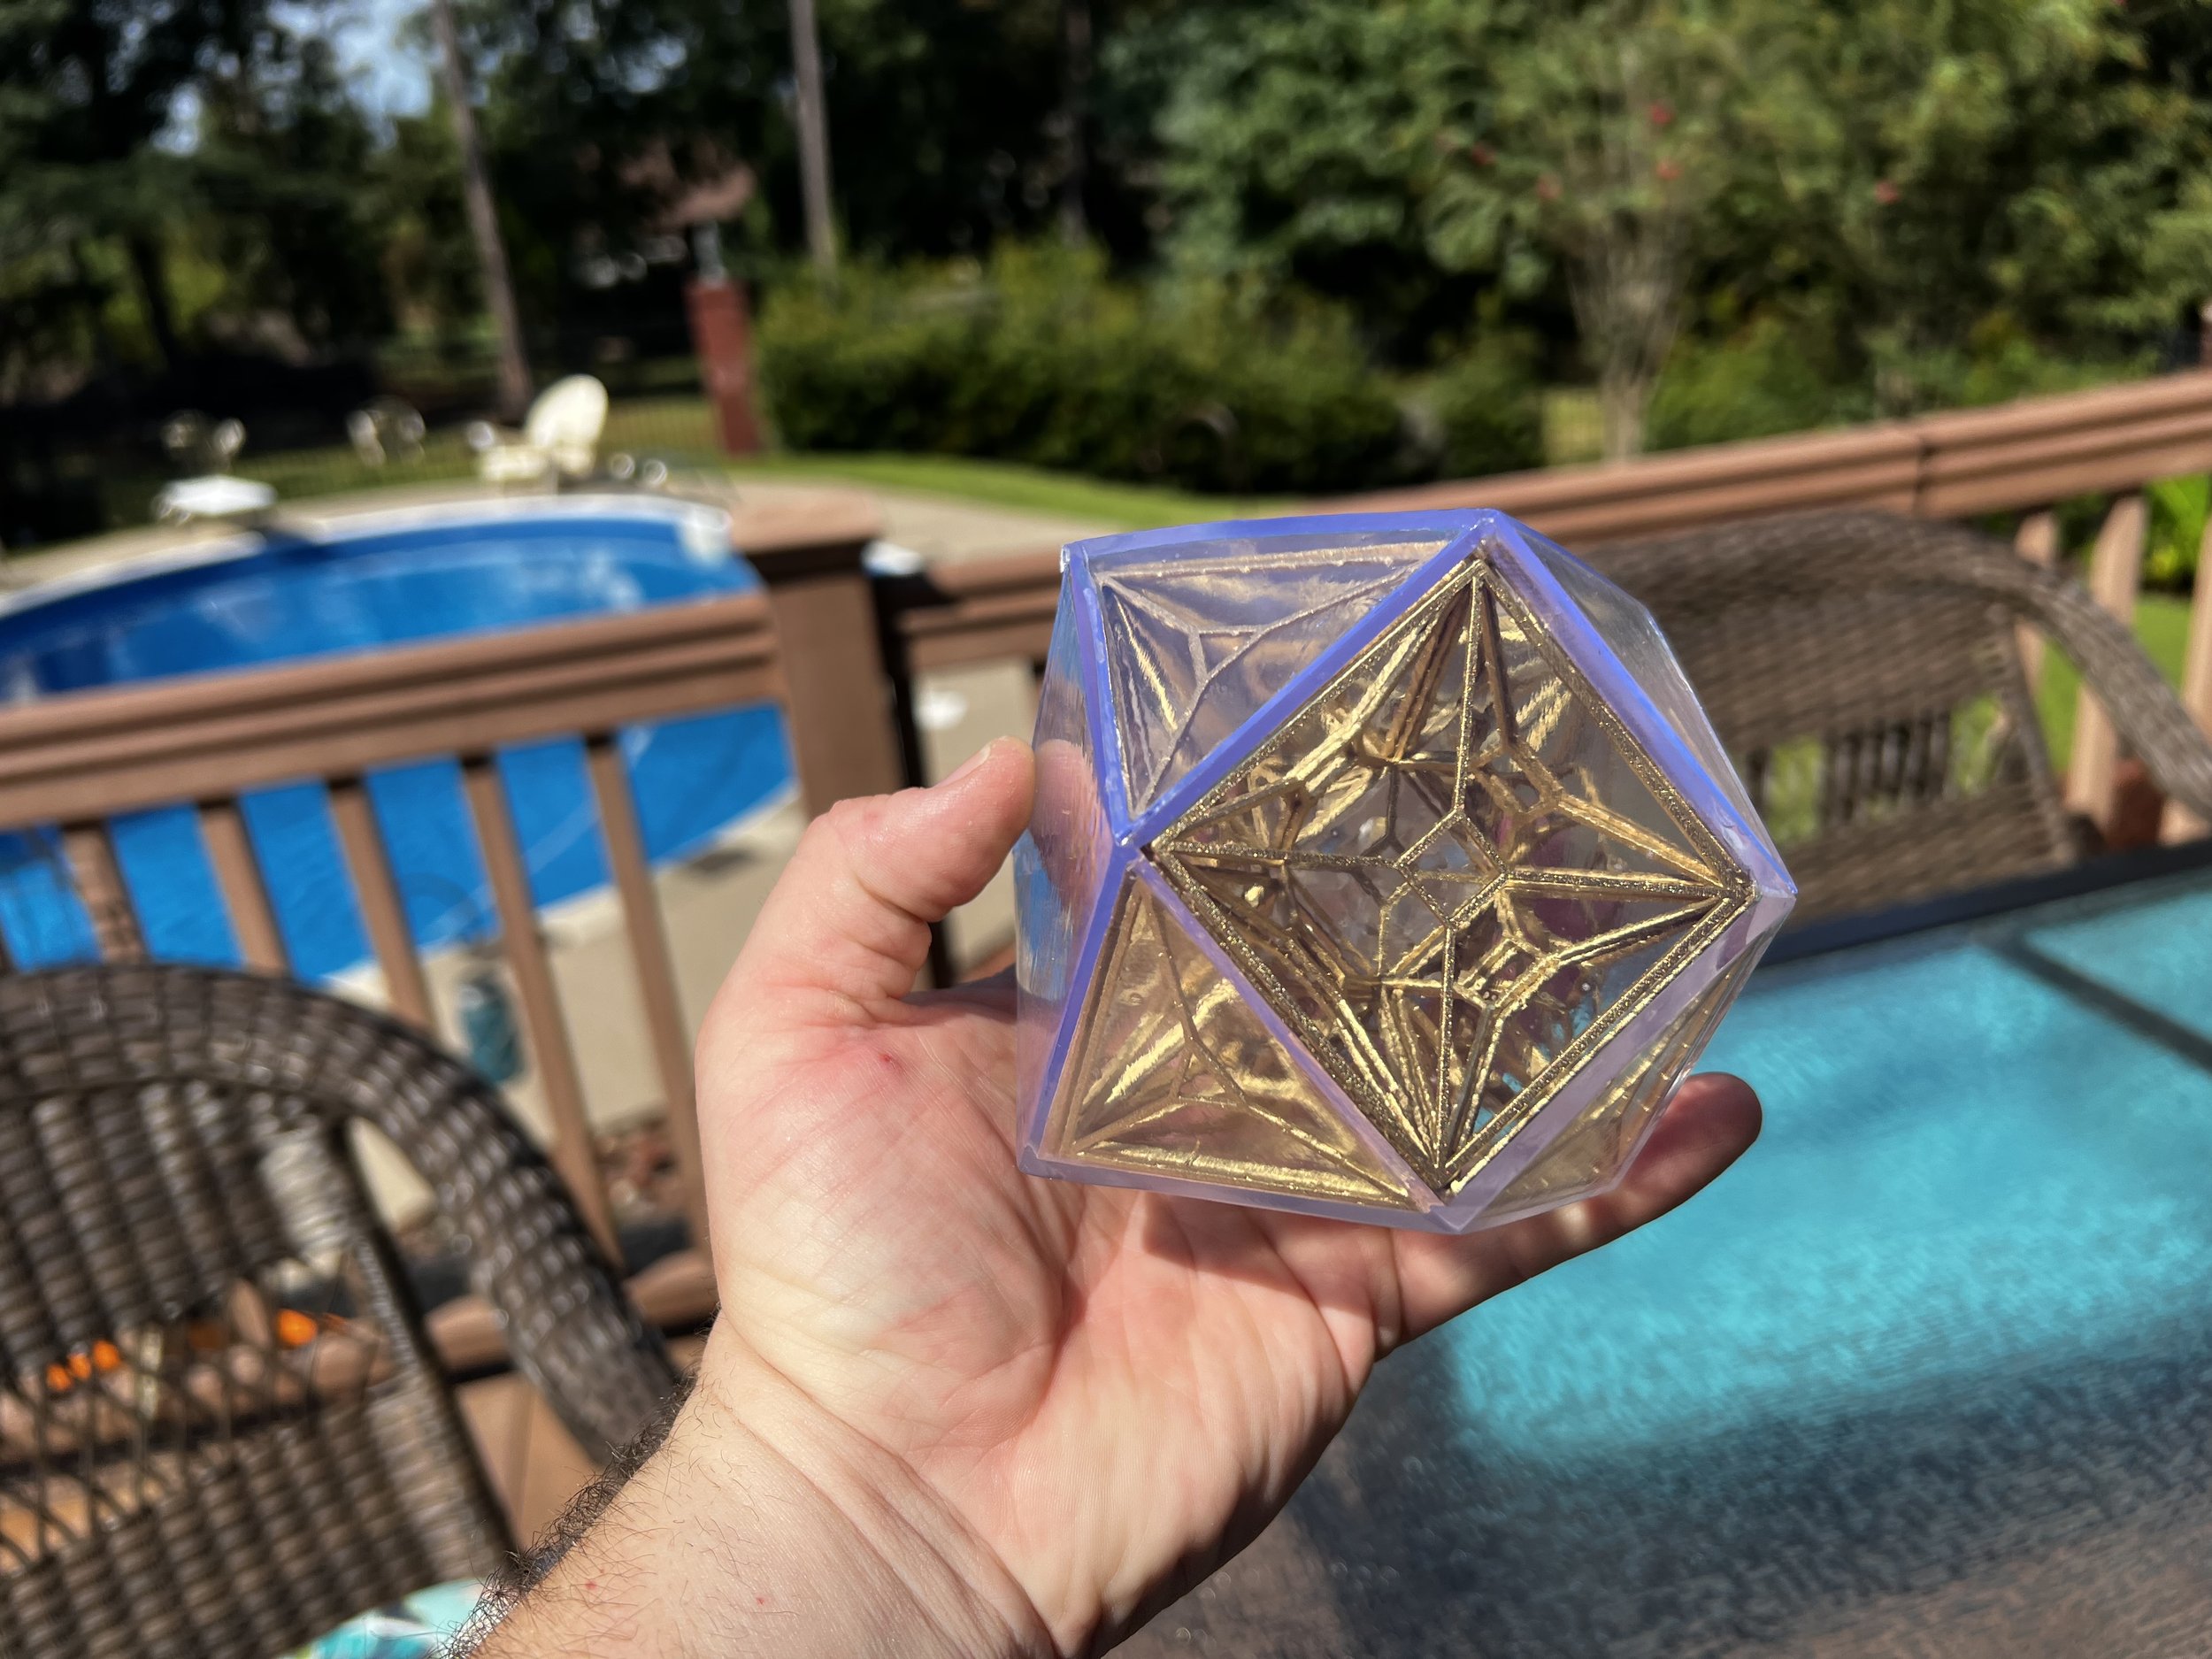
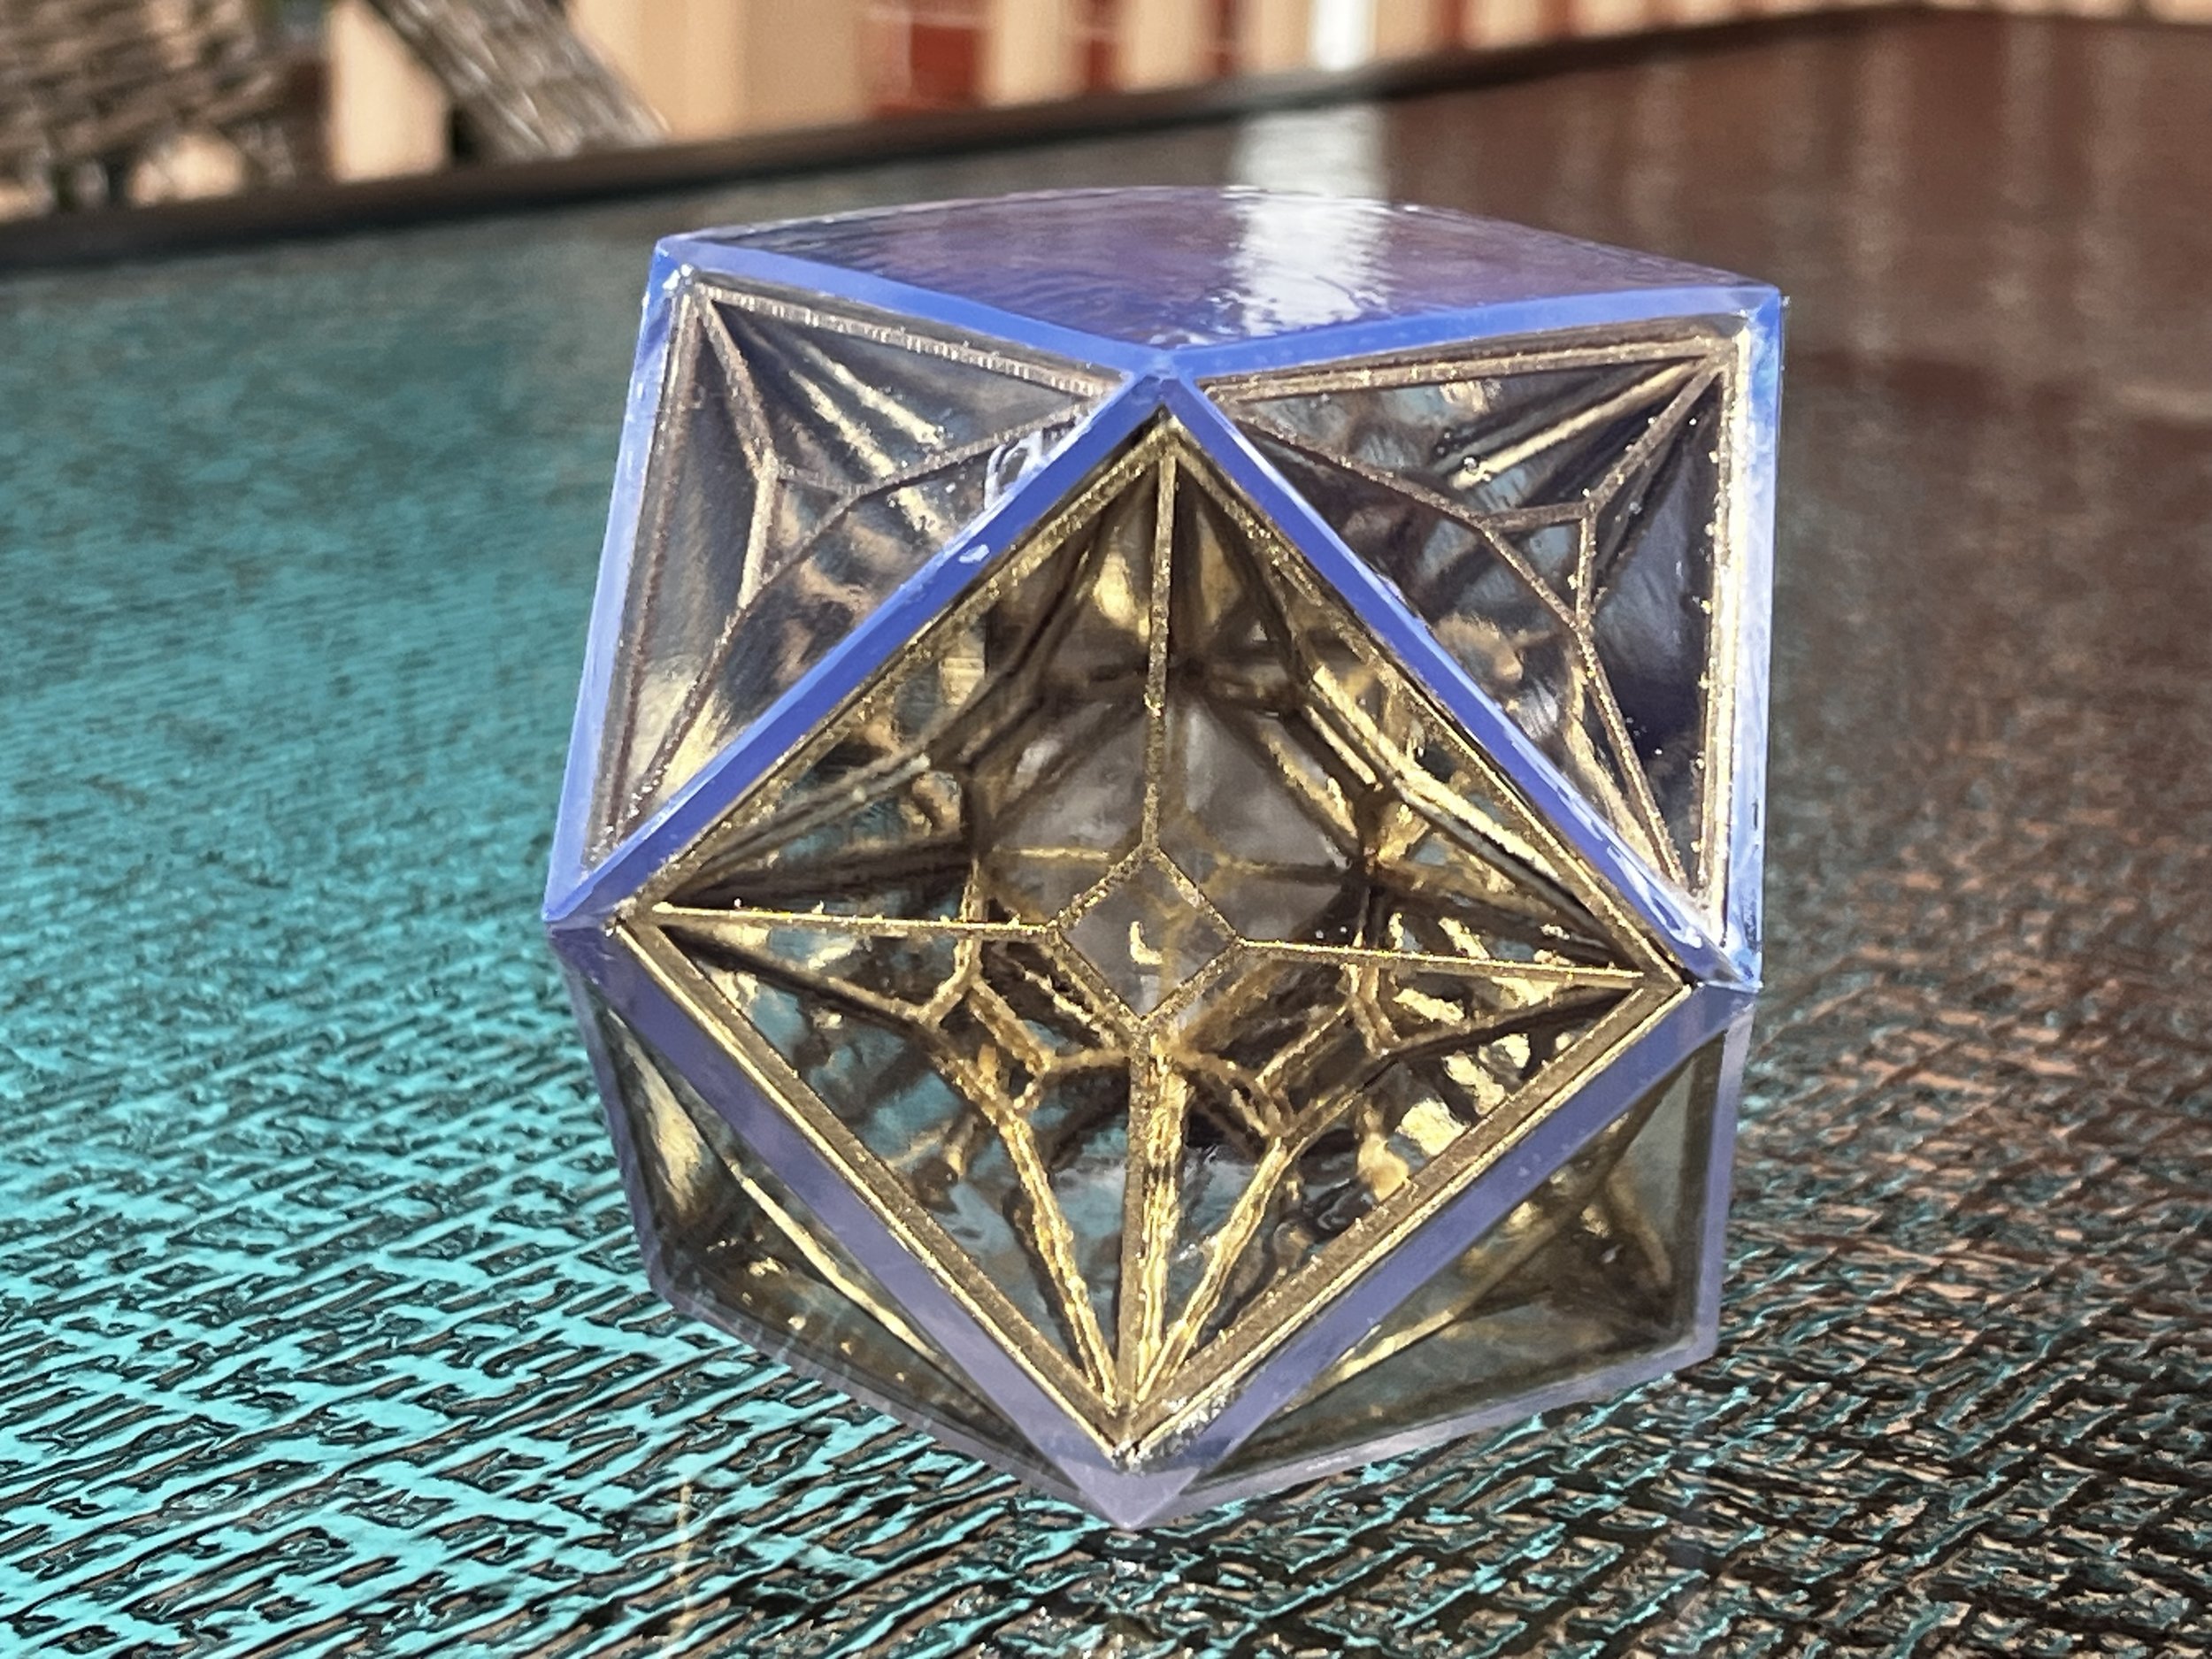
The results were not perfectly clear but by far the best balance of clear but not-sticky and evidently UV resistant to yellowing.
Resin and your Lungs

I did a fair amount of sanding and stripping on the shell halves. At first, to get support marks out and bring out clarity but later using Citris Strip to try to removed failed coats of clear that had surface flaws.
When sanding, I wore a mask and used gloves with the majority that being wet-sanding inside a bucket of water. Some sanding underwater and some sanding above water to observe the high spots and know where to apply pressure.
Note the white residue on the bucket.
This bucket was only ever used when sanding resin (not clear) and this is after it was rinsed with a degreaser and fresh water.
It persists through an industrial degreaser and high pressure water so imagine what it could do in your lungs. Acetone or Naphtha can certainly clean it off the bucket but I wanted to highlight the persistence and long term health considerations of fine resin dust. Be careful sanding! Work in a well-ventilated area, wear a mask or painting respirator and use water to keep the dust down.
DO NOT sand (or any process, really) resin in your kitchen sink or anywhere you may later use for food prep.

Buying a Prime Radiant
Sometimes my own Griswold-esque OCD out strips my own skill and this is one of those times. To get the Prime Radiant I was most happy with, I reached out to a skilled creator on TheRPF forums.

The maker who made this one was extremely fair with his price and did a phenomenal job. He added additional detail to the inside latticework, managed to get a clear poured-solid resin to get the weight right and even had designs laser-etched on the outside. On top of all this he was just a really good guy to talk with.
Prop Making Posts
Dial of Destiny Ordering Info
Dial of Destiny Prop Build Update
Dial of Destiny Prop Build
Dial of Destiny Instructions
3D Printing Shenanigans
eBay Store - Etsy Store
highlighted Posts
Building a Small Indy Bar
8-Year Rule
SFGE 2019
Medieval Madness
Scared Stiff
S.F.G.E. 2018
T-Rex Gamer
S.F.G.E. 2017
Game Room Voice Control
S.F.G.E. 2016
Buying Pinball Machines
Dome Gaming Build
Pinball Industry Spring '16
Bill's Arcade Walkthrough '15
Free Play Florida 2014
“About” Posts
ARCADES
About: Mario Kart Arcade GP(2)
About: Tapper
PINBALL
About: Attack from Mars
About: Medieval Madness
About: Monster Bash
About: Scared Stiff
About: Star Trek The Next Generation
About: Indiana Jones (wms)
About: Tales of the Arabian Nights
OTHER
About: Ice Cold Beer
Contact
KLOV/VAPS Profile
Pinside Profile
Village Profile
Book-Of-Faces Profile
Stuff I'm Following
Gulf Coast Pinball & Arcade
GAPAS
The Village BBS
Kaneda's Pinball Podcast
John's Arcade
Dead Flip
Broken Token
Game Room Junkies
Pinball Undesirables
This Week in Pinball
How Did This Get Played?
GCPAC Resources
Machine Trading Post
Georgia Area for Sale (GAPAS)
Game Map
Resource Directory
Not Arcade Related but Still Awesome
Epic Rap Battles of History
Bald Move
Dan Carlin Hard Core History
Other Posts
-
October 2026
3
- Oct 18, 2026 R.I.P Printy McOldTimer Oct 18, 2026
- Oct 15, 2026 Making a Place to Make Things Oct 15, 2026
- Oct 2, 2026 Arcade Shenanigans, Finale Oct 2, 2026
-
January 2026
1
- Jan 2, 2026 Stranger Things Jan 2, 2026
-
October 2025
1
- Oct 5, 2025 Making A Prime Radiant (again) Oct 5, 2025
-
May 2025
2
- May 24, 2025 Working with Pearl May 24, 2025
- May 15, 2025 XL Filament Printing (live Draft) May 15, 2025
-
October 2024
1
- Oct 23, 2024 XL Resin Printing Oct 23, 2024
-
July 2024
1
- Jul 11, 2024 Dial of Destiny, A Year Later Jul 11, 2024
-
May 2024
1
- May 31, 2024 Tron Lightcycle Run May 31, 2024
-
March 2024
1
- Mar 26, 2024 Captain Crazy's Paradise Mar 26, 2024
-
January 2024
1
- Jan 1, 2024 Happy New Year! Jan 1, 2024
-
December 2023
1
- Dec 8, 2023 Merry Christmas Dec 8, 2023
-
October 2023
2
- Oct 30, 2023 Dial of Destiny Prop Info Oct 30, 2023
- Oct 3, 2023 Quick Prop Build: IJ Antidote Vial Oct 3, 2023
-
September 2023
1
- Sep 10, 2023 Building a Prime Radiant Sep 10, 2023
-
August 2023
1
- Aug 5, 2023 Dial of Destiny Mark 4 Conversion Instructions Aug 5, 2023
-
July 2023
1
- Jul 2, 2023 Indiana Jones and The Dial of Destiny Review Jul 2, 2023
-
June 2023
1
- Jun 3, 2023 Aviation Themed Whiskey Flight Boards Jun 3, 2023
-
April 2023
2
- Apr 30, 2023 Dial of Destiny Prop Build Apr 30, 2023
- Apr 16, 2023 Star Trek Picard Season 3 Apr 16, 2023
-
March 2023
1
- Mar 1, 2023 Home Bar Build: Tiki / Indy Adventure Theme Mar 1, 2023
-
February 2023
1
- Feb 27, 2023 Bambu X1C Feb 27, 2023
-
January 2023
1
- Jan 31, 2023 Some changes in 2023 Jan 31, 2023
-
December 2022
1
- Dec 11, 2022 Andor is Really Good (Really) Dec 11, 2022
-
November 2022
2
- Nov 28, 2022 God of War Ragnarök: A Perfect Sequel Nov 28, 2022
- Nov 18, 2022 Free Play Florida 2022 Nov 18, 2022
-
June 2022
1
- Jun 2, 2022 Modern Star Trek Round Up Jun 2, 2022
-
May 2022
2
- May 29, 2022 Stranger Things Season 4 May 29, 2022
- May 15, 2022 PS5 May 15, 2022
-
April 2022
1
- Apr 6, 2022 Bobiverse Books Apr 6, 2022
-
February 2022
1
- Feb 23, 2022 Free Guy Feb 23, 2022
-
January 2022
3
- Jan 30, 2022 Matrix Resurrections Jan 30, 2022
- Jan 22, 2022 BattleZone! Jan 22, 2022
- Jan 14, 2022 The Expanse Jan 14, 2022
-
September 2021
2
- Sep 22, 2021 Rock 'N Roll Pinball Sep 22, 2021
- Sep 1, 2021 SFGE 2021 Sep 1, 2021
-
August 2021
1
- Aug 23, 2021 Deep Crap for Deeproot Aug 23, 2021
-
May 2021
1
- May 6, 2021 Monster of a Game May 6, 2021
-
April 2021
2
- Apr 25, 2021 Mortal Kombat (2021 Movie) Apr 25, 2021
- Apr 3, 2021 Game Room Walkthrough April 2021 Apr 3, 2021
-
March 2021
1
- Mar 17, 2021 Happy St Pattys Day Mar 17, 2021
-
February 2021
3
- Feb 12, 2021 3D Printed Namco Reunion Dust Washer Feb 12, 2021
- Feb 10, 2021 BitKit Feb 10, 2021
- Feb 1, 2021 Joust Feb 1, 2021
-
January 2021
2
- Jan 26, 2021 3D Printing Monitor Adjustment Tools Jan 26, 2021
- Jan 18, 2021 3D Printing Connectors Jan 18, 2021
-
December 2020
3
- Dec 20, 2020 Christmas Vacation Dec 20, 2020
- Dec 4, 2020 Ready Player [n] Dec 4, 2020
- Dec 1, 2020 3D Printed Scared Stiff Slings (cont’d) Dec 1, 2020
-
November 2020
4
- Nov 30, 2020 Williams Indy Roto Lock Nov 30, 2020
- Nov 20, 2020 No Good Gofers Reconstruction Nov 20, 2020
- Nov 16, 2020 Mid-November Pinball Crossword Nov 16, 2020
- Nov 4, 2020 Scared Stiff Sling Reconstruction Nov 4, 2020
-
October 2020
2
- Oct 23, 2020 Upgrading our Retro Console Setup Oct 23, 2020
- Oct 12, 2020 Star Wars Squadrons is Awesome Oct 12, 2020
-
September 2020
3
- Sep 20, 2020 Sally Sep 20, 2020
- Sep 3, 2020 Going Virtual, The State of VR (dis)UNION Sep 3, 2020
- Sep 1, 2020 Blow On It Sep 1, 2020
-
August 2020
3
- Aug 29, 2020 More ICB Improvements Aug 29, 2020
- Aug 23, 2020 ICB Restarts (Conclusion) Aug 23, 2020
- Aug 19, 2020 Failed GC Attempts.. Aug 19, 2020
-
July 2020
1
- Jul 31, 2020 ICB EPROM Troubleshooting Shenanigans Jul 31, 2020
-
June 2020
1
- Jun 21, 2020 The Importance of Setup: Indy Adjustments Jun 21, 2020
-
May 2020
2
- May 20, 2020 Do the Flynn Thing May 20, 2020
- May 10, 2020 Monster Bash (again) May 10, 2020
-
April 2020
2
- Apr 30, 2020 Glass Corners (3D Print Stuff) Apr 30, 2020
- Apr 13, 2020 Hobby Tools Finding a New Use Apr 13, 2020
-
March 2020
2
- Mar 11, 2020 Pandemic Risk Mitigation & Pinball-Arcade Expos Mar 11, 2020
- Mar 3, 2020 RetroStone 2 Follow-Up (Video) Mar 3, 2020
-
February 2020
2
- Feb 29, 2020 The 8 Year Rule Feb 29, 2020
- Feb 27, 2020 Data is Beautiful, Video Game Sales Data is Sublime Feb 27, 2020
-
January 2020
3
- Jan 23, 2020 Call of Duty: Modern Warfare (2019 Release) Campaign Jan 23, 2020
- Jan 19, 2020 RetroStone 2 Jan 19, 2020
- Jan 11, 2020 Nintendo, The Over-achiever Jan 11, 2020
-
December 2019
1
- Dec 15, 2019 The Groovy Goat Dec 15, 2019
-
November 2019
3
- Nov 20, 2019 Ice Cold Beer Nov 20, 2019
- Nov 18, 2019 Fairhope Pins & Pints Nov 18, 2019
- Nov 2, 2019 Sillyness Nov 2, 2019
-
October 2019
1
- Oct 31, 2019 Introducing: This American Pinball Podcast Oct 31, 2019
-
September 2019
5
- Sep 15, 2019 Creepy Coincidences Sep 15, 2019
- Sep 13, 2019 Centipede’s G07 Sep 13, 2019
- Sep 11, 2019 A Look at the Books: Merch Sales this Summer Sep 11, 2019
- Sep 9, 2019 The Dreamcast Turns 20 Sep 9, 2019
- Sep 8, 2019 Mo’ Retro! Sep 8, 2019
-
August 2019
1
- Aug 19, 2019 Fire Marshall Bill Aug 19, 2019
-
July 2019
1
- Jul 16, 2019 SFGE 2019 or Bust! Jul 16, 2019
-
June 2019
4
- Jun 25, 2019 Southern Fried Gameroom Expo 2019 Show Info Jun 25, 2019
- Jun 22, 2019 A not particularly great game on a particularly great Pinball Jun 22, 2019
- Jun 12, 2019 Mad Galaga Skills on Display! Jun 12, 2019
- Jun 8, 2019 Playfield Protector, meet Indy. Indy, meet Playfield Protector Jun 8, 2019
-
May 2019
12
- May 31, 2019 Tempest! (A Photo Journey) May 31, 2019
- May 27, 2019 Mortal Kombat 11 (Now w/ PTSD!) May 27, 2019
- May 16, 2019 About Ice Cold Beer May 16, 2019
- May 15, 2019 About: Tales of the Arabian Nights May 15, 2019
- May 15, 2019 About: Medieval Madness May 15, 2019
- May 15, 2019 About: Attack from Mars May 15, 2019
- May 15, 2019 About: Indiana Jones May 15, 2019
- May 15, 2019 About: Star Trek: The Next Generation May 15, 2019
- May 15, 2019 About: Scared Stiff May 15, 2019
- May 15, 2019 About: Mario Kart Arcade GP & GP2 May 15, 2019
- May 15, 2019 About: Tapper May 15, 2019
- May 15, 2019 About: Monster Bash May 15, 2019
-
April 2019
5
- Apr 26, 2019 10 Minute Review: Attack from Mars Apr 26, 2019
- Apr 18, 2019 Review Shenanigans Apr 18, 2019
- Apr 14, 2019 A Good Blend of Old and New Apr 14, 2019
- Apr 12, 2019 Star Wars Episode 9, Rise of Skywalker Teaser Apr 12, 2019
- Apr 8, 2019 Upcoming Events.. Apr 8, 2019
-
March 2019
4
- Mar 26, 2019 Pinball at Game Over Retro Pub Mar 26, 2019
- Mar 20, 2019 Stranger Things Season 3 Trailer Mar 20, 2019
- Mar 18, 2019 Donkey Kong: The Re-Kongening Mar 18, 2019
- Mar 15, 2019 Ms Pac-Man Progress Mar 15, 2019
-
February 2019
3
- Feb 20, 2019 Namco 20yr Reunion Feb 20, 2019
- Feb 15, 2019 Wreck it Ralph 2, The Re-Wreckining.. Feb 15, 2019
- Feb 2, 2019 Micro Machines.. well... kinda. Feb 2, 2019
-
January 2019
7
- Jan 31, 2019 RetroAdvance, Update Jan 31, 2019
- Jan 25, 2019 Atari Star Wars Finds a New Home Jan 25, 2019
- Jan 25, 2019 RetroAdvance, First Impressions Jan 25, 2019
- Jan 20, 2019 RoadBlasters Hits the Road Jan 20, 2019
- Jan 18, 2019 Done, and.... done. Jan 18, 2019
- Jan 9, 2019 Munsters @ CES Jan 9, 2019
- Jan 3, 2019 "We have too much stuff!" Jan 3, 2019
-
December 2018
3
- Dec 30, 2018 Bandersnatch Dec 30, 2018
- Dec 24, 2018 Merry Christmas! Dec 24, 2018
- Dec 21, 2018 Seven Days in Sin City Dec 21, 2018
-
September 2018
2
- Sep 12, 2018 Fall 2018 Game List Sep 12, 2018
- Sep 5, 2018 Labor Day Pinball Maintenance Sep 5, 2018
-
August 2018
2
- Aug 20, 2018 Getting Medieval Aug 20, 2018
- Aug 10, 2018 Scared Stiff Progress Aug 10, 2018
-
July 2018
4
- Jul 23, 2018 Wake me up when you're done Jul 23, 2018
- Jul 16, 2018 Scared Stiff Jul 16, 2018
- Jul 13, 2018 God of War, A Dad's Review Jul 13, 2018
- Jul 1, 2018 My Dome / Environmental Game Pod - 4 years later Jul 1, 2018
-
June 2018
4
- Jun 21, 2018 T-Rex Gamer Jun 21, 2018
- Jun 20, 2018 The Death of Tubby Jun 20, 2018
- Jun 17, 2018 SFGE 2018 Jun 17, 2018
- Jun 7, 2018 Data East Star Wars at SFGE 2018 Jun 7, 2018
-
May 2018
1
- May 19, 2018 25 Year Old Pinball or Boxed Wine May 19, 2018
-
April 2018
1
- Apr 2, 2018 Robotron in the House Apr 2, 2018
-
March 2018
1
- Mar 29, 2018 Ready Player One Mar 29, 2018
-
February 2018
2
- Feb 28, 2018 Smart Plugs - a Year Later Feb 28, 2018
- Feb 20, 2018 Gameroom Changes, Concluded (Early 2018) Feb 20, 2018
-
January 2018
3
- Jan 15, 2018 Out with the New, in with the Old Jan 15, 2018
- Jan 5, 2018 (Sold): Revenge from Mars Jan 5, 2018
- Jan 3, 2018 Vegas Arcade-y Goodness and Amazon (AWS) Re:Invent Jan 3, 2018
-
December 2017
1
- Dec 25, 2017 Merry Christmas! Dec 25, 2017
-
November 2017
1
- Nov 2, 2017 Halloween 2017 Nov 2, 2017
-
August 2017
1
- Aug 15, 2017 Attack from Mars Aug 15, 2017
-
June 2017
2
- Jun 17, 2017 Mid-Year Game Room Progress Jun 17, 2017
- Jun 14, 2017 Southern Fried Shenanigans Jun 14, 2017
-
May 2017
1
- May 4, 2017 Star Wars Day May 4, 2017
-
April 2017
1
- Apr 9, 2017 Red Tent Goodness Apr 9, 2017
-
January 2017
2
- Jan 30, 2017 RIP Masaya Nakamura Jan 30, 2017
- Jan 1, 2017 A New Year! - A glance back and looking forward Jan 1, 2017
-
December 2016
1
- Dec 26, 2016 Game Room Voice Control w/ Amazon Echo Dec 26, 2016
-
November 2016
1
- Nov 6, 2016 Halloween Party 2016 Nov 6, 2016
-
October 2016
1
- Oct 30, 2016 Star Wars Oct 30, 2016
-
September 2016
1
- Sep 17, 2016 Arcade Move Sep 17, 2016
-
August 2016
1
- Aug 15, 2016 The Ghostbusters Effect Aug 15, 2016
-
July 2016
2
- Jul 30, 2016 July Arcade / Pinball Open House Jul 30, 2016
- Jul 3, 2016 Southern Fried Gameroom Expo 2016 Jul 3, 2016
-
June 2016
1
- Jun 25, 2016 Buying (and selling..) Pinball Machines Jun 25, 2016
-
April 2016
1
- Apr 15, 2016 A Busy Spring in Pinball Apr 15, 2016
-
February 2016
1
- Feb 23, 2016 Looking for Contributors Feb 23, 2016
-
January 2016
2
- Jan 10, 2016 Saying Goodbye to Tron! Jan 10, 2016
- Jan 1, 2016 December was Awesome - Happy New Year! Jan 1, 2016
-
November 2015
2
- Nov 28, 2015 Bills Arcade, Walkthrough 2015 (in 4k!) Nov 28, 2015
- Nov 2, 2015 Pirates! Nov 2, 2015
-
October 2015
3
- Oct 29, 2015 Halo 5 Oct 29, 2015
- Oct 24, 2015 Halloween Block Party 2015 Oct 24, 2015
- Oct 1, 2015 Dome Gaming Build Oct 1, 2015
-
August 2015
1
- Aug 3, 2015 Gulf Coast Pinball / Arcade Enthusiasts Aug 3, 2015
-
June 2015
1
- Jun 15, 2015 Some Arcade Playtime Jun 15, 2015
-
May 2015
2
- May 26, 2015 ...over the weekend.. an Epic Indy Match May 26, 2015
- May 13, 2015 Donkey Mother F#?@*&% Kong May 13, 2015
-
April 2015
1
- Apr 6, 2015 Busy Couple Weeks of Arcade Goodness Apr 6, 2015
-
March 2015
1
- Mar 8, 2015 A Look at Star Wars by Data East Mar 8, 2015
-
December 2014
1
- Dec 4, 2014 Free Play Florida Dec 4, 2014
-
July 2014
1
- Jul 14, 2014 Bill v Tron Pinball Jul 14, 2014
-
June 2014
1
- Jun 17, 2014 Star Wars Trilogy Pinball (Owner / Overview and Repair Tale) Jun 17, 2014
-
May 2014
1
- May 25, 2014 Arcade Collecting: About 3 Years In May 25, 2014
-
February 2014
1
- Feb 17, 2014 Star Wars Trilogy Pinball Resurrection Feb 17, 2014
-
November 2013
1
- Nov 15, 2013 Mario Kart GP Arcade Owner Review Nov 15, 2013
-
June 2013
1
- Jun 12, 2013 About Arcades (and Console Video Gaming) Jun 12, 2013