Printing big things
Some of my favorite 3D prints are somewhat large items. You can print giant things with normal size printers, there are some great builds out there of everything from full-size Darth Vader’s to life-size museum-quality Dinosaur skeletons.
The Bambu X1C has a 256mm x 256mm x 256mm build volume. You can do a lot in that amount of space, especially if you are dedicated to the project. My own desktop Bambu X1C has over 6000 hours of print time, everything from small fidget toys to Cosplay pieces and prop weapons.
Smaller build surface equates to more seams, more post-processing. Sometimes you just want to one-shot print a Mando helmet for a friend and not worry about seaming and sanding. This need has fed the recent trend towards accessible filament printers with larger build plates.
In this post I’m going to share my experience with two popular XL filament printers. I have some strong opinions, so it is probably best that I’m not sponsored in any way by these companies.
Printing Complex Things
In addition to larger build volume, the recent wave of printers introduce or expand on multi-material printing capabilities.
As an engineering problem there are a few ways to achieve multi-material printing.
The Bambu AMS allows users to load 4 different materials per AMS unit and has the ability to chain multiple AMS units through a series of material hubs. Lets say you wanted to print Odie from Garfield. He has a yellow body, brown ears, white eyes, black eyeballs, nose and tail. You could load yellow, white, black and brown filaments into the AMS, assign those filaments to parts of the model and print a nice-looking multi-color Odie.
3d printers assemble objects by laying down melted material layer-by-layer. The way the Bambu AMS acts like a material multiplexer. As each color change is detected in each layer, the printer retracts the current color out of the hotend by winding the spool. It then loads the next color into the hot end and purges a small amount of material into a poop chute before resuming the print.
This is really handy but it has some limitations. The most obvious is that it wastes alot of filament and time through this highly repetitive purge process. A least obvious drawback but just as important is: the thermal state of the hotend. Different materials have different extrusion temperatures and binding characteristics. Generally, the printer will heat-soak the hotend and allow the temperature to fluctuate +/- 10 degrees based on the selected material properties as encoded in the g-code file. But, when you have two materials that work well together but have wildly different print-temperatures the printer is often unable to feasibly meet the hot/cold state necessary to support both materials. One popular example is dissolvable supports. Another example is making parts that include both rigid and flexible materials.
These multi-material printing characteristics account for some design differences in the most popular printers.
The PrusaXL 5 Tool


Coming into this hobby I understood Prusa to be a darling of the maker community. Based in the Czech Republic, Prusa is known for modular design, reasonably transparent and open ecosystem and steady pace of innovation.
When the Prusa XL was announced, I was immediately interested. A generous build volume of 360mm x 360mm x 360mm is complimented by a build plate that supports heated zones and the ingenious concept of a tool changer.
Printing a Benchy in the top left of the plate, only the top left portion of the plate will be heated.
The tool changer supports up to 5 different materials running distinct hot-end characteristics per hot-end.
Instead of multiplexing the material when the printer encounters a color change, it simply parks the current tool head, picks the appropriate tool by color assignment and continues printing. The only waste generated would go to a flush-tower and that is optional.
This has a ton of potential in time-saving over a model with many material swaps. Especially as (eventually) the firmware develops and if Prusa can prep-warm the temperatures of the various tools before they are called by the carrier / gantry.
Potential isn’t always realized.
Read the Fine Print

My PrusaXL order was held for a few extra days at a local Fedex terminal but Fedex agents couldn’t explain why. Eventually, they delivered it.
About a week later I started getting emails about CBP forms that needed to be filled out and an invoice for $157 in Duties. Most of those communications seem to imply they would hold my shipment until these were paid even though the printer had already been delivery. There are so many scam / phishing attempts around parcel handling that at first I was suspicious of those communications. On deeper inspection, they are customs paperwork and duty obligations for Prusa buyers shipping into the US. I understand those duties have increased since so-called Liberation Day. :eyeroll:
PRUSA XL: Assembly and Setup
The assembly / setup time even for the assembled Prusa XL 5 Tool, was about 1/2 of a bottle of Jameson or 3ish hours. Less, probably, if you don’t have to stop working on it every 5 minutes to make some minute decision about dinner three days from now or which pair of Terry Cotton socks from Temu are likely to match a school uniform.
The assembly guides for both the unassembled and assembled versions are on Prusa’s site. I suggest you check them out before ordering to determine your own “assembled for $more or unassembled for $less” calculus and tolerance. At a glance, the unassembled version looks like it would take the better part of a quiet Saturday.
The wiki-based assembly guides are well done and include comments from other Prusa customers that are validating.
Things like: “Why am I having to install the super delicate wifi module and antenna on my assembled printer?” or “I found this other approach easier for this step.”
Mostly, assembly involves installing the Nextruders, which is all quite easy and well designed. Setup involves a number of calibration steps that require user intervention like “screw in this thing, un screw this thing, re screw this thing back in”. Nothing difficult but you are essentially trapped by your new toy while it calibrates.
PRUSA XL: Fit and Finish
Companies like Prusa are addicted to the narrative of a printer company that makes printers that are used to make more printers. I get that. It is cute in a recursive way that my programmer brain appreciates. My first nit to pick relates to this decision.


If you must use 3d printed parts in one of your flagship products, could you at least not use the shittiest print settings imaginable for those parts?

My first experience unboxing the PrusaXL was honestly:
Whiskey Tango Foxtrot
This leaves a really meh first impression.
Add some top layers, reduce the layer height? C’mon guys.
Channel your inner Steve Jobs, just for a minute. This was your flagship printer!
Prusa XL: Layer Shifts
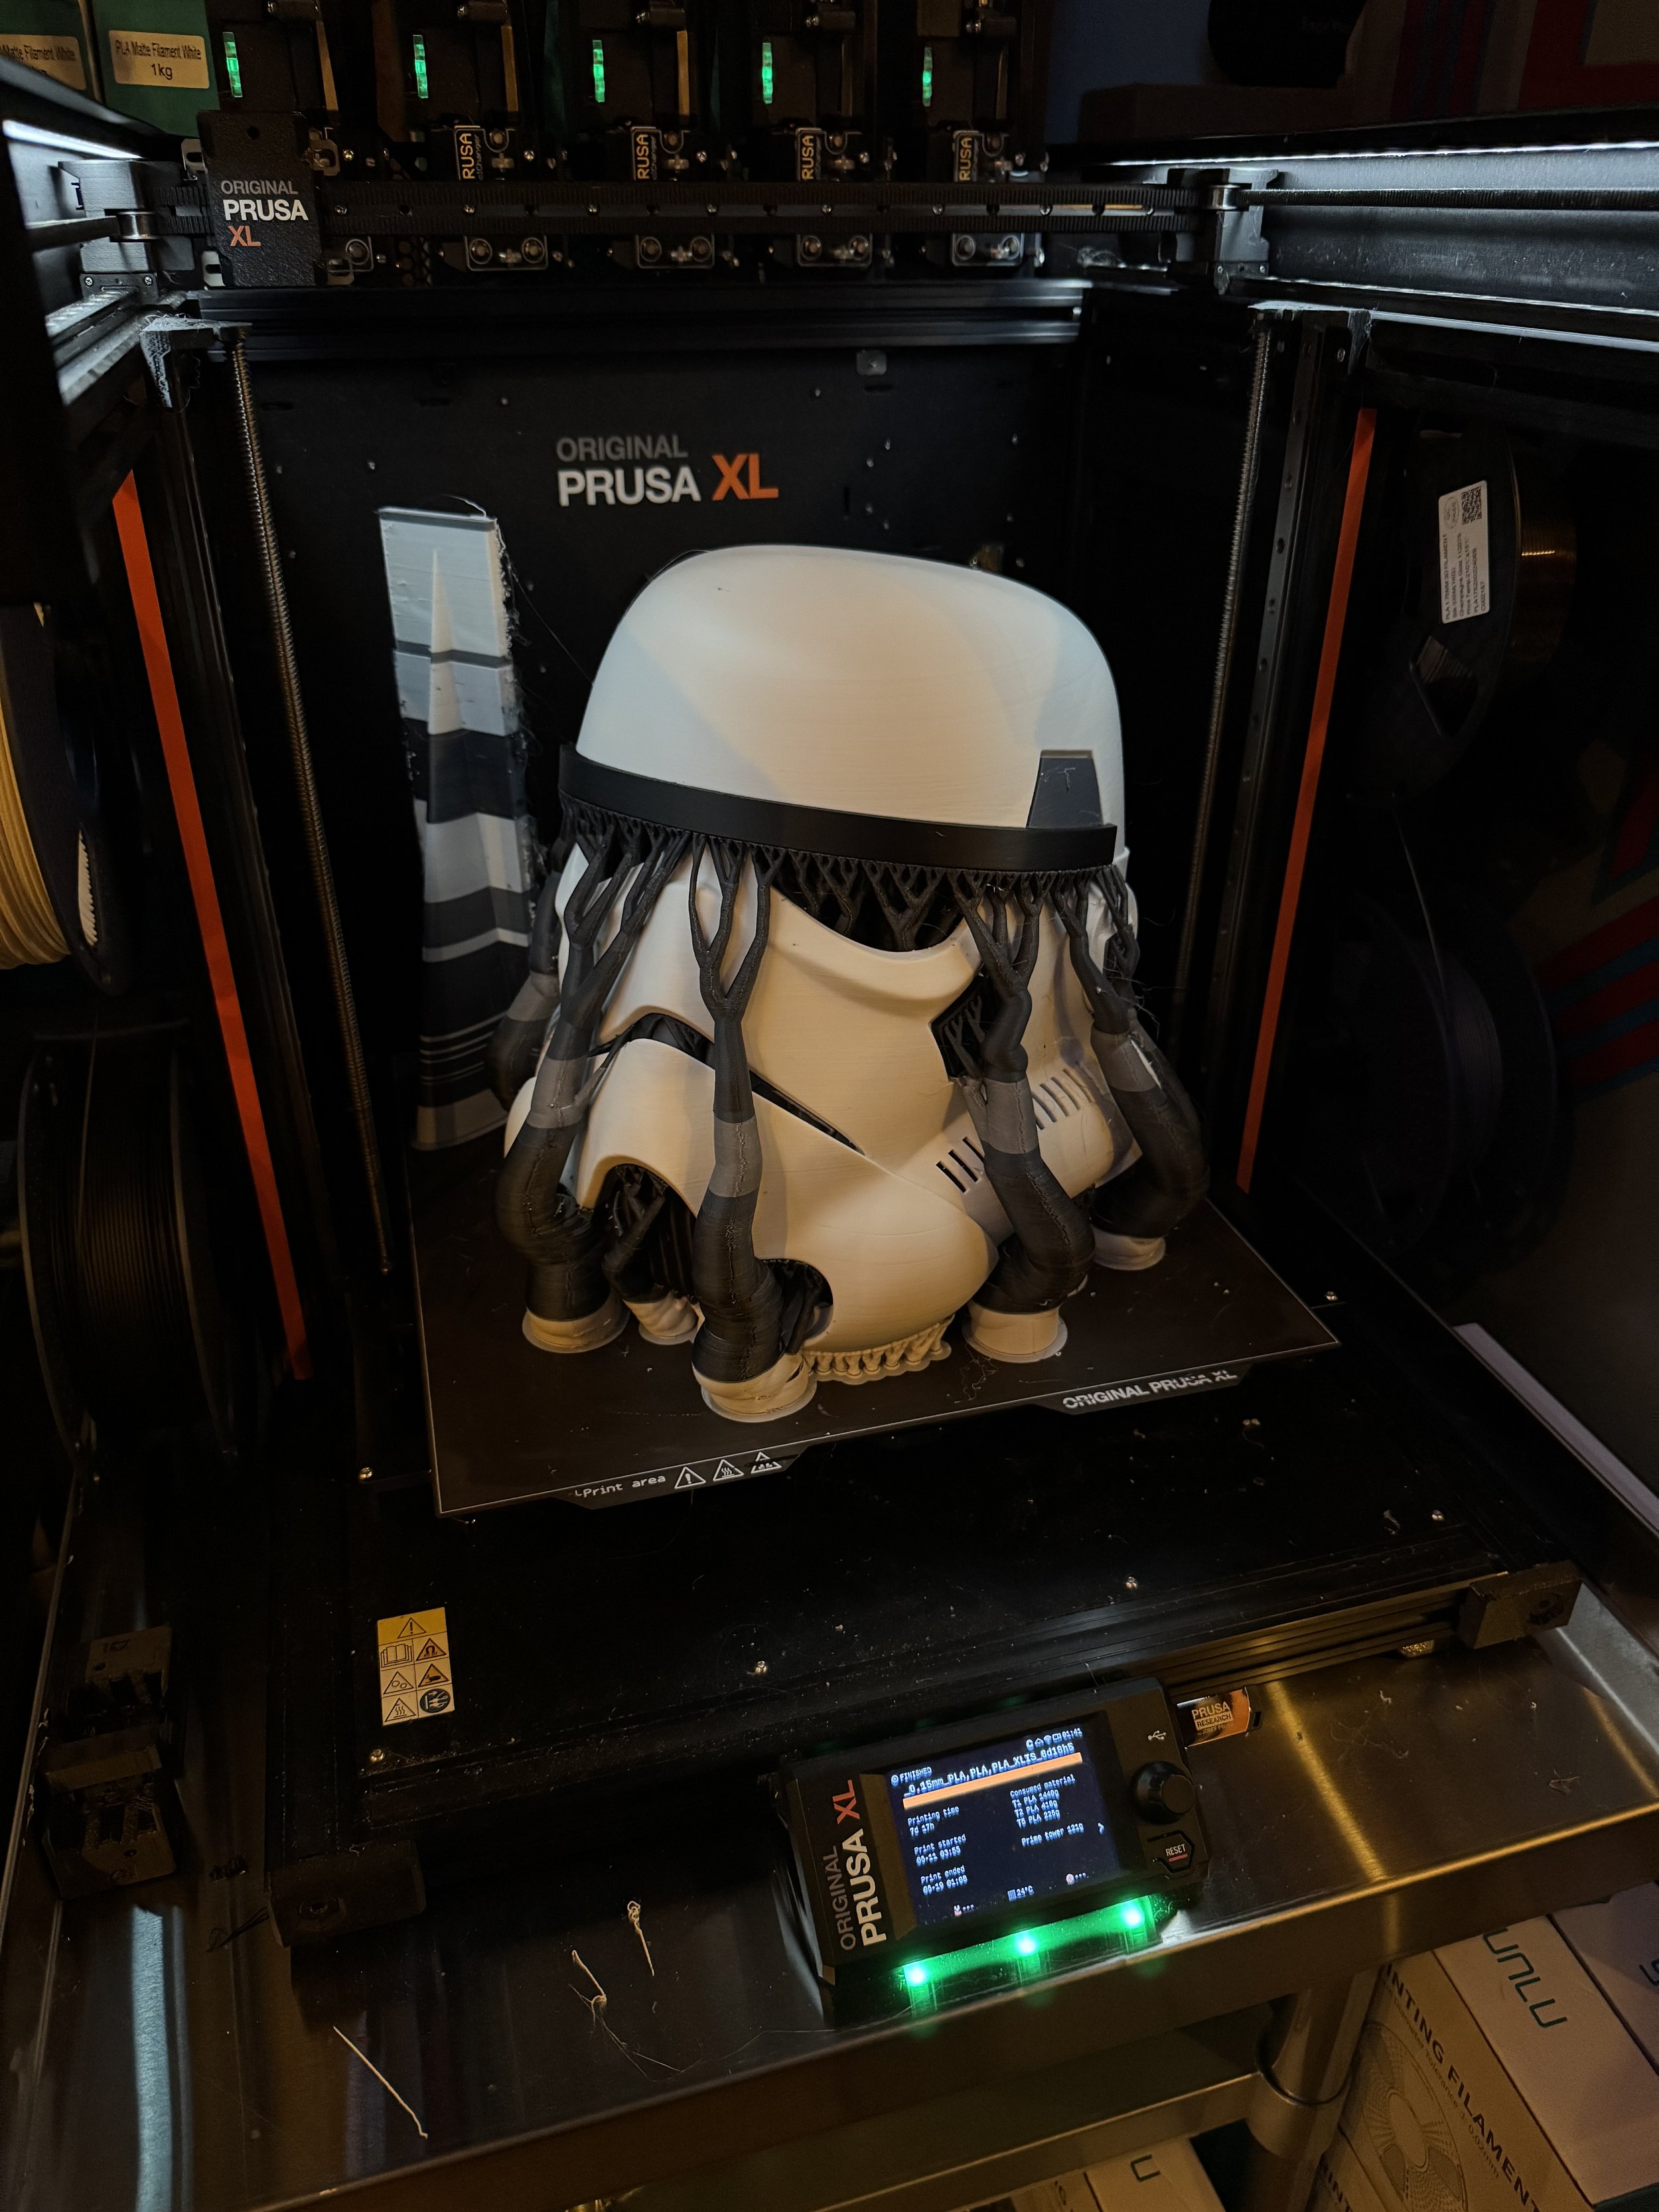
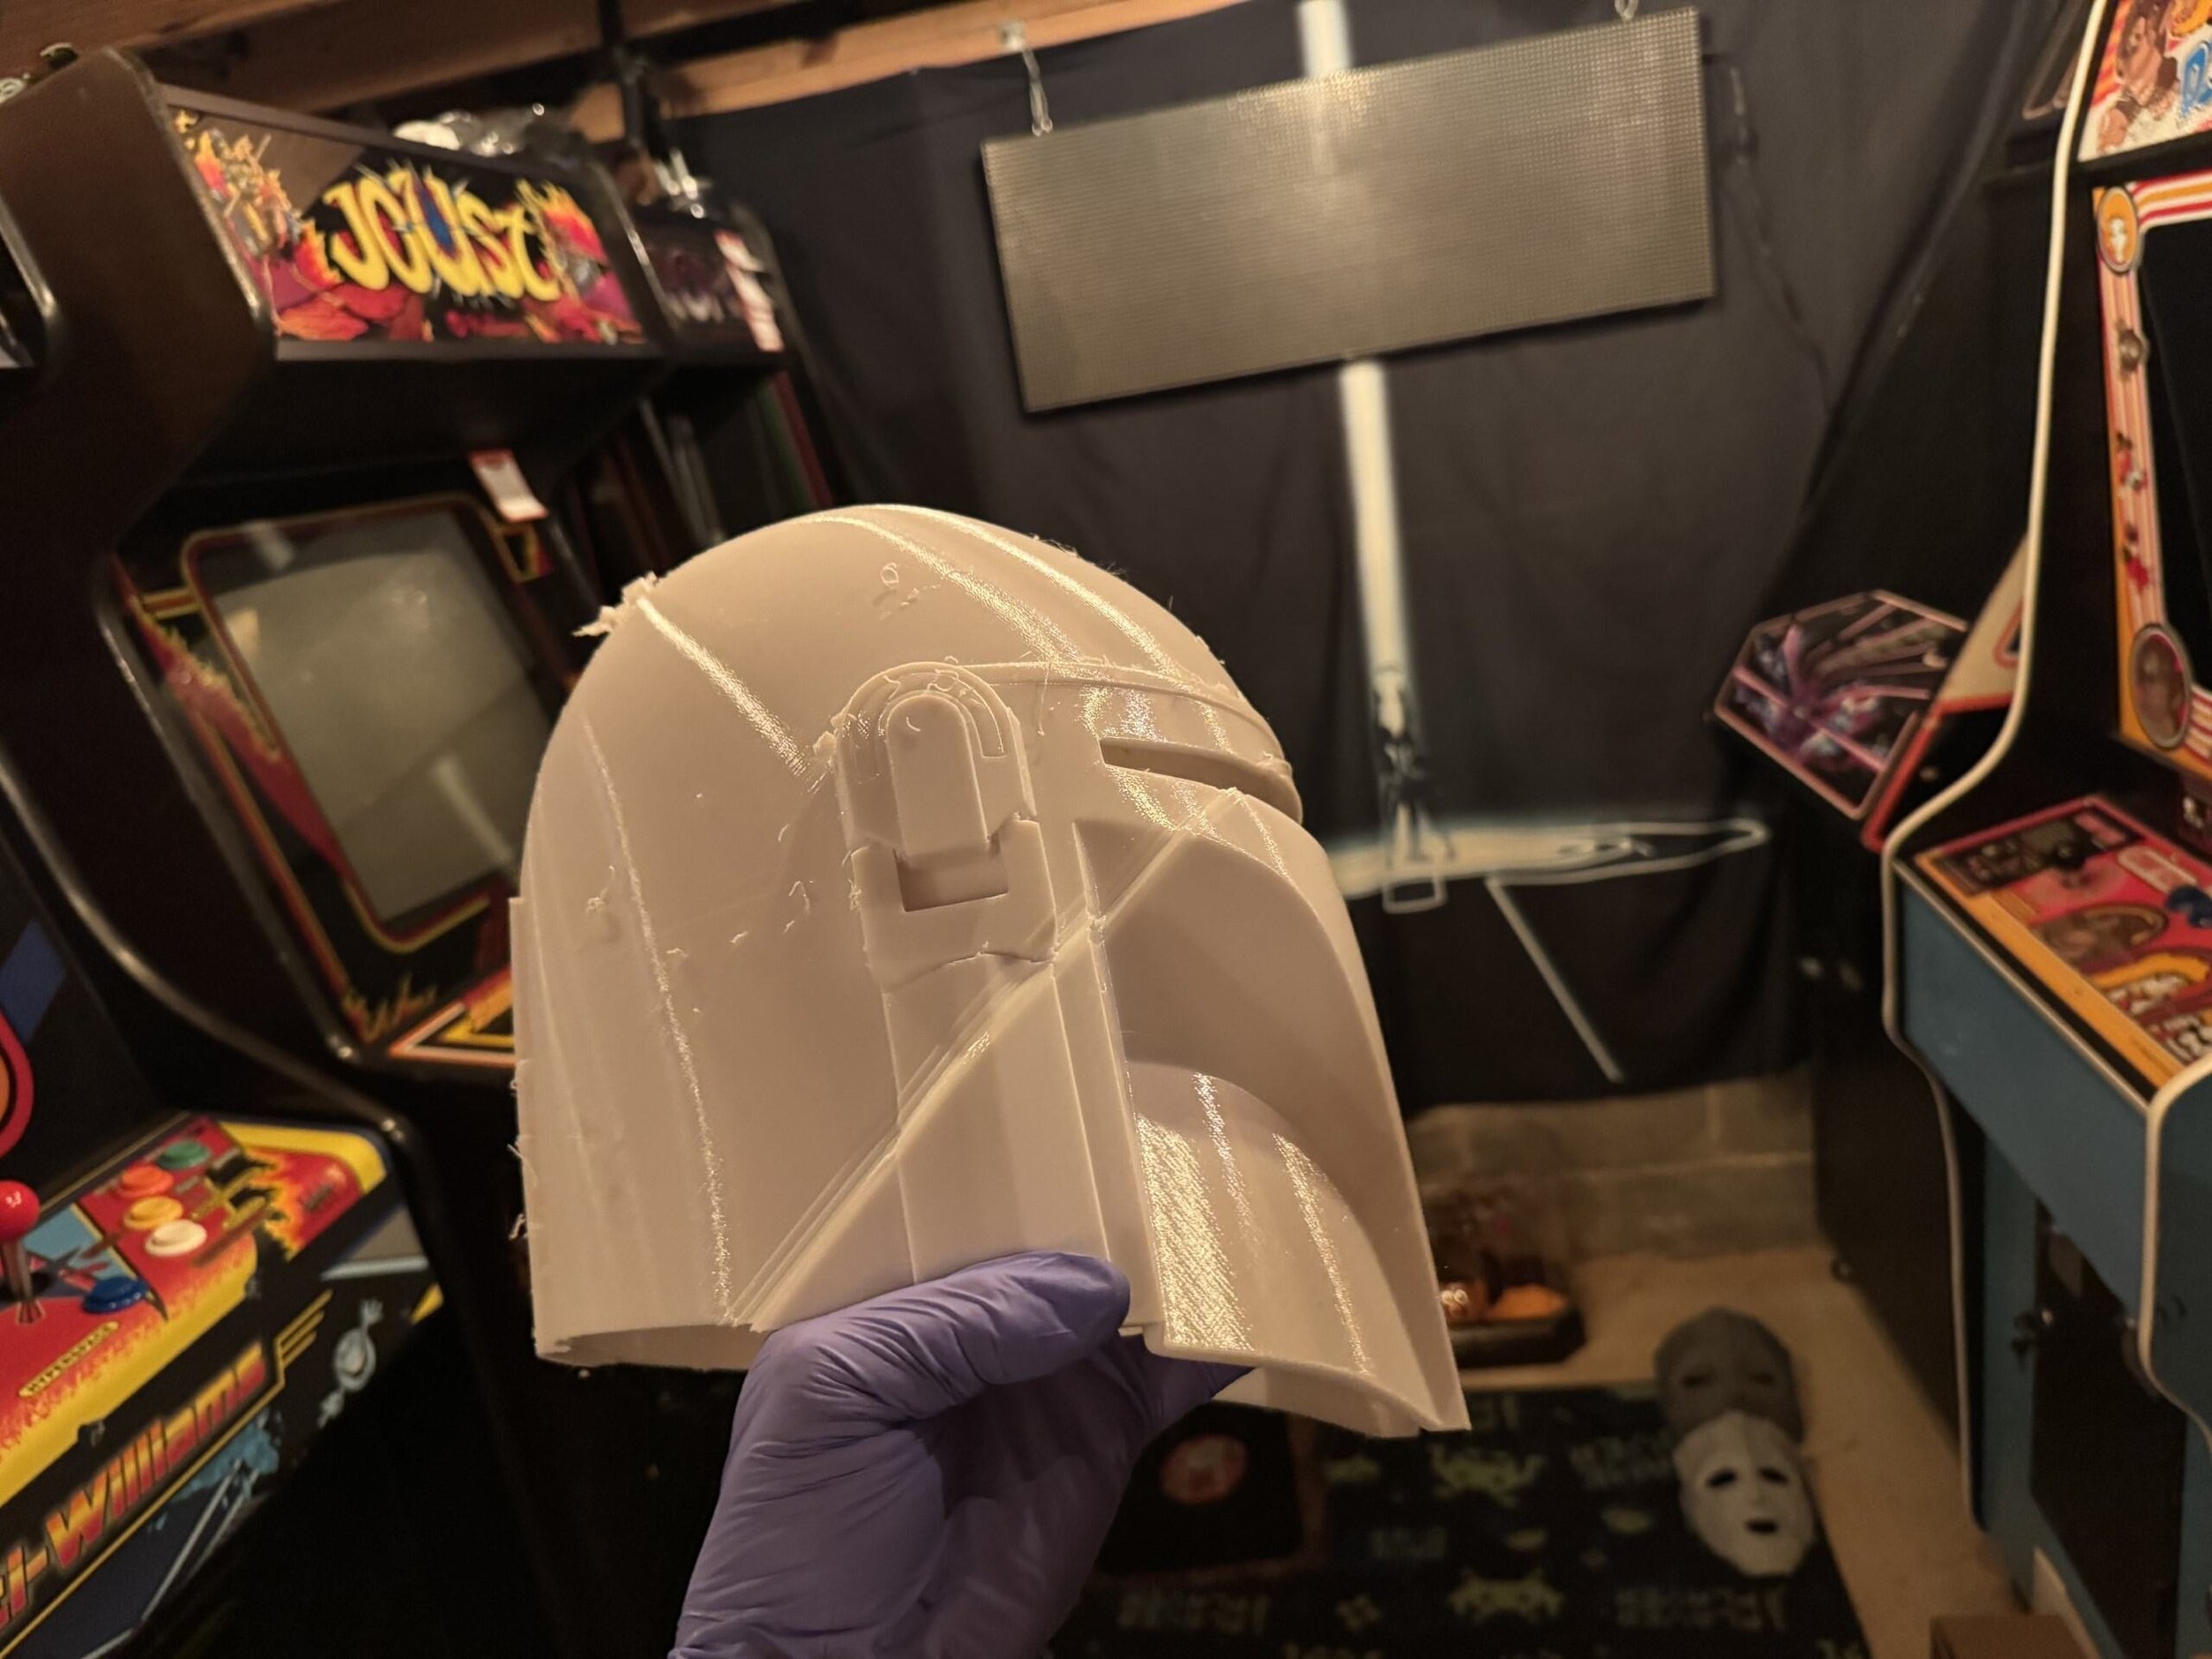
One of the first models I attempted to print was a Mando helmet. Instead of Mando helmets, the Prusa XL made a bunch of silk black bowls with massive layer shifts.
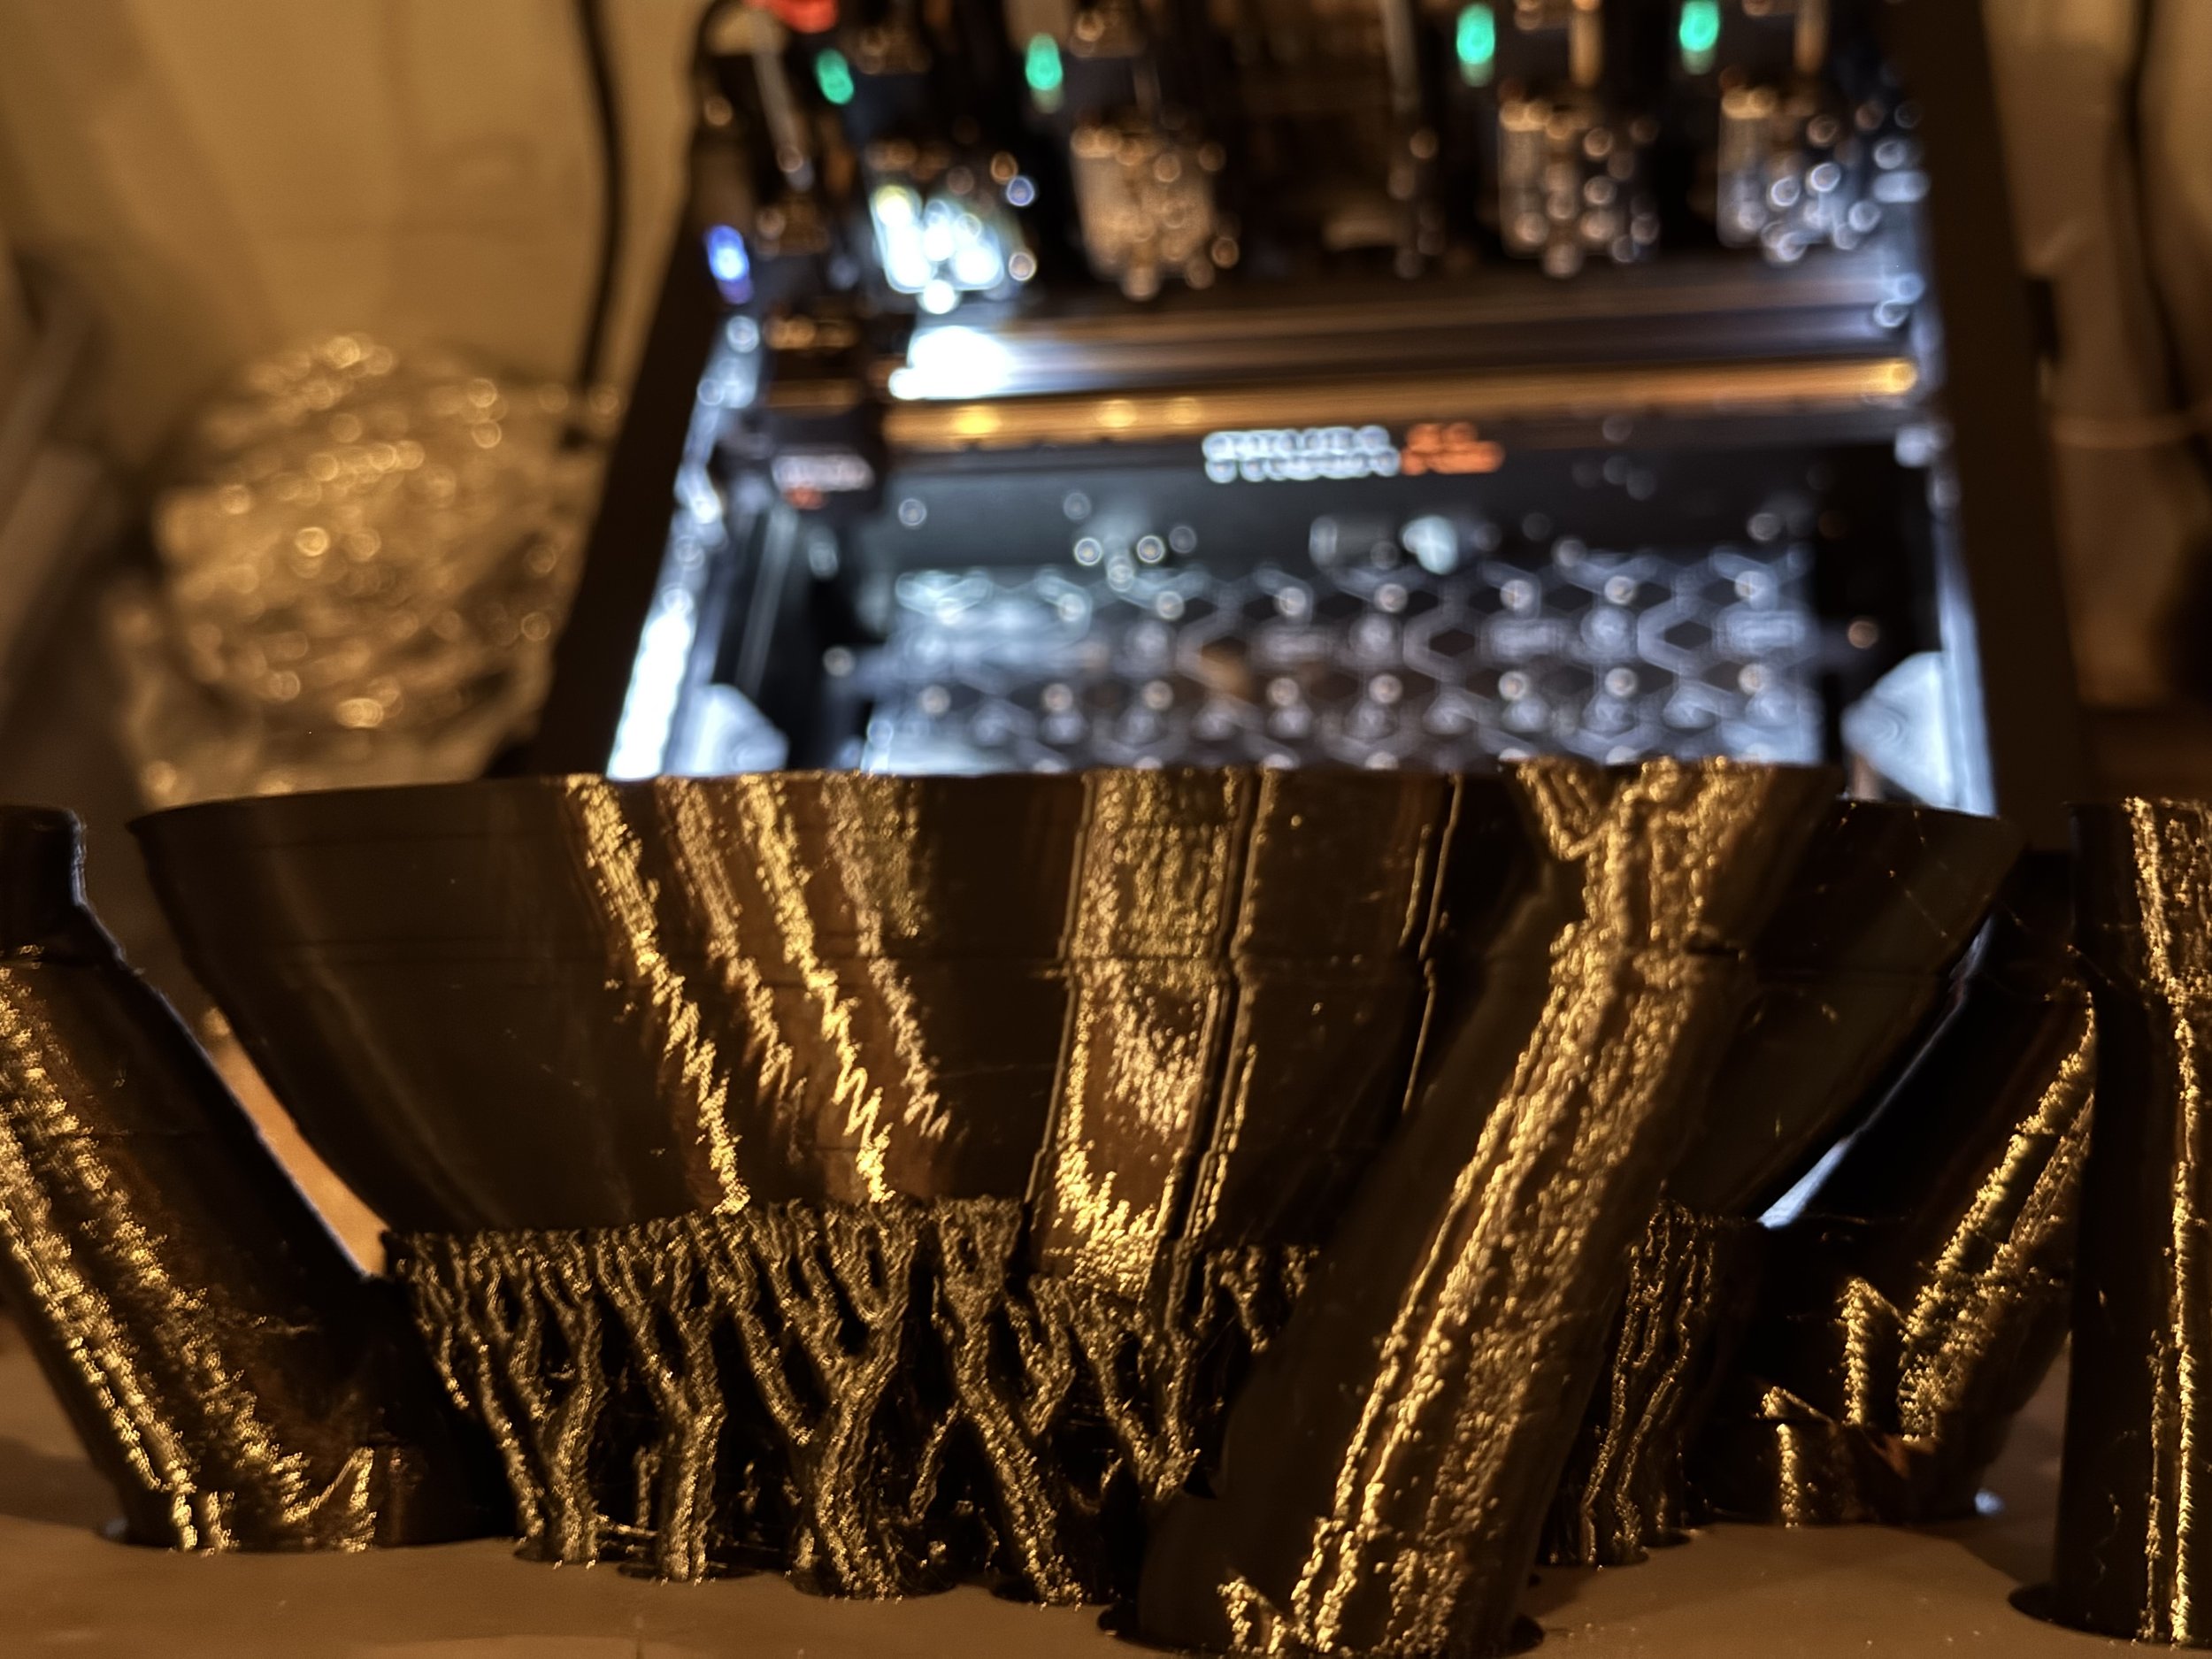

I had five consecutive failures in the attempt to make a Mando helmet with the PrusaXL. Two of these attempts included the print head being slung off of the carriage assembly resulting in an unrecoverable error. Not unrecoverable for any particular mechanical reason. Unrecoverable because of shitty firmware with many dead end errors.
Apparently the input shaper printing profile included default non-print travel acceleration of 5000 mm/s. The belts were perfectly set but this speed in certain circumstances was causing the carriage’s momentum to hop across multiple belt grooves or the aforementioned yeeting of the tool from the carriage.
My opinion is that Prusa tried to push the print speeds in order to goose their performance in head to head comparisons with competitor machines. This marketing ambition creating real problems for customer results isn’t the sort of thing that I expect from an eingeering-forward company like this.
Success

With this problem out of the way, I went on to successfully print a scaled down Sauron helmet. At 60% gyroid infill, this was a 4 day print. It turned out pretty nice. Four days seems excessive for a single color print of this size, though.
Print Quality

In terms of print quality, I’ve had mixed results with the PrusaXL. For most things, if I print the same model with the same filament and comparable settings on my Bambu X1C - the X1C yields a cleaner print. Less noticeable layer lines, cleaner support removal. The X1C just makes nicer prints.
One of my primary goals for the PrusaXL was to use PETG prints with PLA support interfaces or vice-versa. This almost never works. They have a 20 page article about it on their support wiki. I’ve read it many times. I haven’t found a set of settings that really work for this purpose.
Speaking of PETG. The same PETG that I use on my X1C in the exact same environment is always much more stringy on the PrusaXL. I can usually tweak the nozzle temp to get the stringiness mitigated but it this is a noticeable characteristic of this printer’s nozzle and PETG. Plenty of Prusa XL users on facebook groups and reddit pages have the same issues with PETG. The fanboys will all point out that, “You gotta dry your filament first.”
To that straw man I say: “Look, I don’t have to give the same PETG a spa day before the X1C can use it. I expected at minimum the same out of this much more expensive printer. Fix your damned material profiles and nozzle.” Though, I suppose if you want your PrusaXL to look like it has a penis foreskin, you can buy the $650 enclosure.
Reliability
Prusa’s are known for being workhorses. Surely this printer is at least reliable?
Not really. The PrusaXL doesn’t come pre-loaded with cameras like other printers, though you can add them. This means that spaghetti detection capabilities of other printers are not available without 3rd party cameras.
The following print was part of the Noodle Nexus AMS stacker. I printed each part twice (for a friend). This was a reprint so the same settings that yielded a perfectly serviceable part now resulted in a catastropic failure of the same hot end. The printer pulled around the melted plastic and it built up around the heater block end, partially severing the thermistor wire but this time, when I’d like the printer to detect a failure and stop - it just kept on dragging this blob around the build surface.

I wanted this.
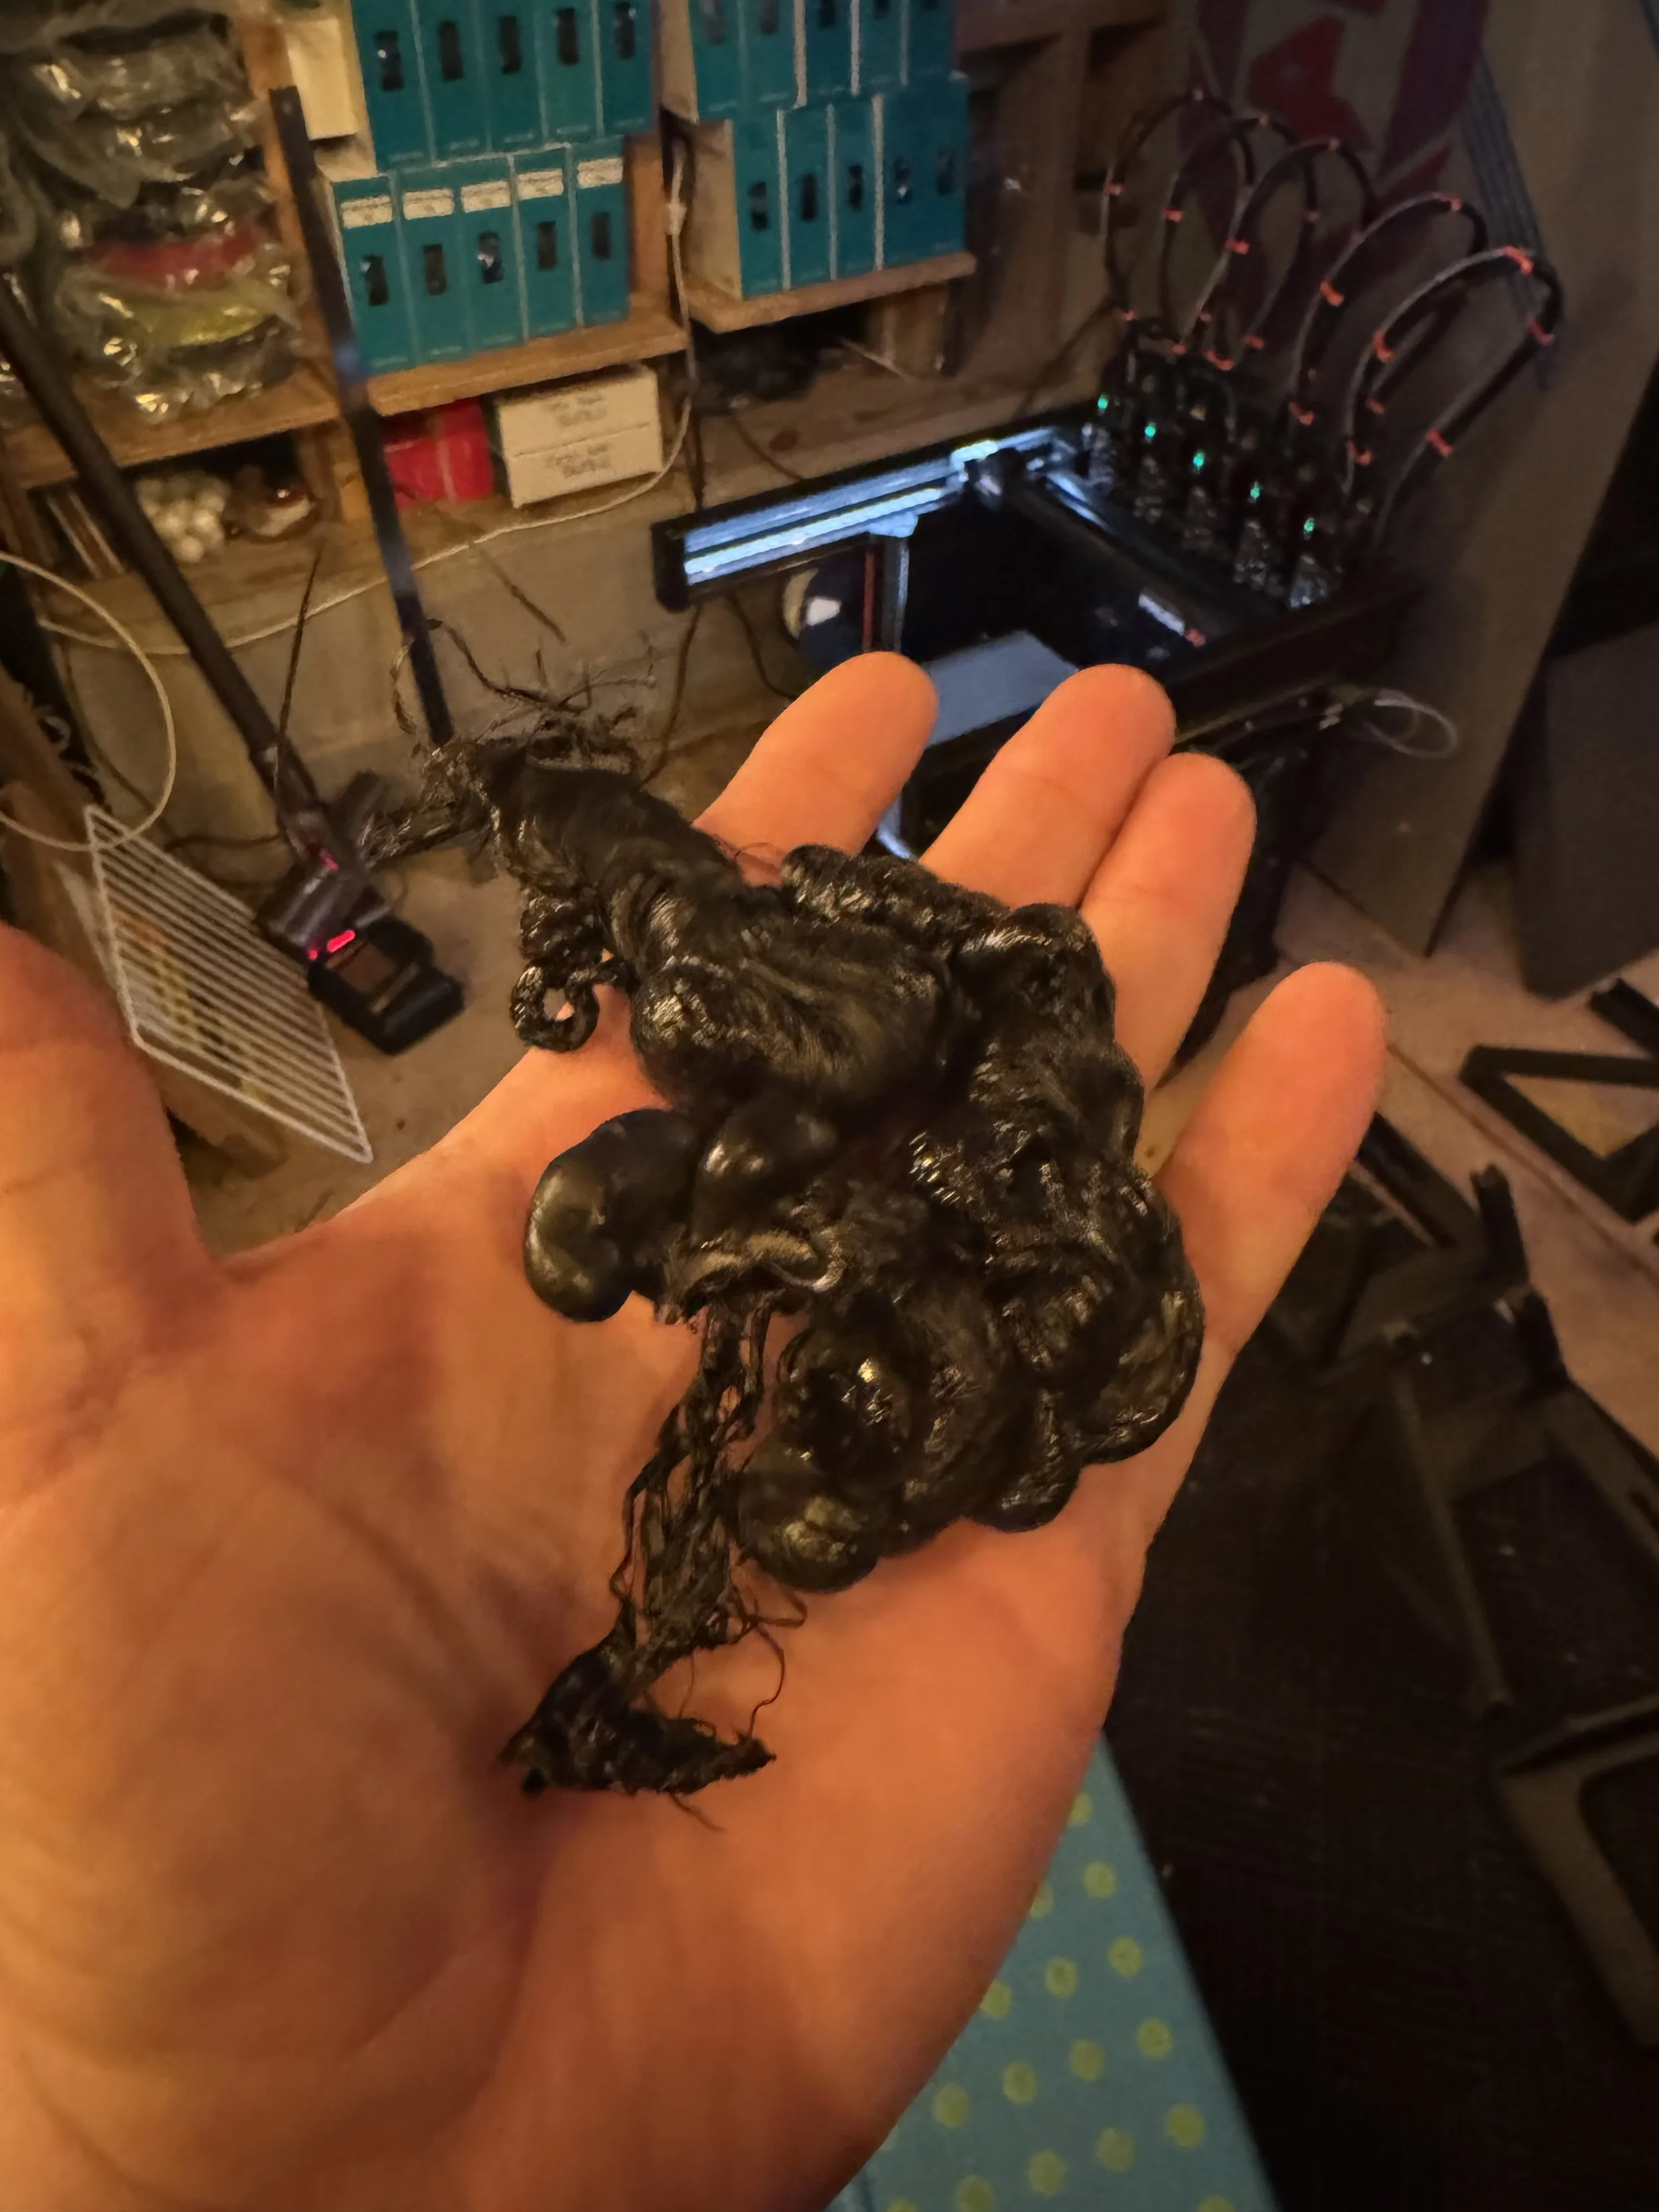
I got this.

The (initial) repair cost for this little misadventure was north of $200USD.
I like having spares, so while ordering I scoured the site to see if I could just buy a complete spare / fully assembled tool. They come in little neat packages with the printer, after all. I did not see a way on Prusa’s site to just order a completed XL Hotend Tool that is assembled. You have to work out and buy the parts individually. I see others have asked the same question and not received any guidance. They have a $350 spare parts bundle that was out of stock.
I’m glad that I paid for Int’l Priority Shipping. 6 days later, this order wasn’t even in the US, yet.
Oh, FFS


Great. Another $70 shipped and week delay.

While I wait on those parts, at least I have four perfectly good mounted print heads to use, right? RIGHT?
Sort of.
With 1 tool offline, I can’t print anything to this printer over the network.
With Tool #3 removed from the printer.. despite the gCode not using that tool, PrusaConnect’s derpy matchy-matchy logic for qualifying this printer to show up in available resources is busted.
I get the privilege of sneaker-netting the pen-drive into the basement whenever I want to make a print. Party like its 1995.

I broke one of the rules of Murphy’s Law by not breaking down the assembly in order to check the level of the above print failure more closely before ordering the parts above.
As the filament glob climbed the heater block, it snagged and pulled the connector sideways on the Dwarf board, shearing one of the pins from the PCB itself.
I thought to myself..
“Self (that’s what I usually call me), This PCB is completely repairable, this is just a sheared off pin.”
So, I opened this support chat with Prusa to see about ordering the pins. No path for repair. Can’t sell you the pins.

Admittedly, these pins will be available at any electronics component shop and I probably have something close enough in my arcade-pinball repair stuff. With easy access to desoldering tools, a hot air rework station - this is a super simple fix. But, I thought the very least I could do is offer to buy it directly from them so they could save me the research of hunting down the exact pin for this connector type.
NOPE.
I’m so glad that I watched all of these Youtube factory tour fluff pieces about Prusa making their own boards in house and the benefits of that vertical integration to their customers.
Random Errors == Sundry Frustrations

Another one from the duh files.
Loading and unloading filament should be easy. This is a chief interaction between the customer and your product. So, for a filament runout sensor you have a PTFE tube mated on each end to the sensor block with very cheap collars. There is a travel gap inside the sensor block. 3d Printing filament is delivered from a spool and has some amount of shape-and-bend memory.
As the spool finishes (usually the tightest-curl of the filament wire) and the wire runs past the sensor, it triggers a filament unload cycle from the Nextruder. This filament unload pushes the curliest part of the filament in reverse through that sensor gap and the curl of the filament catches internally and the filament remanent doesn’t fully unload and/or creates strain at the cheap-ass collar and pops the PTFE out of the sensor block. This happens in -almost- every filament unload/reload cycle. I guess if the filament came in a tense straight line like the filament production rig, it wouldn’t be a common problem. This is just a bad design.
The 3d print community saves the day with this mod:
https://www.printables.com/model/699934-xl-filament-sensor-blocks-3x-and-6x-with-pc4-m10-p

This $4200 machine sure does blue screen alot.
Firmware != [Solutions for Mechanical Connectivity]


https://www.printables.com/model/1124941-secure-xl-nextruder-cable-connector-solution - 3d printable fix for this mechanical connection issue.
Yet another dead-end error that can occur at random intervals that puts this printer in a state from which it cannot resume printing.
I received this “Extruder Motor not spinning on Tool [n]” error several times, each case it was late within a print cycle, wasting filament and time. This particular error tends to happen more frequently on Tools 1 or 5 - because of the angles of travel involved with the cable management loom. The QR code here will take you to a support wiki that includes a fraternity of other frustrated commenters with exactly the same problem and the head-dizzying implication that this problem has since been solved in firmware.
The real problem stems from the dwarf-board connector coming partially disconnected at certain angles, shutting down the extruder stack for that given Tool.
The notions of tweaking the firmware to “adjust the tolerances” is completely bullshit. If Prusa wants to solve this with Firmware, I have a Galaxy Brain idea:
Allow an escape hatch out of this error so that the error can be cleared and printing can resume. Perhaps by.. dunno just riffing here.. reassigning the active tool to one of the other 4, mid-print.
Prusa3D: Final Thoughts
I know, I know: these are spicier takes than my usual faire. The first six months with the PrusaXL has been frustrating in a way that resonates with some of my particular pet peeves.
I joined a few subreddits and Facebook groups for PrusaXL owners and observe the usual internet-standard ratio of frustrated owners and snarky shills. I’m sure there are plenty of PrusaXL’s cranking out quality prints for makers but there appear to be just as many people grappling with avoidable issues like these. Given the potential of this printing platform, that is a real shame.
Over six months of intermittent use, some frustration and many tweaks, I feel like I’m just finally starting to get workable prints from my PrusaXL. The rational move would be to cut my losses and sell it. I’m not quite there, yet.
Would I recommend a PrusaXL?
Not based in my experience.
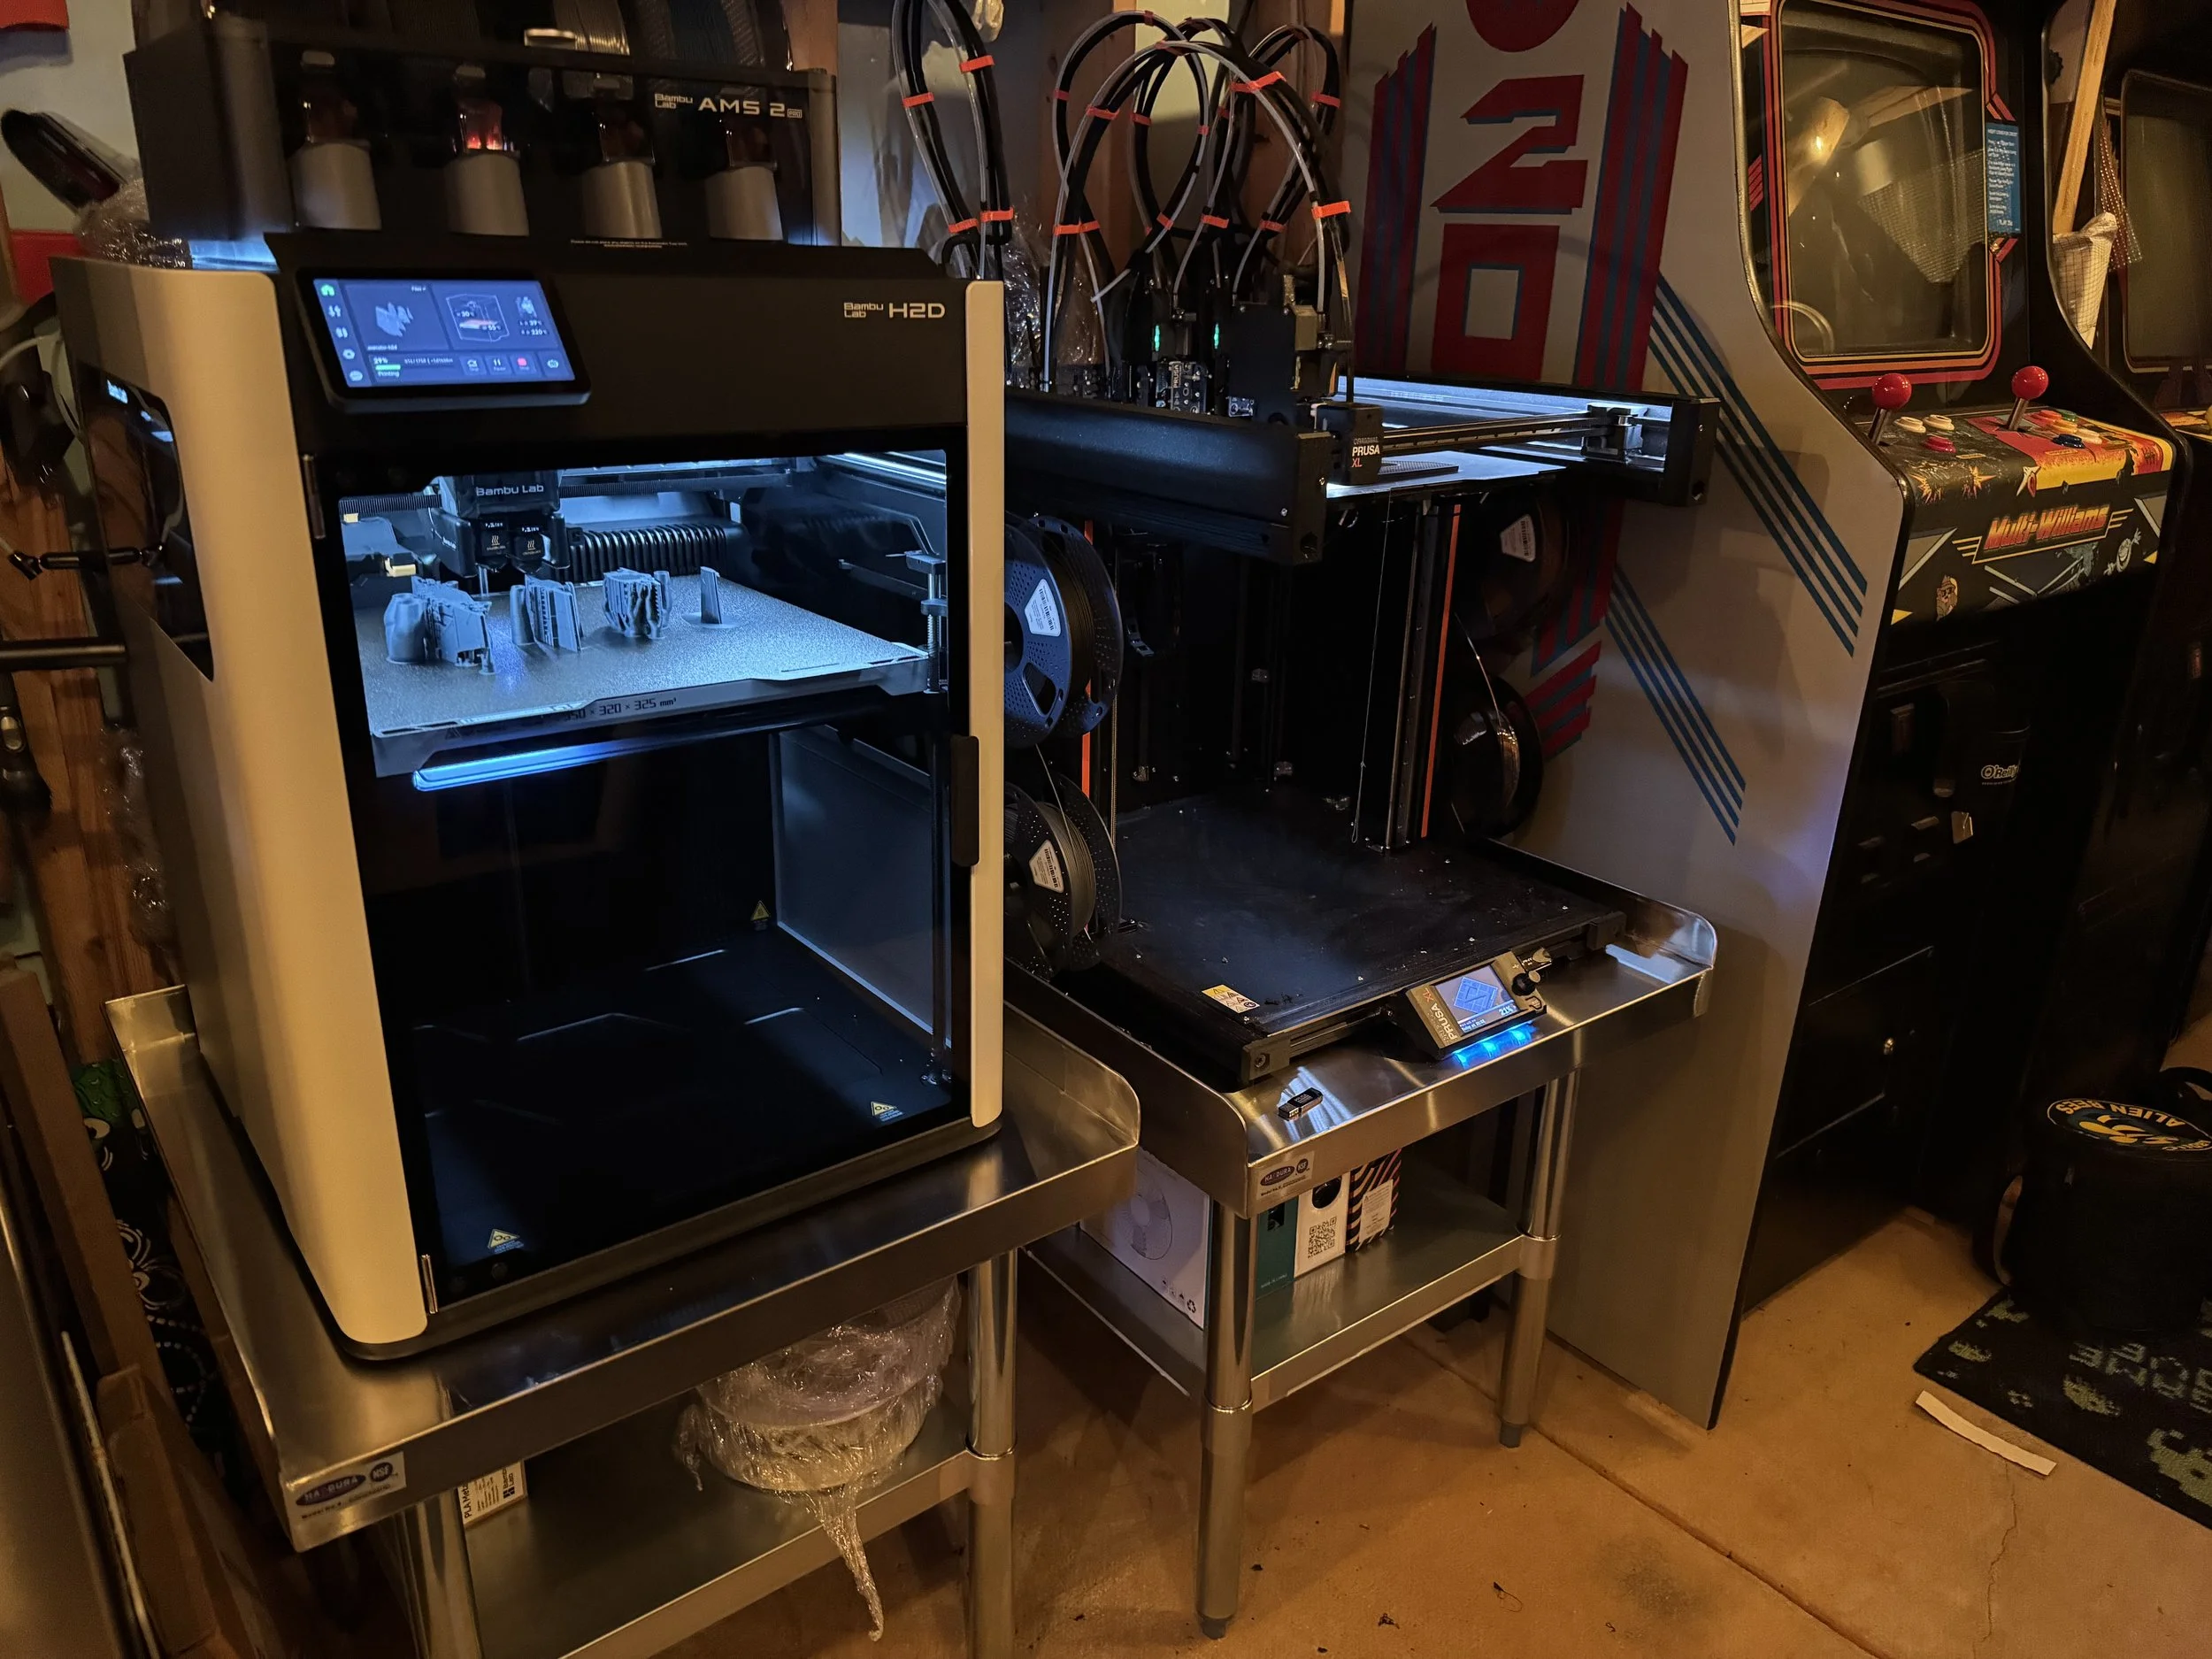
The Bambu Lab H2D
Clickbait thumbnail and title aside; I think FauxHammer’s thoughts after living with the H2D for a bit more or less resonate with my own.
I share the perspective that I’m not into 3d printing for 3d printing’s sake. I want a tool that works for the job that I assign it. The more attention I have to pay to the printer, the less that my attention is focused on the goal of a particular set of makes.

That gash in the box? Yeah, that is where the glass front is. Thankfully Bambu packed it well.
The Bambu H2D answers the “Big Stuff” print challenge with a 350mm x 320mm x 325mm build volume. Personally, I was hoping for something close to the PrusaXL’s dimensions. The H2D continues on the X1C’s answer for multi-material with a slightly upgraded AMS. Instead of a tool changer, the H2D distinguishes itself in waste reduction and solves for more complex material combinations with a two-nozzle design very similar to my old Ultimaker.
The H2D comes in variations with or without AMS and with or without a laser-module and related laser-safety features.
I hope that Bambu didn’t set themselves up for a support tsunami with those additions.
The laser module, drag knife and pen plotter are interesting but laser smoke-debris opens up a level of chamber contamination I’d prefer to avoid. I’ll stick to a Cricut and my garage-exiled xTool F1 Ultra (device name: Stinky Pete) for those features. For now, anyway.

Step 1) Unbox the Printer
Step 2) Let the robot calibrate itself
Step 3) Print a thing
… and it just works.

Vader’s Ship
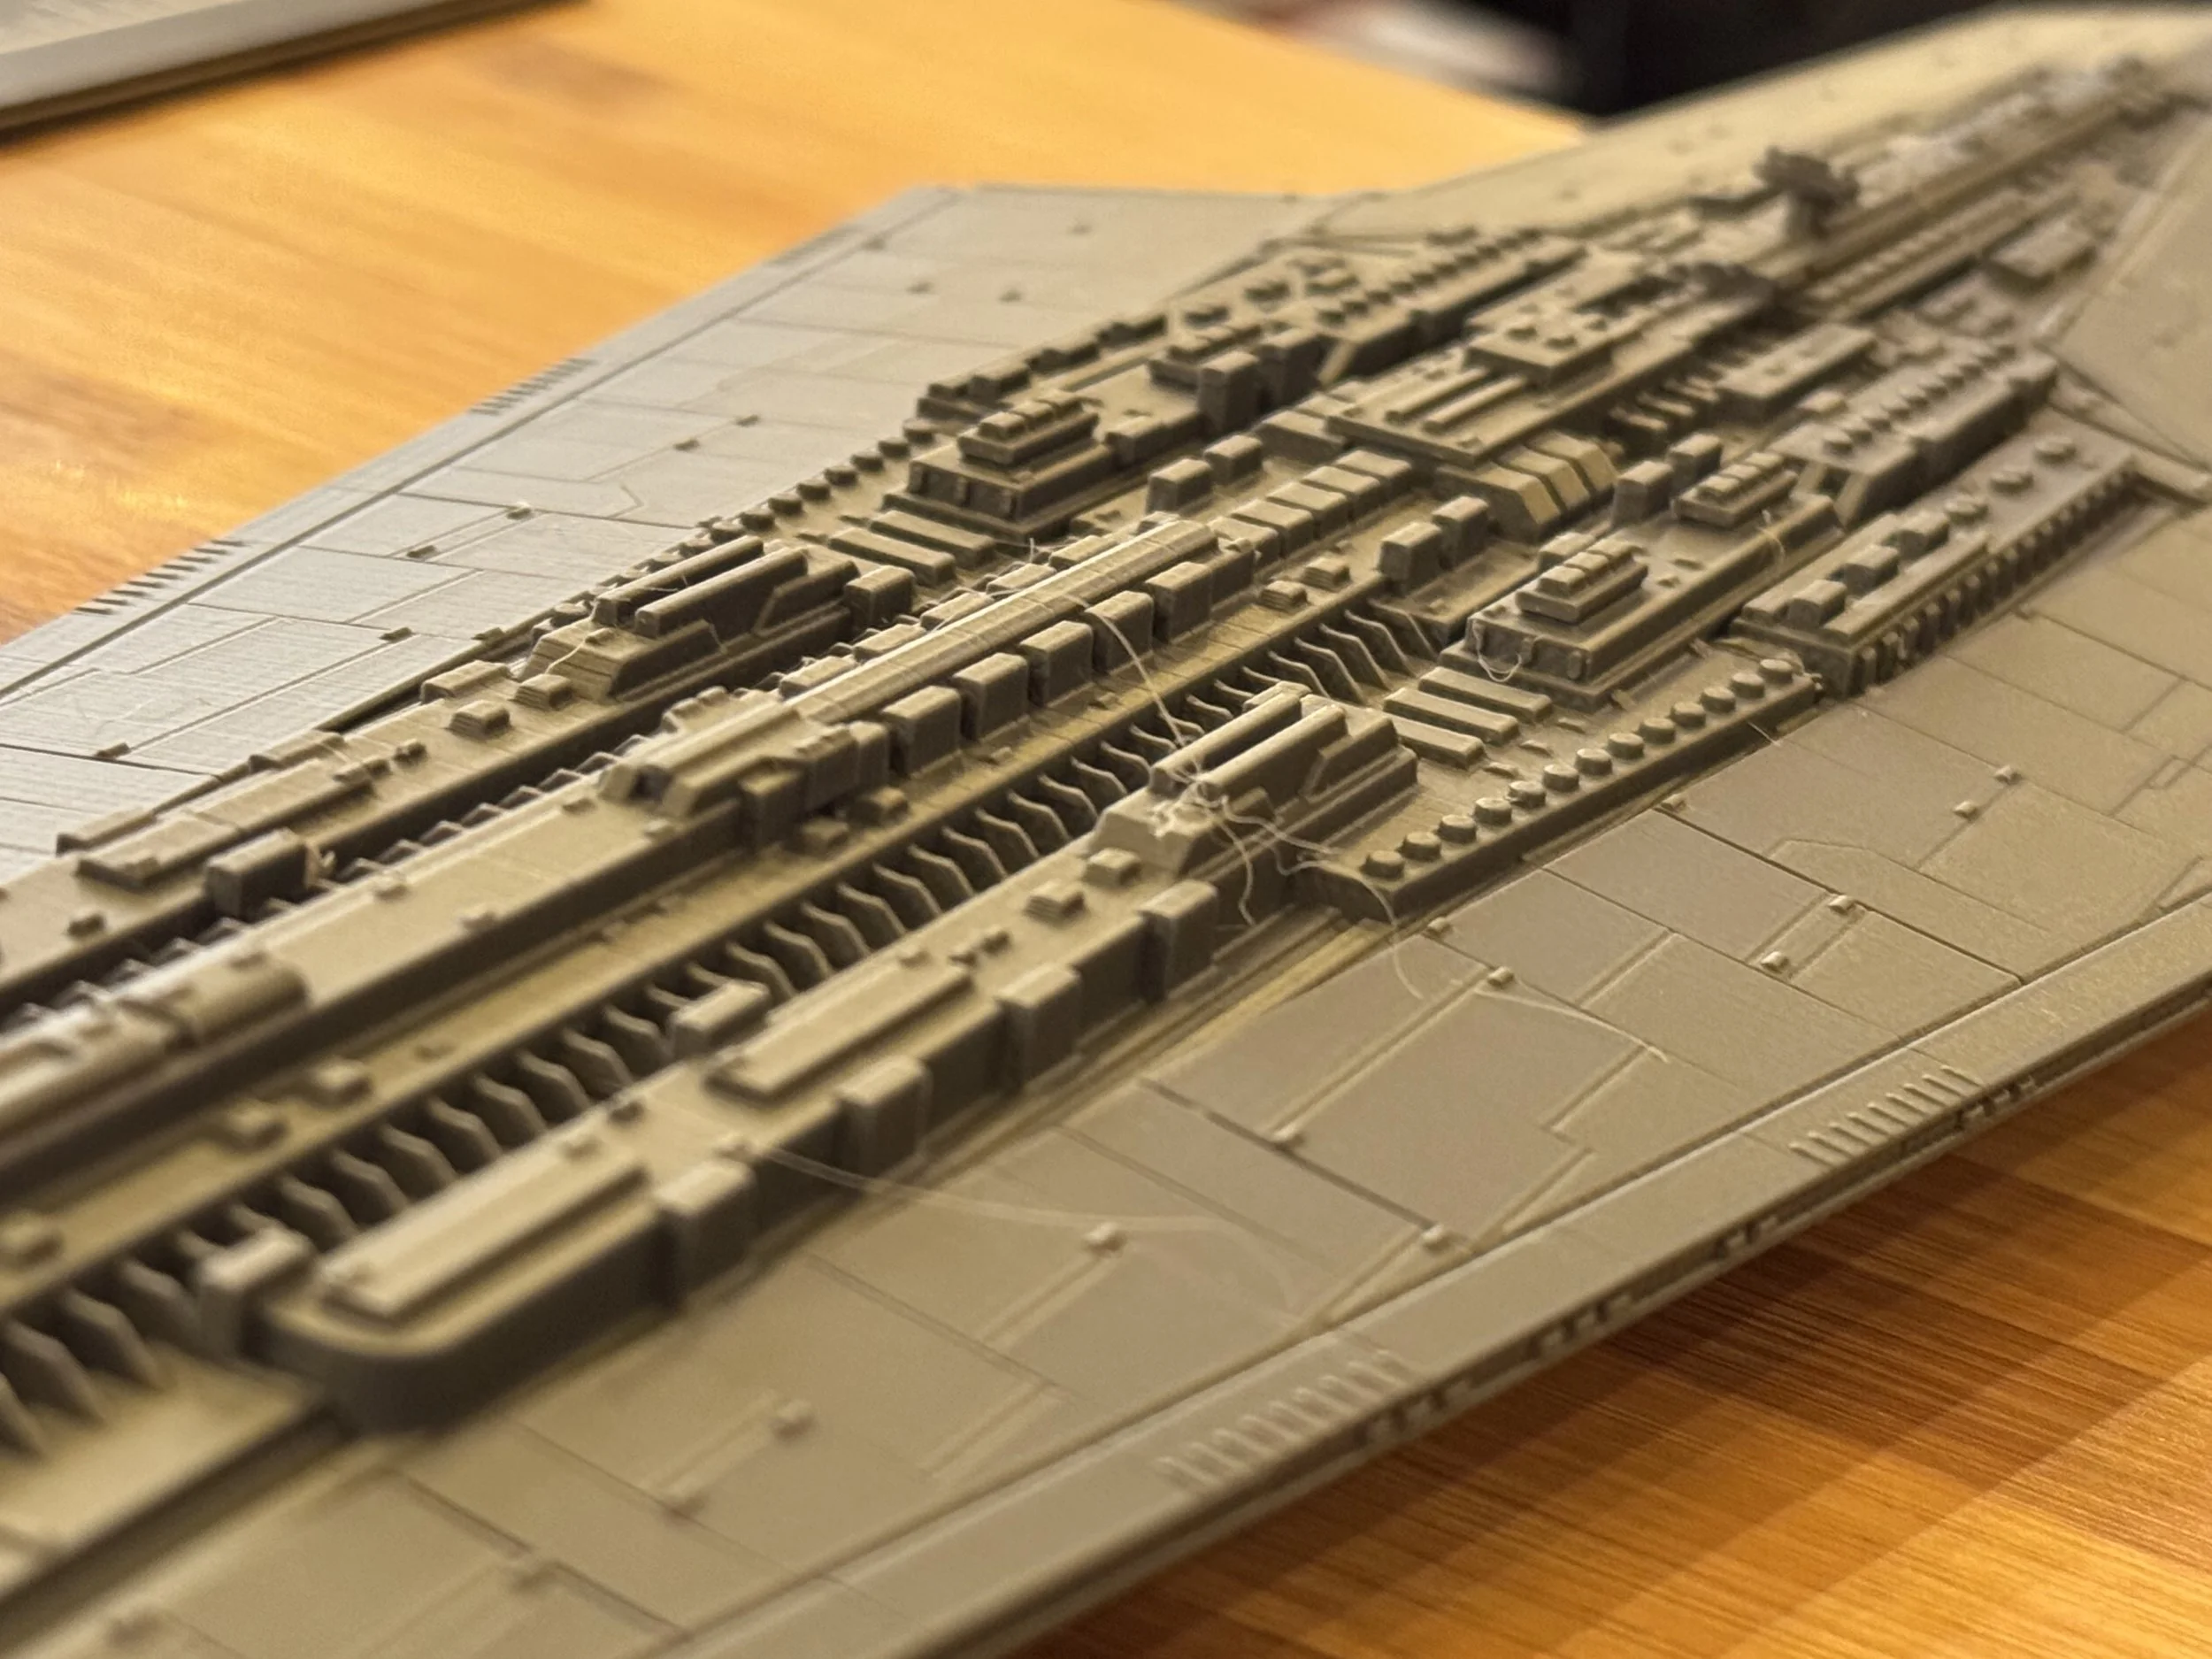
My first test print with the H2D was ResinEngine’s Executor.
Print Profile: 0.12mm Fine
Infill: 42%, Gyroid
Supports: Auto, Organic
Print Time: 35.6 hours

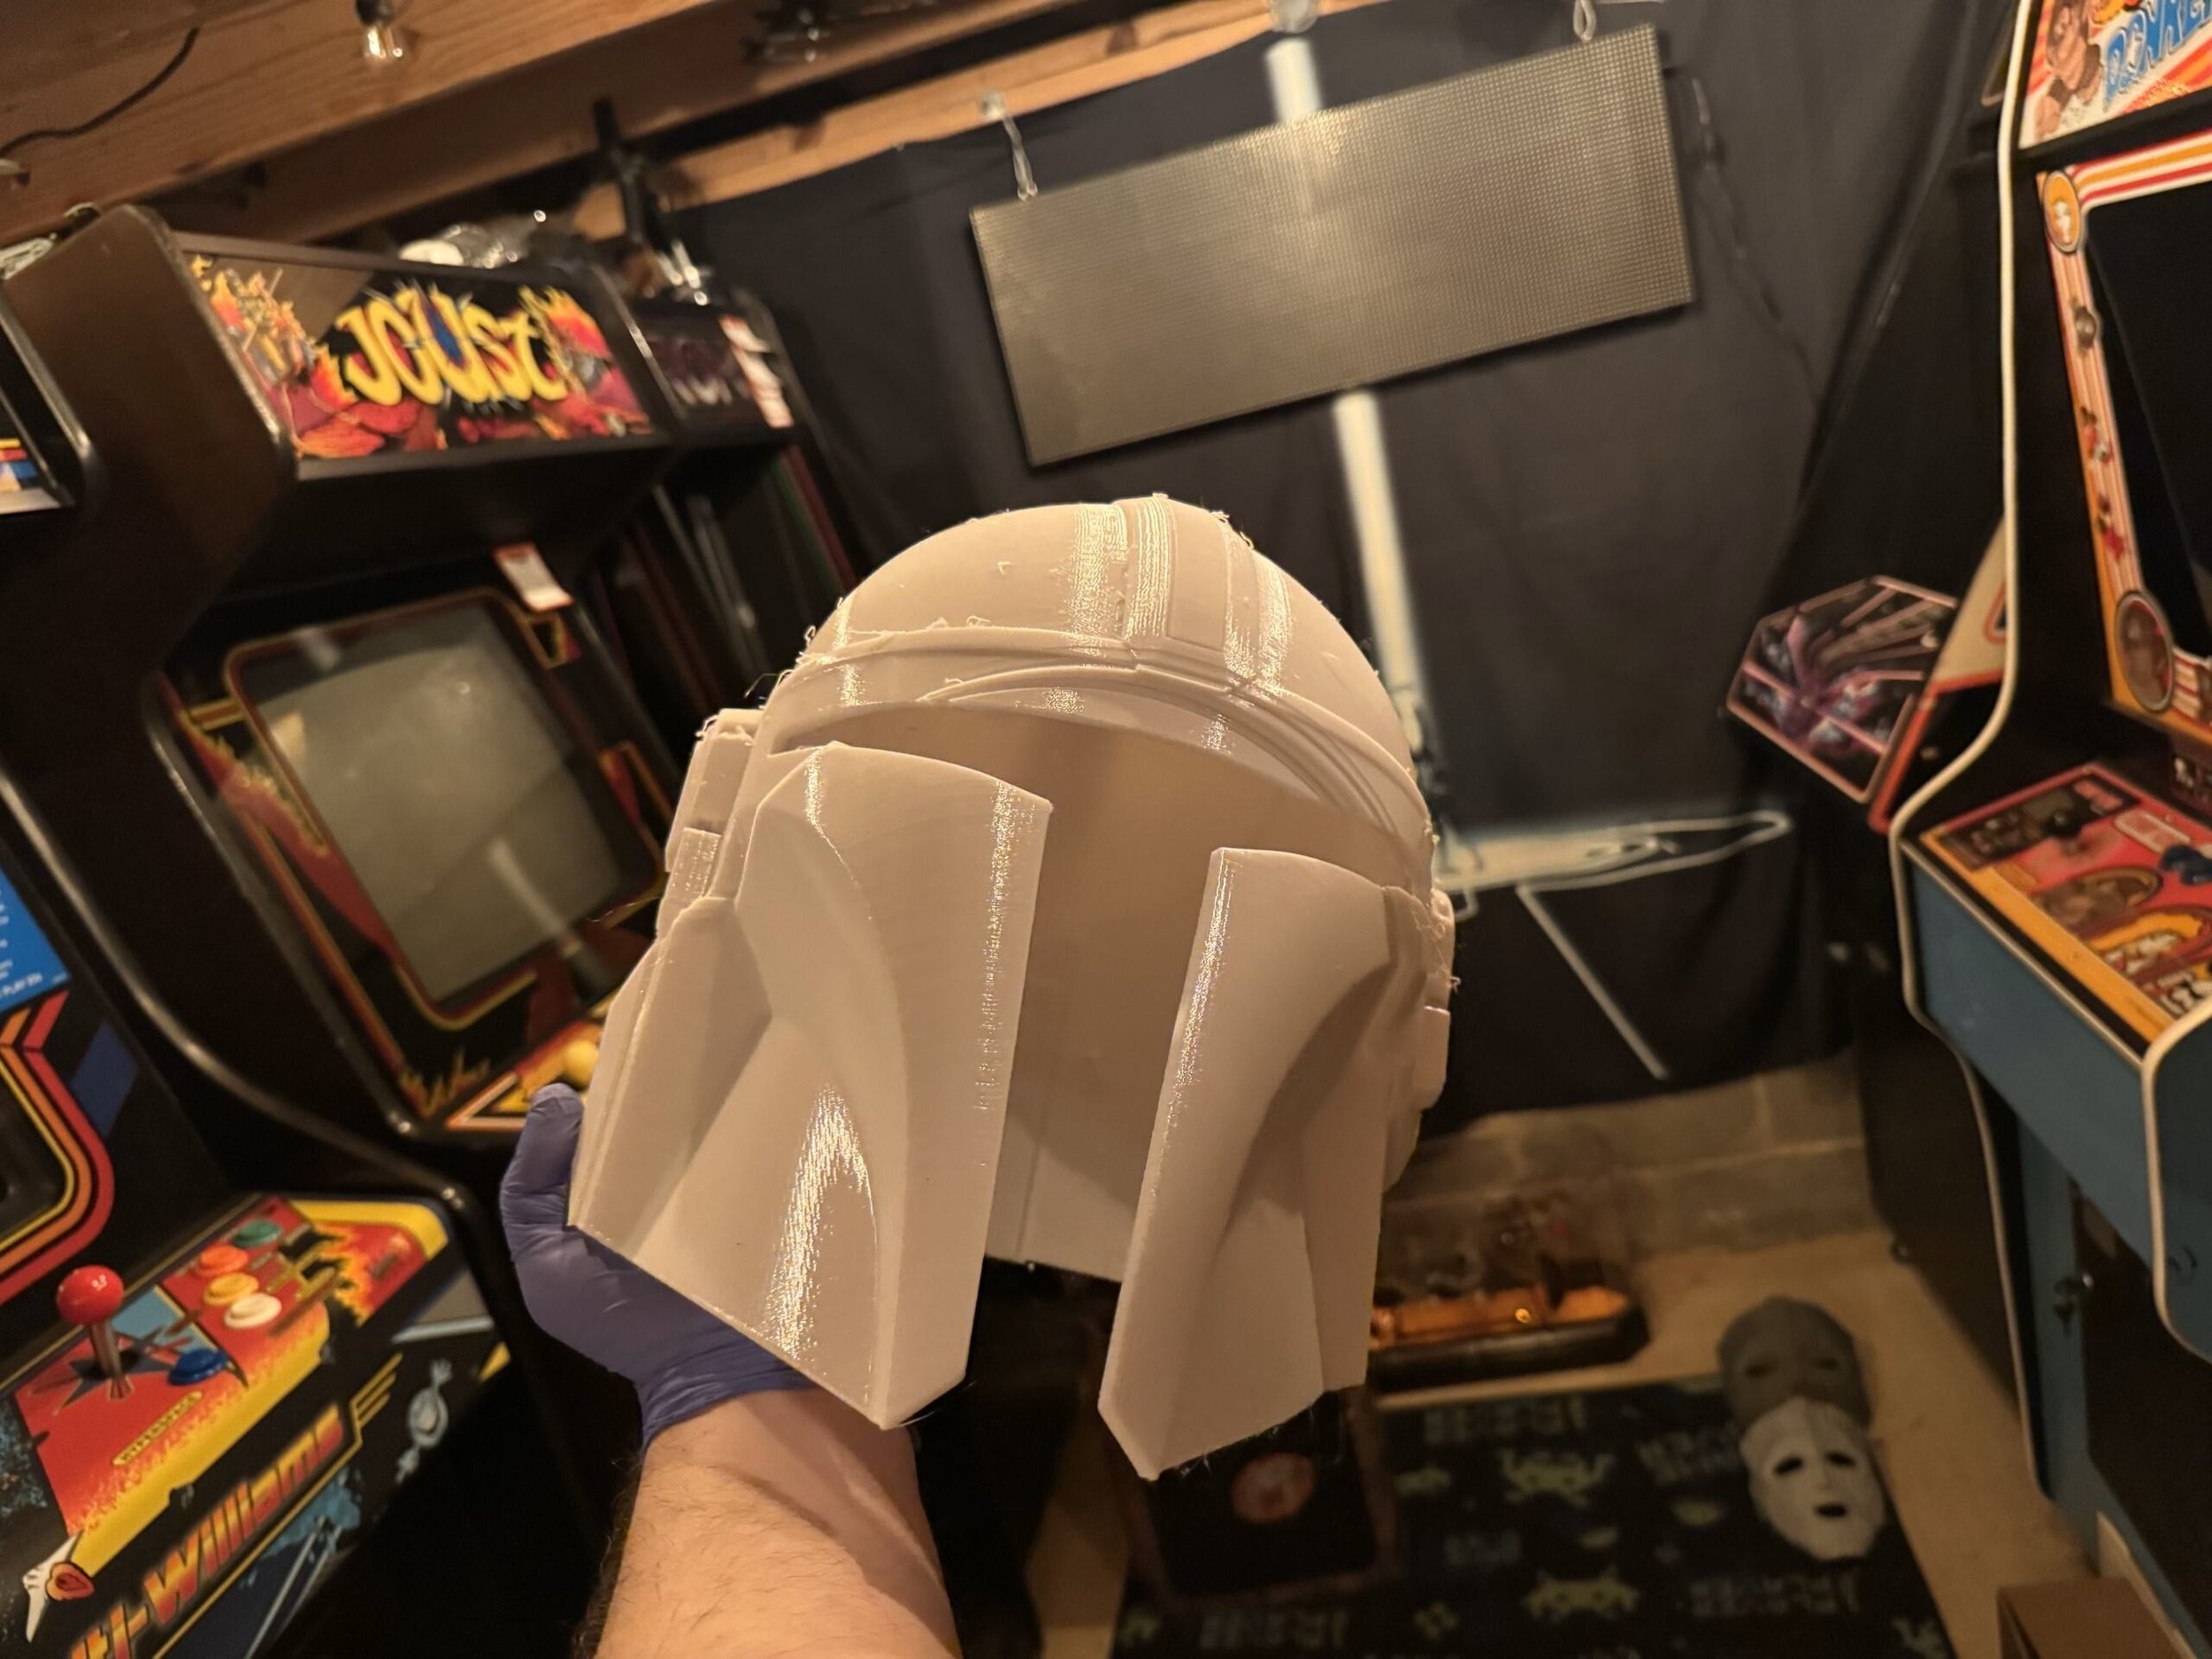
Mando Helmet

The second print test is the V3 Mando Helmet.
(in progress)
Print Profile: 0.12mm Fine
Infill: 42%, Gyroid
Supports: Auto, Organic
Print Time: 35.6 hours

Far from perfect but I’ll be able to make this work. I’m tempted to lower the table to reduce vibrations, recalibrate and try again.
PrusaXL vs H2D Head to Head Prints
Over the next few weeks I’ll do some tests on both printers to see how they come together.