Intro - Click the video to see the backstory and the Dome gaming rig in action.. :)

A little over a year ago, I found for the first time, Namco's Mach Storm Arcade system at a Dave and Buster's in Atlanta.
I honestly couldn't tell you much about the conference that I attended that week. But, I distinctly remember the exilirating feeling of being titled, "Demon Lord of the Skies!" as I entered my initials (WGD) in 2nd, 3rd and fourth places of the leaderboard after drinking from their tasty Guinness tap with a friend.
Mach Storm is this huge, 1200lb wide cabinet that you sit in similar to a racing game. You enter through the door on the left, where you are seated in front of a 180 degree hemispheric dome screen measuring about 6 ft in diameter. The game itself is a rail flight sim shoot-em-up game. Kinda like After Burner and other similar titles. The dome projection screen, sound, seat rumble packs and a series of fans come together to create a really immersive experience! Added by clever in-game dynamics that given you the illusion of being in control, even though really, the game is doing the flying.
For about 30 minutes on one rainy spring afternoon, I was the demon lord of the skies! At least that's how the game makes you feel and isn't that the point of these arcade excursions?
Below, is a pretty good video of the in-game experience..
(not filmed by me)
It is no real surprise that this game comes from Namco. I won't try to hide it, I'm a huge fan of Namco and what they are doing in the amusement industry. If you take a given modern arcade and remove the Namco titles, you are left with a dystopian nightmarish hellscape of claw machines and games that are identical to their Playstation 3 counterparts.
I really feel that Namco is the only company actually innovating. These games are the whole reason you are going to an arcade, to get something you can't otherwise get on your console or phone.
Then, this year, I heard about the release of The Star Wars Battle Pod. Basically, The Mach Storm cabinet with a Star Wars game.
You had me at Star Wars.
Just look at that thing!! It's like some sort of Disney-land ride, sprinkled with unicorn tears and force-willed into existence. Seriously, I have a little lump in my throat just thinking about it. It is that freaking awesome.
Last month while staying in Destin, we made the trip to Dave and Busters at Pier Point, Panama City Beach. With the kids and an annoyed wife in tow, I got to play it 3 times. It. is. every bit as awesome as I hoped.
Below is a considerably better example of the in-game experience, a fellow wearing a Go Pro during gameplay.
In fact, the game left such an impression on me, I entered D&B that day as an arcade enthusiast. I left D&B as a man on a mission. We ate at Dippin' Dots and I'm not sure what was discussed because frankly I had already retreated to my mind to start planning.
I will own one of these or something loosely adjacent to it's level of awesomeness.
After talking to a couple of gaming vendors that I've bought game parts from in the past (many of which wouldn't even return my calls and emails until I used my company name), I learned the arcade version of the Battle Pod could be had for about $30k (and at the time they were sold out / back ordered.)
There is also a $35,000 home version and $100,000 premium-home version and I'm not entirely sure I understand the pricing and complete feature differences but I've heard the premium one has leather seats, upgraded resolution and other premium features for that.. well.umm.. premium..
For about 2 seconds I thought about various scenarios of savings-drain and credit card usage where I could swing that purchase of one of the lower versions. But alas a) it is probably too tall for my basement, which has a low ceiling and b) I don't have that sort of dough to throw at something like this.
Don't get me wrong, I don't besmirch Namco for charging this much. In fact just the opposite, I applaud them for the innovation. R&D for things like this isn't cheap and I'm glad they are around, profitable and making awesome games like this.
Sadly, I just can't afford it.
Next, I thought "gee, there's gotta be something out there already. I wonder if there is something I can buy for less than $1,000 to do this.
I found this video of the TOOB F from a couple of years ago.
Sadly, their domain name returned a 'for sale' placeholder and their crowd-funding campaign to bring this to the masses didn't appear to get funded.
(which is a total shame because it looks awesome!)
I also found this thing called jDome which was super-interesting:
I read some things talking about being able to buy one for $200 but when you go to their site, they have that 'pre-revenue' feel of a company where you can't actually buy the thing.
Literally, I could not find a way to buy it. Plus, the folds in the screen seem a little distracting..
Finally, I found plenty of companies specializing in large, inflatable and event domes for trade shows and large events. Basically, planetarium domes to house anywhere from 7 to 1,000 people, ranging from $5,000 on up into the $millions.
So...
Let's (try to) Make One!
In my home and with no budget to speak of, I'm not going to be able to make something at parity with the quality and polish of one of these finished systems - at least not at first. Then, there is the software - I don't have it and won't be able to get it. (Why would they send it to me?)
But, there are plenty of fun Air Flight Sims that would probably be fun on a dome projection booth plus, I'm hopeful for the new Star Wars BattleFront coming this winter / late fall.
Creating a Dome
Creating a dome is harder than one might think. During this process, I found myself wishing I had paid better attention in Mrs. Thomas' Geometry class. The wizened word's of my High School algebra teacher's (hi Mrs. Cameron!) response to my smart-elic teenager-y inquiry, "But, really when am I ever going to use this stuff in the real-world?" - stung especially hard. :)
My first attempt at building a dome was the idea to try to find something existing with a dome shape. I felt like this would be a good start, either to tile a material on the inside to use as a projection surface or to act as a mold for something more sturdy. The first thing that came to my mind was the Geodesic climber. So, in typical shoot first, ask questions later fashion, I bought one to try.
Granted, I can read and I knew the climber, when fully built, would be too large for this application but I really thought there would be a potential for me to only build a portion of it. Basically use only the top-half. The theory was good and I figured as a proof of concept, if it seemed to work, there are plenty of sources for custom geodesic kits, joints and other materials.
Unfortunately for my project (and fortunately for my 6 year old who loves to climb on stuff) the geodesic didn't work. It is simply too heavy and the joints aren't rigid enough to maintain their shape, when the weight load is distributed in reverse (as-in, a bowl).
Next, I tried making a frame out of PVC. At first, I tried bending a couple of PVC tubes into a circle. The tension of the PVC, bent into a circular shape kept springing the assembly apart. I know you can heat PVC and work it but as I'd heat sections of PVC, those sections would crumple instead of forming like I wanted.
They make these gigantic warmers you can put a full stick of PVC into and warm, to shape it around something. I don't have one and I don't have the something with which to bend the PVC around to create a perfect circle.
Instead, at least for testing initial proof of concept, I opted for a PVC octagon with flexible cross-members forming the bowl of the dome.
As you can see, the result is pretty craptastic but worked well enough to prove the projection concept.
Which leads us to the math problem, of what shape, when cut out of a square, can be mapped over a hemispheric surface with minimum folding / seams?
After searching many origami sites and forums, I ran across this really good paper:

The answer, as it turns out, is the Petal Shape. Either individual petals that get smaller as they move out from the center, as in the jDome design - or a 4-or-more-petal design.
It seemed to work well enough for the salsa-bowl scaled down test. However, my 87"x110" blackout cloth just didn't turn out so great when put on the PVC frame. Part of the issue is, it needed to be about 40% larger. The other issue, was mounting and seaming. I'm just not that handy in terms of sewing / seaming so as to come up with appealing results.
Though, at least it worked well enough for me to work out the projector placement specifics, which, as it turns out - affect our dome requirements.
What I learned from this was:
1) The PVC frame is fine for a proof of concept but isn't going to cut it for the finished example
2) Any wrapping of some material around a frame is going to have a pretty miserable projection surface filled with seams or lines and probably wrinkles and creases.
3) Based on my projector experimentation (more on that below) - I need a truncated hemisphere, not a full hemisphere, in turns of shape, so that the projector can be placed behind the surface of the dome.
More Dome Construction Fail
Next, I decided to try to build a dome by coating a giant balloon with various materials.
This ultimately failed but I'm going to list out the various things I tried because I think this process has merit, maybe with different materials.
Latex Balloon + StyroSpray 1000 + FiberGlass
The idea here, is to inflate a gigantic balloon, coat with StyroSpray, then lay fiberglass on the StyroSpray coating to build rigidity.
I bought this 72" balloon from Amazon: http://amzn.com/B0044328OU
I Converted the PVC dome from my tests above into a basket to support the balloon and tried inflating it. It popped at 57" diameter. So I ordered two more. One popped at 60" diameter and the other, I stopped at 65" and it held, for awhile anyway.

At $27/ each this part started to get more expensive than I preferred.
With some googling I found this stuff called StyroSpray 1000. I bought 4 gallons of it and still have 2 gallons left for future experiments.
It is basically a paintable plastic coating. I believe it is a mixture of polyurethane resin and latex paint (though, I'm not entirely sure).
http://www.industrialpolymers.com/styrospray/styrospray-1000

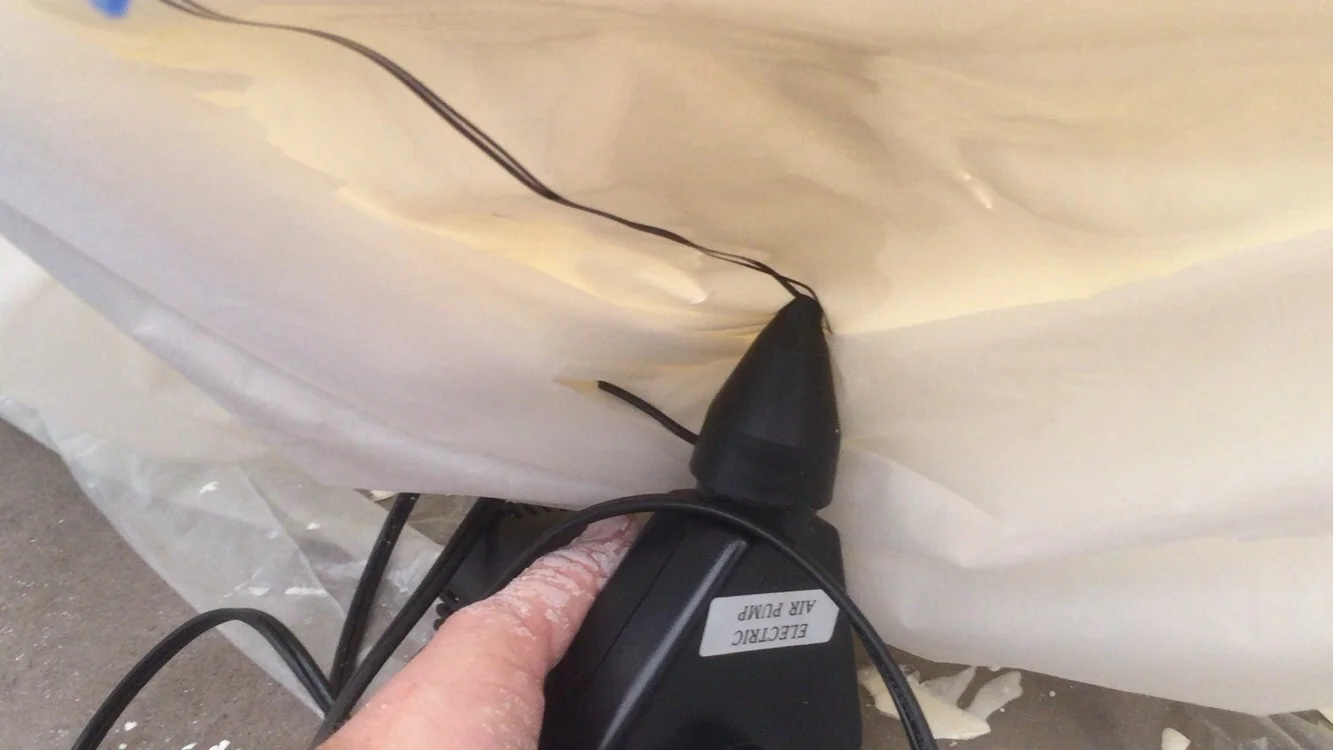
I blew up the balloon and started coating it directly with StyroSpray.
I don't know if it is the Styrospray or the interaction with the latex but this stuff was all sorts of strong. Needless to say, a full ventilation mask is a necessity. Seeing as that a small, diluted amount bound to my skin during tool cleanup, I can only imagine what it would do to your lung sacs. In defense of Industrial Polymers, their Material Safety Data Sheet adequately warns you of the danger.

At least I get to work on my Bane impression..
The StyroSpray coated pretty well, had decent self-smoothing properties considering that I wasn't using it as directed.

I successfully got 2 coats of StyroSpray on and I was impressed with its characteristics. It is rigid and firm. 2 coats don't have enough tensile strength to hold this form but 5-8 coats probably would.
My intention was to get up the next morning and start laying fiberglass to reinforce the structure. (Figuring you probably can't lay fiberglass directly onto a latex balloon, surely the reaction-heat would burst the balloon).
The next morning, I got my first small batch of resin mixed but disaster struck as a tear formed in a thinner area of the balloon / coating.
I tried patching the tears so that I could continue applying figerglass but each inflation caused a new tear, cascading failure as rips formed and the dome lost it's structure.

I was left with a crinkly piece of rigid plastic with a really great interior surface that would have been perfect for projection. It was really quite interesting that the StyroSpray and Latex were completely indistinguishable. They had merged.

I tried attaching the StyroSpray dome to a PVC frame, just to experiment with. The biggest problem is, the danged smell of the stuff lingered for over a week, it was too strong to bring inside The once perfect interior of the bubble did get weathered and wrinkled.
Projector Stuff
For the Star Wars Battle Pod / Mach Storm, the cabinet dimensions are listed on the brochure as 103" H, 76"W, 73"D. When I was in the Battle Pod, I noticed the projector is mounted above the seat to your right, above your shoulder.
The projector is shooting from over your shoulder onto the screen and filling what appears to be, based on these dimensions, a roughly 6ft truncated dome. In order to emulate the Battle Pod's projection technology, it would need a projector that can project a 6 foot image, in focus, through a fisheye lens, at a throw distance of about 6 foot and with an in-focal range of about 3 foot in depth from image-plane start.
This is terribly specific and no doubt where the bulk of the company's cost comes in.
For this to be within my budget of, basically a couple hundred dollars, I hoped to leverage one of the existing projectors that I already own (for meetings, and more importantly - outdoor movies in the cooler months.)
Being a photography-guy, I thought that it seemed feasible that I could shoot a regular projector through an off-the-shelf fisheye filter (like you screw onto a DSLR filter ring). I figured, if it worked in concept I could build a rigging to float the fisheye in front of the projection plane at whatever distance is appropriate.
I took to Craigslist and eventually found an Opteka HD2 Xtreme Fisheye on a 58mm screw mount. I met the owner, a pleasant 60+ year old transvestite at a restaurant parking lot during lunch one day for the exchange.

The Lens was in perfect shape but unfortunately it didn't work out. As it turns out, the image needs to be in focus as it passes through the fisheye for distortion and angular dispersion. With either of my projectors, the minimum focus distance (the closest distance from the projector lens to the projection surface where the image is in-focus) is around 17 inches. At 17 inches, the image size is considerably too large to pass through the fisheye. In fact, I would need a fisheye with an aperture of about 12 inches to even get close.
In addition to focus issues, I was surprised by the cost of brightness the fisheye caused. As the image passed through the fisheye lens the image brightness was reduced by easily 40%. Using a 700 lumen LED projector, I just don't have that sort of brightness to sacrifice.
A good bit of research through planetariums and museums landed me on this guy's site:
On his site, Paul has a wealth of resources surrounding a method for dome projection that basically involves shooting a projector into a spherical mirror.
I used an inexpensive spherical mirror and my very rough PVC frame to work out that the spherical mirror + projector would more or less work for my purposes.
Still, I brought in the frame and cut a place for a projector to do some testing.

The placement of the mirror is important. You want the mirror to be at the base of the dome and the projector will shoot at the mirror from behind the dome.

The great thing about the mirror-projector method is that you do not loose brightness. Even my 700 lumen projector was good enough to test with.
I ended up bringing the frame into the Gameroom for a couple hours for experimentation (ahem, play). Me and the kids played some Wipe Out on it. The visual distortion is extreme, so I know that's something I'll have to work out but the kids (of all ages) had a great time, which just encouraged me to keep going..
My focus group liked it. Alot!
In the end, though, BillDome Mark1 and Mark2 ended up out by the road for trash pickup and for my neighbors to puzzle over. :)

Bill's garbage is strange.
What I learned:
StyroSpray is pretty awesome. (But expensive for my zero budget at $70/gallon)
-If it gets on your skin, not denatured alcohol, nor fast orange, nor paint thinner, nor Xynetol, nor Goof Off, nor Gasoline will remove it. It must wear offMayflower Balloons 72" Balloons can't be inflated to 72"
My garbage pickup people don't like me and neighbors now think I'm engaging in Breaking Bad: Home Edition
Balloon + Paper Mache + FiberGlass
Next, I ordered an 8 ft balloon from BallonsFast:
http://www.balloonsfast.com/96-inch-white-round-latex-balloons.html
I figured getting a larger balloon and not pushing the limits would help. These balloons were better built, for sure. (But, the project still failed)
Thinking about Mardis Gras floats, I believe they are basically wire-formed Paper Mache with a coating (like the StyroSpray mentioned above).
Many people suggested this could be a good way to get a Dome shape. Plus, it solves the issue of not being able to lay fiberglass onto a latex balloon.
My kitchen table version, worked out well enough. It wasn't perfect but certainly with some paint and sanding could have been smoothed out.

Two coats of paper mache around a balloon.
So, we tried again. This time a slightly better 'basket' and the better balloons.
In case you are ever asked, it takes one person 4 hours to paper mache a 6 foot balloon - that's the first coat.

The next morning, I was happy to see the balloon was still in shape, so I begin cutting paper for another coat, when from my kitchen table I heard the loud "pow!" of failure.
This attempt, too, failed. The balloon burst, probably trying to expand with the heat of the day into the rigid shell of the dried paper mache. The entire thing just crumpled up into a big ball of crinkling failure as the latex tried to contract around the dry paper mache. It sounded like popcorn and smelled like tears.
Time for Some Pragmatism
it is at this juncture, that I decided to stop trying to build the Dome structure, myself.
On my desk, a stack of Home Depot, Lowes & Amazon receipts totaling several hundred dollars, including $175 in just big silly balloons.
Add on copious quantities of fiberglass @ $30/gallon, 4 gallons of StyroSpray at $70/Gallon, 3 gallons of Elmers Glue @ $15/gallon, $20 in Sunday newspapers, PVC, wood and other materials, my attempts to do this on the cheap started to really stack up to be not-so-cheap-anymore.
All this investment (not to mention time) and I had very little to show for my efforts. Plus, my wife really wanted the garage back. :)
It was time to just go buy a dome (besides there are plenty of other components needing to be built to finish out the project.)
Along the way I had been talking to everyone you can imagine, trying to source a dome structure. I tried everything I could reasonably think of and many sources suggested by smarter folks. It still seems like there HAS to be a low-tech plasticky (or other) dome structure out there that could be repurposed for this.
I tried spas/ tubs, koi pond parts, custom aquariums, fire pit inserts and lids, farming silos, industrial tanks, cut-down propane tanks, playground parts, skylights and various plastics and acrylics suppliers. I went to three scrap yards and talked to all sorts of people who gave me weird looks when I tried to explain what I was looking for.
I talked to every plastics and acrylics fabricator and many-many fiberglass fab shops within a 200 mile radius. A few could do it but needed to build a form, first. That cost ranged from $1400 up to $85,000 depending on who I talked to. They would basically CNC, cut circles of plywood until they built out the 6 ft dome of stacked plywood. Then, lay fiberglass or melt down plastics over top of it.
Many responders were downright discouraging with snarky comments like "6ft?! What the heck are you building over there, a rocket?"
Yes, I'm ordering the equivalent of a 6 foot rubbermaid trash can lid, it MUST be rocket science.. :)
Sourcing a Dome
If you want a dome made, here are your options (at least from what I've found).
You can reach out to local fabricators. Two options I've found are Fiberglass or Acrylic.
The Fiberglass folks need a good mold to work with. If they build you a mold, the average cost of a CNC-cut mold is going to be about $3500. Each dome from that mold will cost about $1500. Unless you find a fiberglass shop that happens to have a giant round ball sitting around.
For Acrylics, I've found that many shops simply do not have an oven large enough to heat that large of a sheet. 69" Diameter is about as large as most can do to limitations in either material availability or oven size.
In the Acrylics-Plastics side of things, you are looking for a thermo-molding fabricator. Ideally, someone that already has a round mold to work with or has some other ability to mold plastics, such as vacuum-forming or free-blowing.
If you aren't going with a local fabricator, there are a few places online that sell domes for skylights, buildings, churches, etc.
These guys make them:
http://www.eztopsworldwide.com/domes.htm
Their prices are really fair. Sadly, shipping costs as much (more, actually) as the dome. I almost ordered from them but I was concerned that when I got the dome home and tried to cut the plane / truncation out - I may crack or otherwise damage the acryllic.
I really wanted a full-service shop to just do all of that cutting for me.

Cutout diagram. r*cos(45). Really wish I'd have paid more attention in school.. :)
In one of my late-night-searches, I found this Youtube video:
After some searching, I found a company called SSD Plastics in Boulder Colorado.
http://ssdplastic.com/
Talking to them on the phone, they were super easy to work with and very helpful and open. The owner (I presume), named Phil, was super-helpful on the phone suggesting acrylics handling and mounting techniques and going over the specifics of my project.
He taught me about the options, molded versus blown-domes. Where a mold will be nearly perfect on each build, the blown domes like in the video above will have some slight variances from piece to piece: ranging to about 2%-4% variance. Well within my margin of error for this project! :)

This is the sketch that sent around to a few fab shops explaining the cut-off portion of the truncated-dome.
From the time I ordered, it took them about a week to get my special-ordered acrylic sheet and another three weeks before they were able to heat it, blow it, cut it to my specifications, package and ship. Times may vary, depending on how busy their oven is. My dome showed up in right at a month from ordering.
I was left with the impression that they 'cook' on Mondays and finish plastics for the remainder of the week.
A completed, truncated Acrylic dome like this will cost you $700/each, plus shipping.

Freight time from Colorado to the Gulf Coast took about 5 days.

The extra-large crate barely fit on the lift gate of the truck.

Did I mention the crate was really big? Basically two standard sized pallets in size. (Which does drive up shipping cost.)

The crate was constructed from 1/2" OSB Chip board and 2x4's with a 3/4" plywood floor. It was at this time I wished that I had waited to build the rest of the cabinet. Much of this material could have been used in the construction of the cabinet rings, the floor surrounds and supports.

Most importantly, the cuts from SSD Plastics were done exactly as I'd asked. Convenient mounting holes on the flange, well packaged, perfectly sized - I couldn't have been happier with their quality of work!
Building vs Buying
In retrospect, I still say there is something to the fabrication method of big balloon + some sort of shell applied over it. Ideas I've considered:
Human Hamster Ball
Giant Beach Ball
If you decide to try to build yourself, maybe one of these better built orbs will work out better than the giant latex balloons that I tried.
It is a shame, because I'd like for the title of this blog post to be "guy makes home-dome-gaming cabinet out of newspaper, balloon and glue" but the costs really do stack up pretty quickly.
If you decide to have a go at it, hopefully one of these ideas will work for you!
Check your local plastics and acrylic fab shops - maybe you will be lucky and have a local source for a formed or blown dome structure. In my case, SSD Plastic's dome plus shipping was ultimately cheaper than doing it myself but your mileage may vary! I do highly recommend them, though.
Just for fun, in searching for giant balls to use for a Dome, I ran into this hilarious video that you should watch. It looks like fun!
The Rest of the Build
In the down weeks, waiting for the dome to arrive, I set to task trying to create the other components of the build. At this juncture, I wasn't entirely sure if I would be proceeding with a full enclosure that you sit on (w/ doors and all) but I did know (thanks to Phil's advice) that I would need a support structure on which to mount the dome.
It stands worth mentioning that I'm no carpenter and have no particularly strong woodworking experience aside from being frugal and fixing household things when they break.
First, I started with a poor-man's compass. I measured a stick hole-to-hole to match the intended radius of my dome.
I then used this rigging to mark some plywood to get the appropriate arc.
I cut out a bunch of them (20 in all) . I made them larger than necessary so as to be able to hopefully accommodate whatever variances in dome size might come into play.
Next, I cut the ends so that the pieces fit relatively smoothly end-to-end and stacked the so that the top ring overlapped solid where the bottom ring had joints. Then I glued it all up and added a slew of wood screws to hold it together.
The end result totally resembled a tiny Star Gate! (If only...)
Feeling some confidence in my newly acquired zigsaw, I continued and built a base to act as the floor-support for the dome. We want the dome to be suspended off of the ground for optimal viewing, for floor-speakers, etc.
More poor-man's compass, this time for the 'floor surround' - the bit that will support the base of the dome and conveniently enough have speakers in it. Truthfully, the most complicated bit was mathing out the bit for the floor arc. Eventually it occurred to me, it's a circle, so my diagram to the dome supplier had the answer I was looking for. Radius x cos(45) was the answer, based on my cut directions to the dome fabricator.
I built floor stands to hold the frame.

If I haven't mentioned it in a couple of paragraph, I love lasers. Lasers are the bacon of science. Everything is made better with lasers!
The general idea for how this is going to come together. I created each side as two pieces, so as to adjust the width / depth later and screw down a block to tie the two pieces together (and potentially disassemble later).
I attached small 1x2 boards to act as cross-members for support.

I used hardboard sign material (located in the home depot plywood area) as a paneling. The idea here was something flexible enough to conform to a round shape. The panels were overlapped and molding covers to the overlaps.

I built a stud structure to support the weight and to act as a brace for the door.

For a seat, I pulled the passenger seat out of a wrecked 2008 Eclipse at a local junkyard.

Many layers of lysol and steam-cleaning later, the seat looks and smells like new.
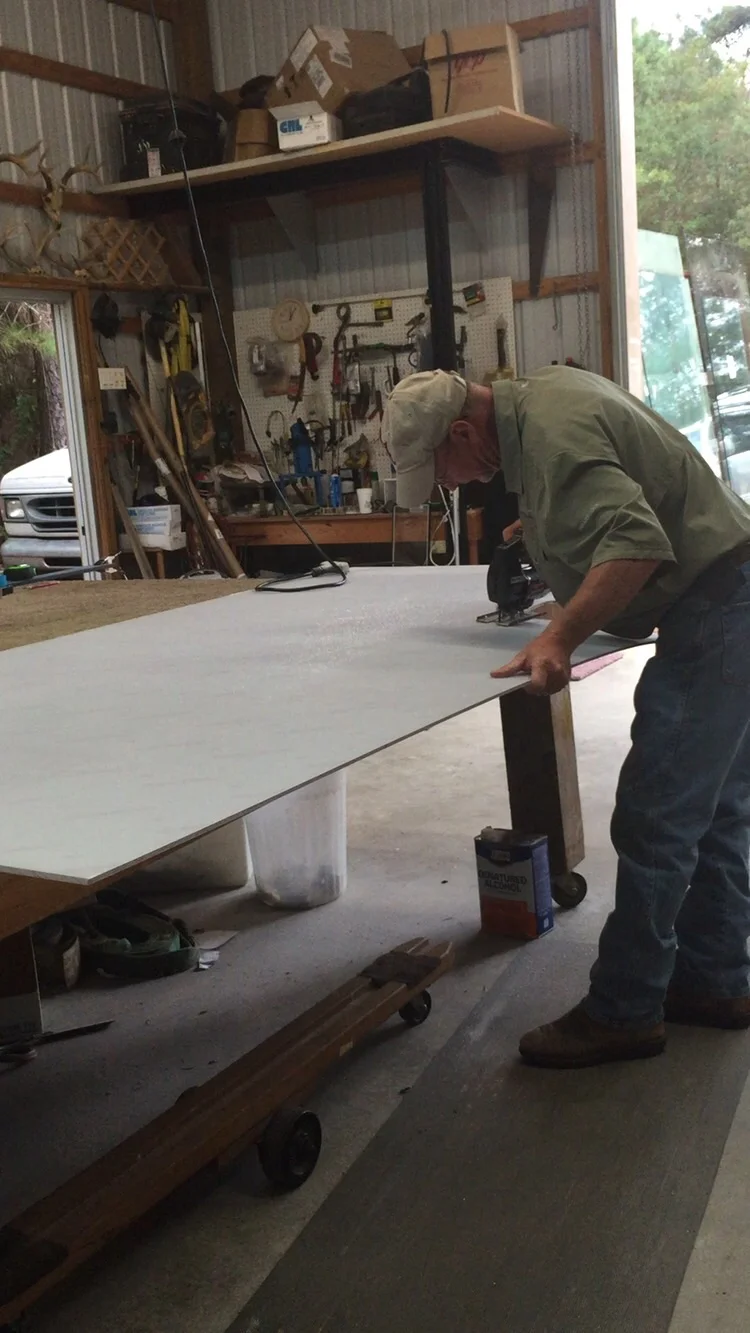
LA Showers and glass helped to get me a huge piece of Makrolon from which to cut the door. Mike cut my initial shape.

It was cheaper for me to tint a clear sheet, versus buying a pre-tinted sheet of Makrolon. Be sure to use adhesive-free window film. Lexan gasses over time and will bubble up on adhesive-based window films.
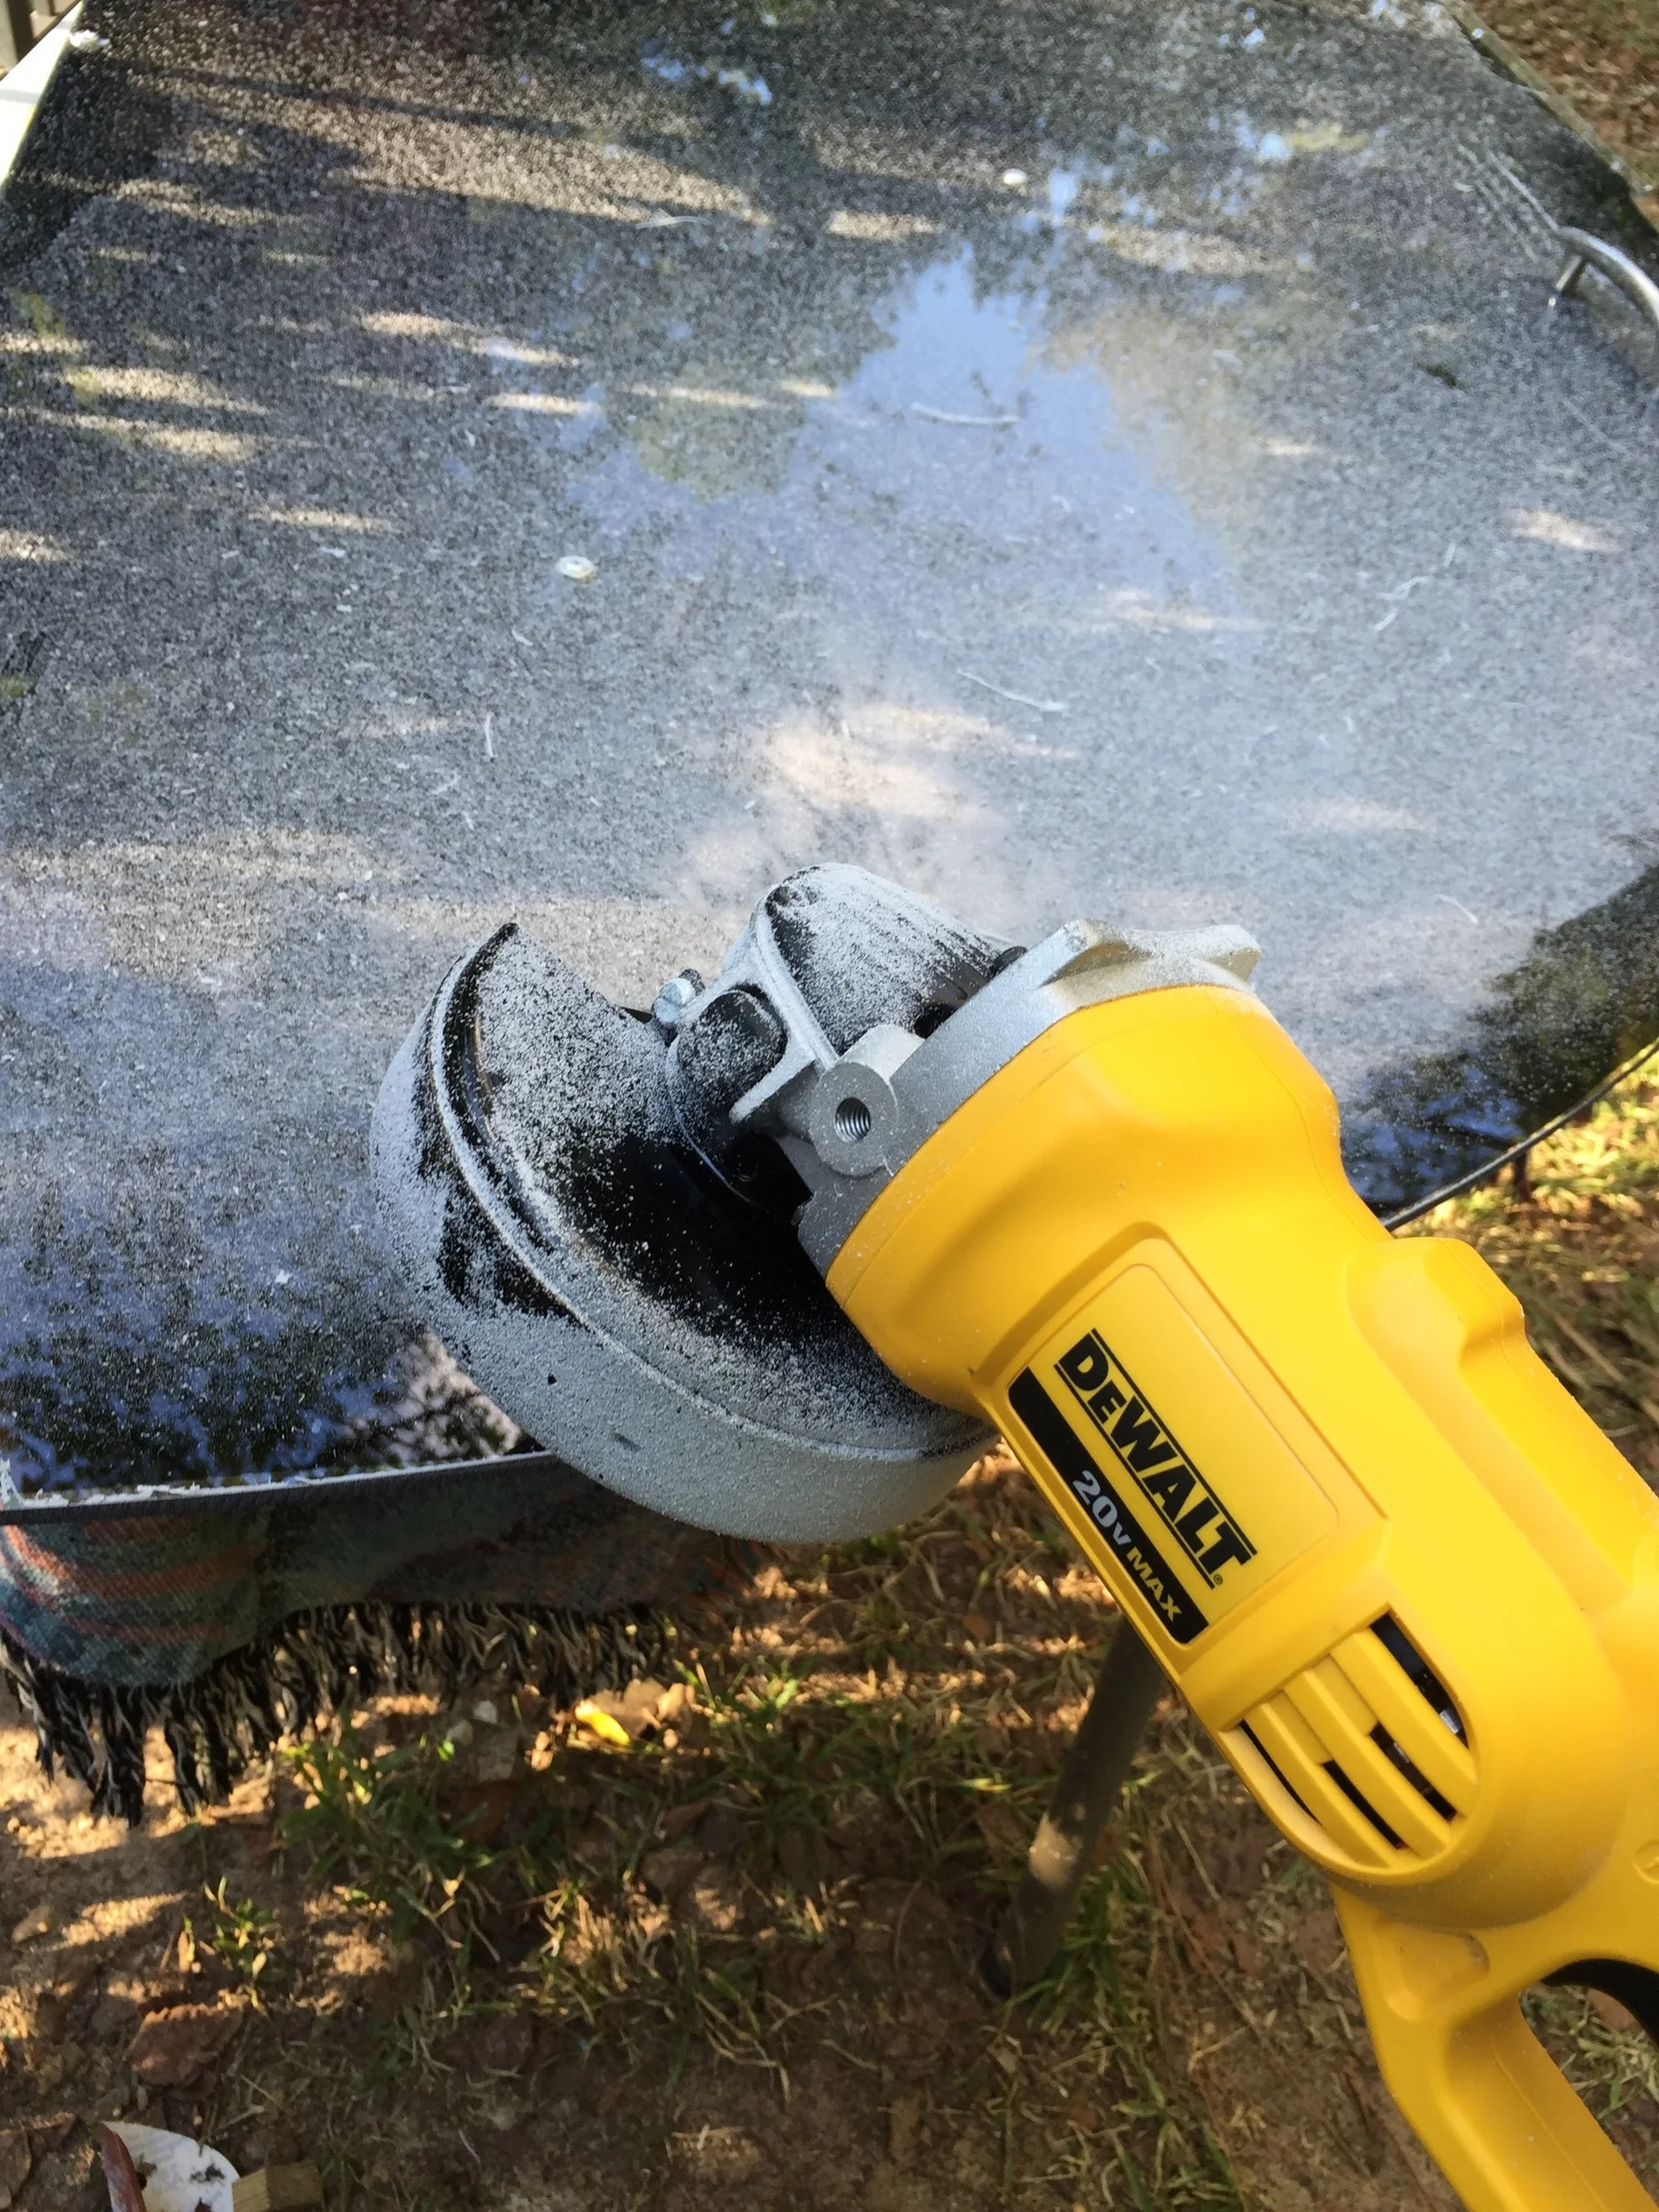
Using a grinder with a sand wheel attachment, I made final trims to the door.

The door was mounted to a braced-L shaped wooden frame that is hinged to the cabinet. A shower handle is the door handle and a magnet holds the door shut.

Using parts from the shipping crate, I fashioned uprights to act like as a painting stand.

For the outside shell, I applied 2 very light coats of Latex Acrylic Sherwin Williams Paint + Primer with an air sprayer, followed for 2 more heavy coats with light sanding of small runs and drips between each coat. I finished with one more light coat.
For the inside, I applied 2 light coats of Latex Acrylic Behr Silver Screen Paint + Primer with an air sprayer and 3 medium-heavy coats with sanding of raised areas between each coat.

Final Parts List and Cost
(not including prototype / failed attempts, PVC, balloons, fiberglass, etc)
1x ~69in diameter dome @ $700/ea
3x 4"x8" sheets of 1/2" plywood @ $24/ea
- I had these cut down in to 2" x 4" sheets at the store, so they would fit in my car :|
12x 3"x1"x8' boards @ $3/ea
- these are actually 2 1/2" by 3/4" inch x 8 ft. I don't know the reasoning for the advertised vs actual difference, seems like shenanigans to my non-carpenter self.
1x 4"x8" sheet of 3/4: plywood at $29/eac
3x 2"x4" wall studs at @ $3/ea
13x 'hardboard' paneling @ $6/ea
3x Gallons of Paint (Black, Grey, Silver Screen) @ $28/ea
1x Quart of Paint (Light Grey for Trim) @ $12/ea
1x Rubber Floor Mat @ $16/ea
1x Polycarbonate Sheet (for door) @ $75/each
1x Spherical Mirror @ $27/each
1x Car Seat @ $35/each (salvage yard, from 2008 Eclipse)
1x Optoma HD65 Projector @ $200 (used)
1x Klipsch ProMedia 2.1 Computer Speakers @ $50 (used)
Various Hardware: Screws, Hinges, Door Handle: $25
Total Build Cost: $1370
(not including failed attempts with balloons and tools!) :)
Tools Used
Skil Miter Saw
Dewalt Skill Saw,
Dewalt Jig Saw,
Dewalt Drill/ Screwdriver
Tape Measure(s) of various ilk
Cobalt Paint Sprayer (and air compressor)
Lots of Google for circle and triangle math
My rum-soaked brain
Next Steps & Improvements
The Mirror
I'm still experimenting with various mirrors from Amazon and other sources. Paul's site mentions that you need a first-surface-mirror to improve quality of the image. I tried a polished stainless steel mirror but it went pretty poorly. Right now we are using a low-cost 18" acrylic mirror - it is good enough to get us started.
The Projector
Today, I'm using an Optoma HD65 Projector that was a Craigslist find.I love Optoma projectors, their lamp costs are reasonable and they perform very well. This projector, at 720p and 1600 lumen, I could see upgrading to a higher resolution and brighter model in the future.
Seat - Dome Distance
As it sits, with the mirror at your feet, your feet can get into the projection image during gameplay. It's a challenge because you don't want to sit too far out of the dome and lose the immersive experience but too close and you interfere with the mirror. I will continue to tweak the cabinet depth or I will make some additional attempts to figure out a low-cost fisheye projection rigging.
Controls
I have a plan to create control pedestals for different types of games that you take in and out of the dome. One for racing, one for flight, etc.
Fans
The floor surround beneath the dome has room to add fans. I will be adding these because I could see the dome getting hot in summer months and heavy use.
Conclusion
As a parent, you know the whole deal about how Christmas morning after all of the presents are open, the subdued frustration associated with the fact that the kids are playing with the box instead of the toys.

Big dome wrap-around screen? Nope, my son is looking at the Wii-U pad instead :)
After the build-up and excitement and effort, when I peeked in to the dome to see my son just staring at the Wii-Pad in a comfy new seat, instead of looking at the gigantic dome in front of him, I had to just laugh.
Yep. That's what happens. :)