
So... two July's ago, I had this machine set up from SFGE and Marshall comes over and drops a 62,700,000 point game on the board. I had it set pretty hard but there was some scandal from those that witnessed the game that maybe one of the multi-balls lasted an unnatural time. Hard to say since this game offers the ability to extend multiballs through spider wheel awards but I always took the score seriously as the one to beat.
Maybe too seriously...
For nearly two years at least twice a week, I go downstairs, put on some tunes and have a go at his score. Down to the point that I really didn't want to change the rubbers and swap the original pcb back in until after I beat that score.. After dozens of 50million point games and even one 60million, 96 million finally happened.
Game details:
3Ball Game. Earned an EB from the Bat ramp, another EB from the leaper mania. Finished the Stiff O Meter/ Monster Multiball twice and finished Spider Mania. The trick to the spider wheel I found is there is a bounce off the locked crate from the left flipper that usually deflects into the pops and dribbles into the spider hole. I also used the monster lab orbit shot as a spider hole technique. I think my GoPro battery died sometime after spider mania - will check in a bit. All this time I was focusing on Monster Multiball but Spider Mania - is where the points really happened.
Just glad to knock that one off the OCD/ bucket list 😜
Now, time to freshen the rubbers and put the WMS PCB back in..
Labor Day Pinball Maintenance
Didn't have the inclination to fight boat-ramp traffic on the last summer beach holiday of the year, so ended up spending Labor Day weekend fixing things (and cooking things) instead of enjoying the beaches and water.
Instead, decided to tackle a few projects in the gameroom that I've been putting off.
LED OCD & GI OCD
For a game that I know I'll be keeping for awhile - LED OCD is something I'm inclined to add to games but the install process isn't my favorite task.
LED OCD and GI OCD essentially try to make LEDs, less .. umm.. LED-y. I'm sure they explain it better over at: ledocd.com
Ultimately, they give you finer control over the LEDs in the game by wedging a micro-controller between the original controlled lamps and the lamp matrix harnesses. The LED OCD micro-controllers endeavor to smooth insert animations to more closely resemble the inter-fade in incandescent bulb animations. The GI OCD board performs similarly for games where GI animations might be used. (TOTAN, Scared Stiff for instance)
They also tend to just make the LEDs less bright but in a good way.


One challenge to the install is actually fitting the board in the backbox so that: it doesn't ground against anything, it doesn't get in the way of the speaker panel but can still be reasonably close for the factory harness to be diverted to the new board.

GI LCD adds a few more parts, including a breakout board.

GI OCD also complicates the mounting dilemma a little, the breakout board doesn't really have enough lead cable to mount anywhere. They accounted for that by removing the mounting posts and including a large tie wrap, I suppose the intention is to tie-wrap it to a cable bundle. Oh, OCD-named product, this disturbs my wire management OCD. :)
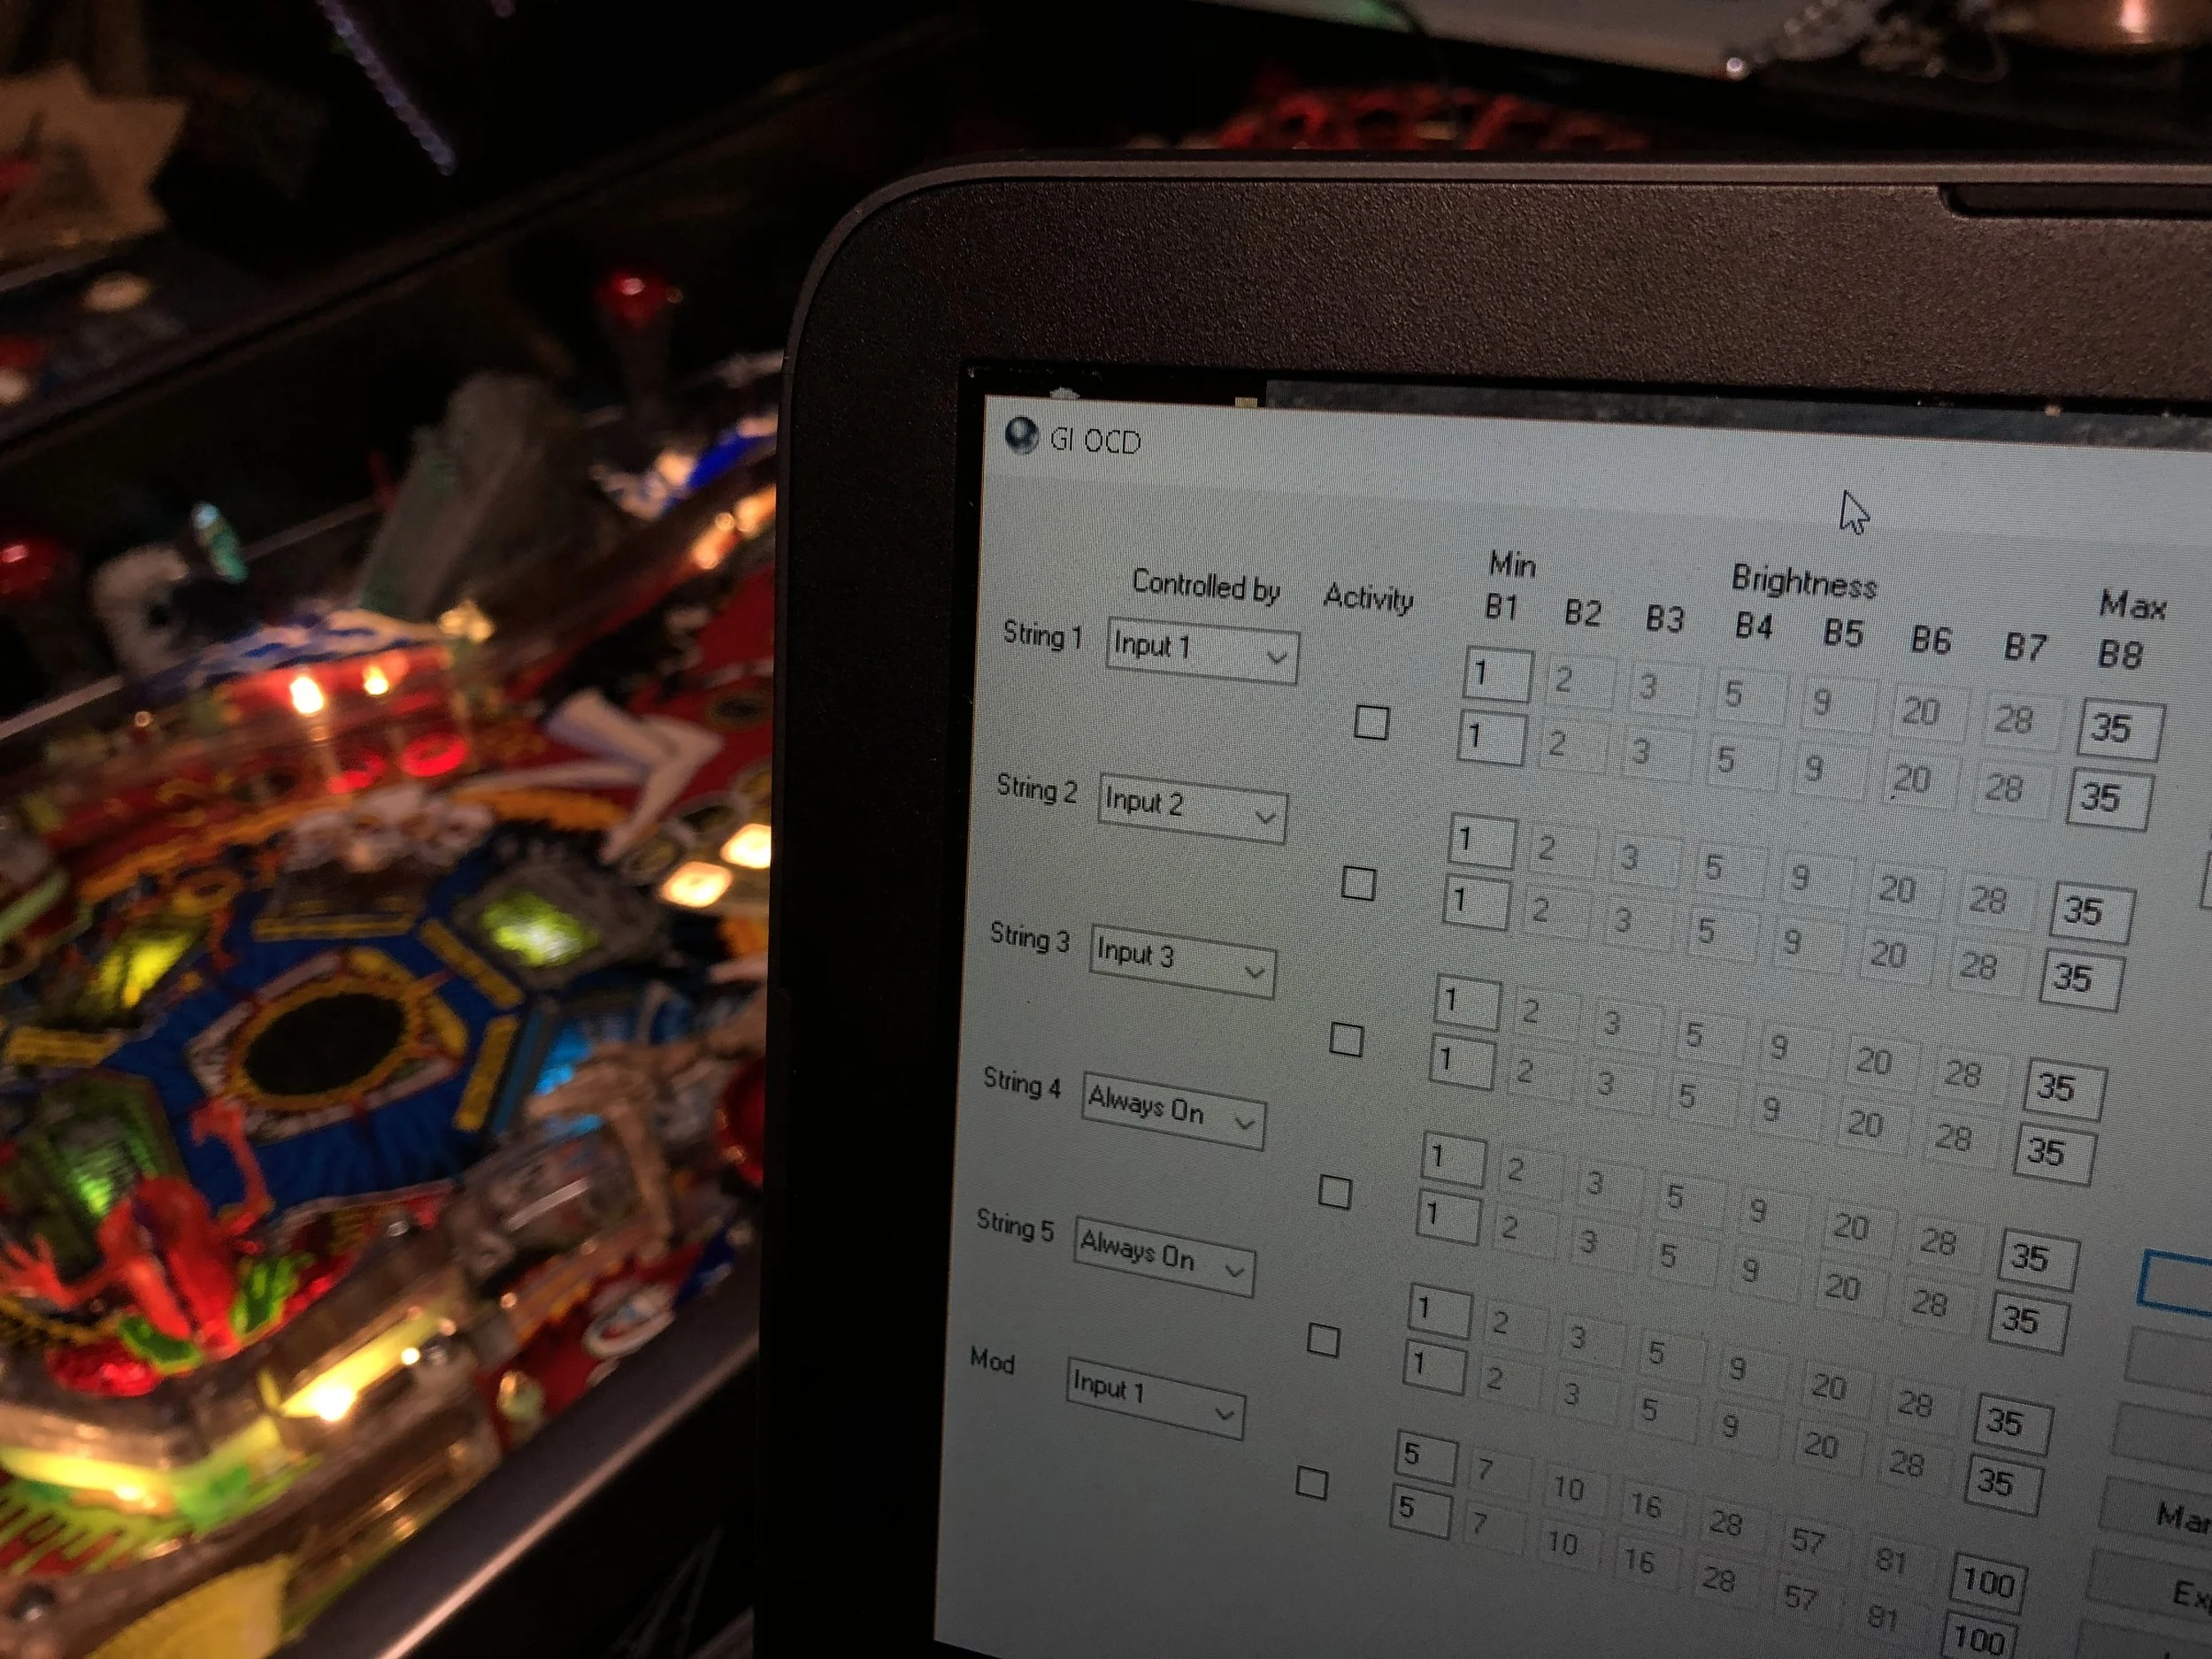
GI OCD really only seems to come in handy if you have a game with overly bright GI that needs to be brought into check or if the game has fade effects in the GI as part of the light show. I'm not really sensing a tremendous difference in the GI board on Scared Stiff, as I did in Tales of the Arabian Nights. Still, the extra control to dim them is kinda nice.
The video shows the smoothing on the insert animations and the GI adjustments. Admittedly this quick clip looks darker than it really is in person but I also intended for this game to be a bit darker than normal for theme purposes.
Monster Bash Ramps
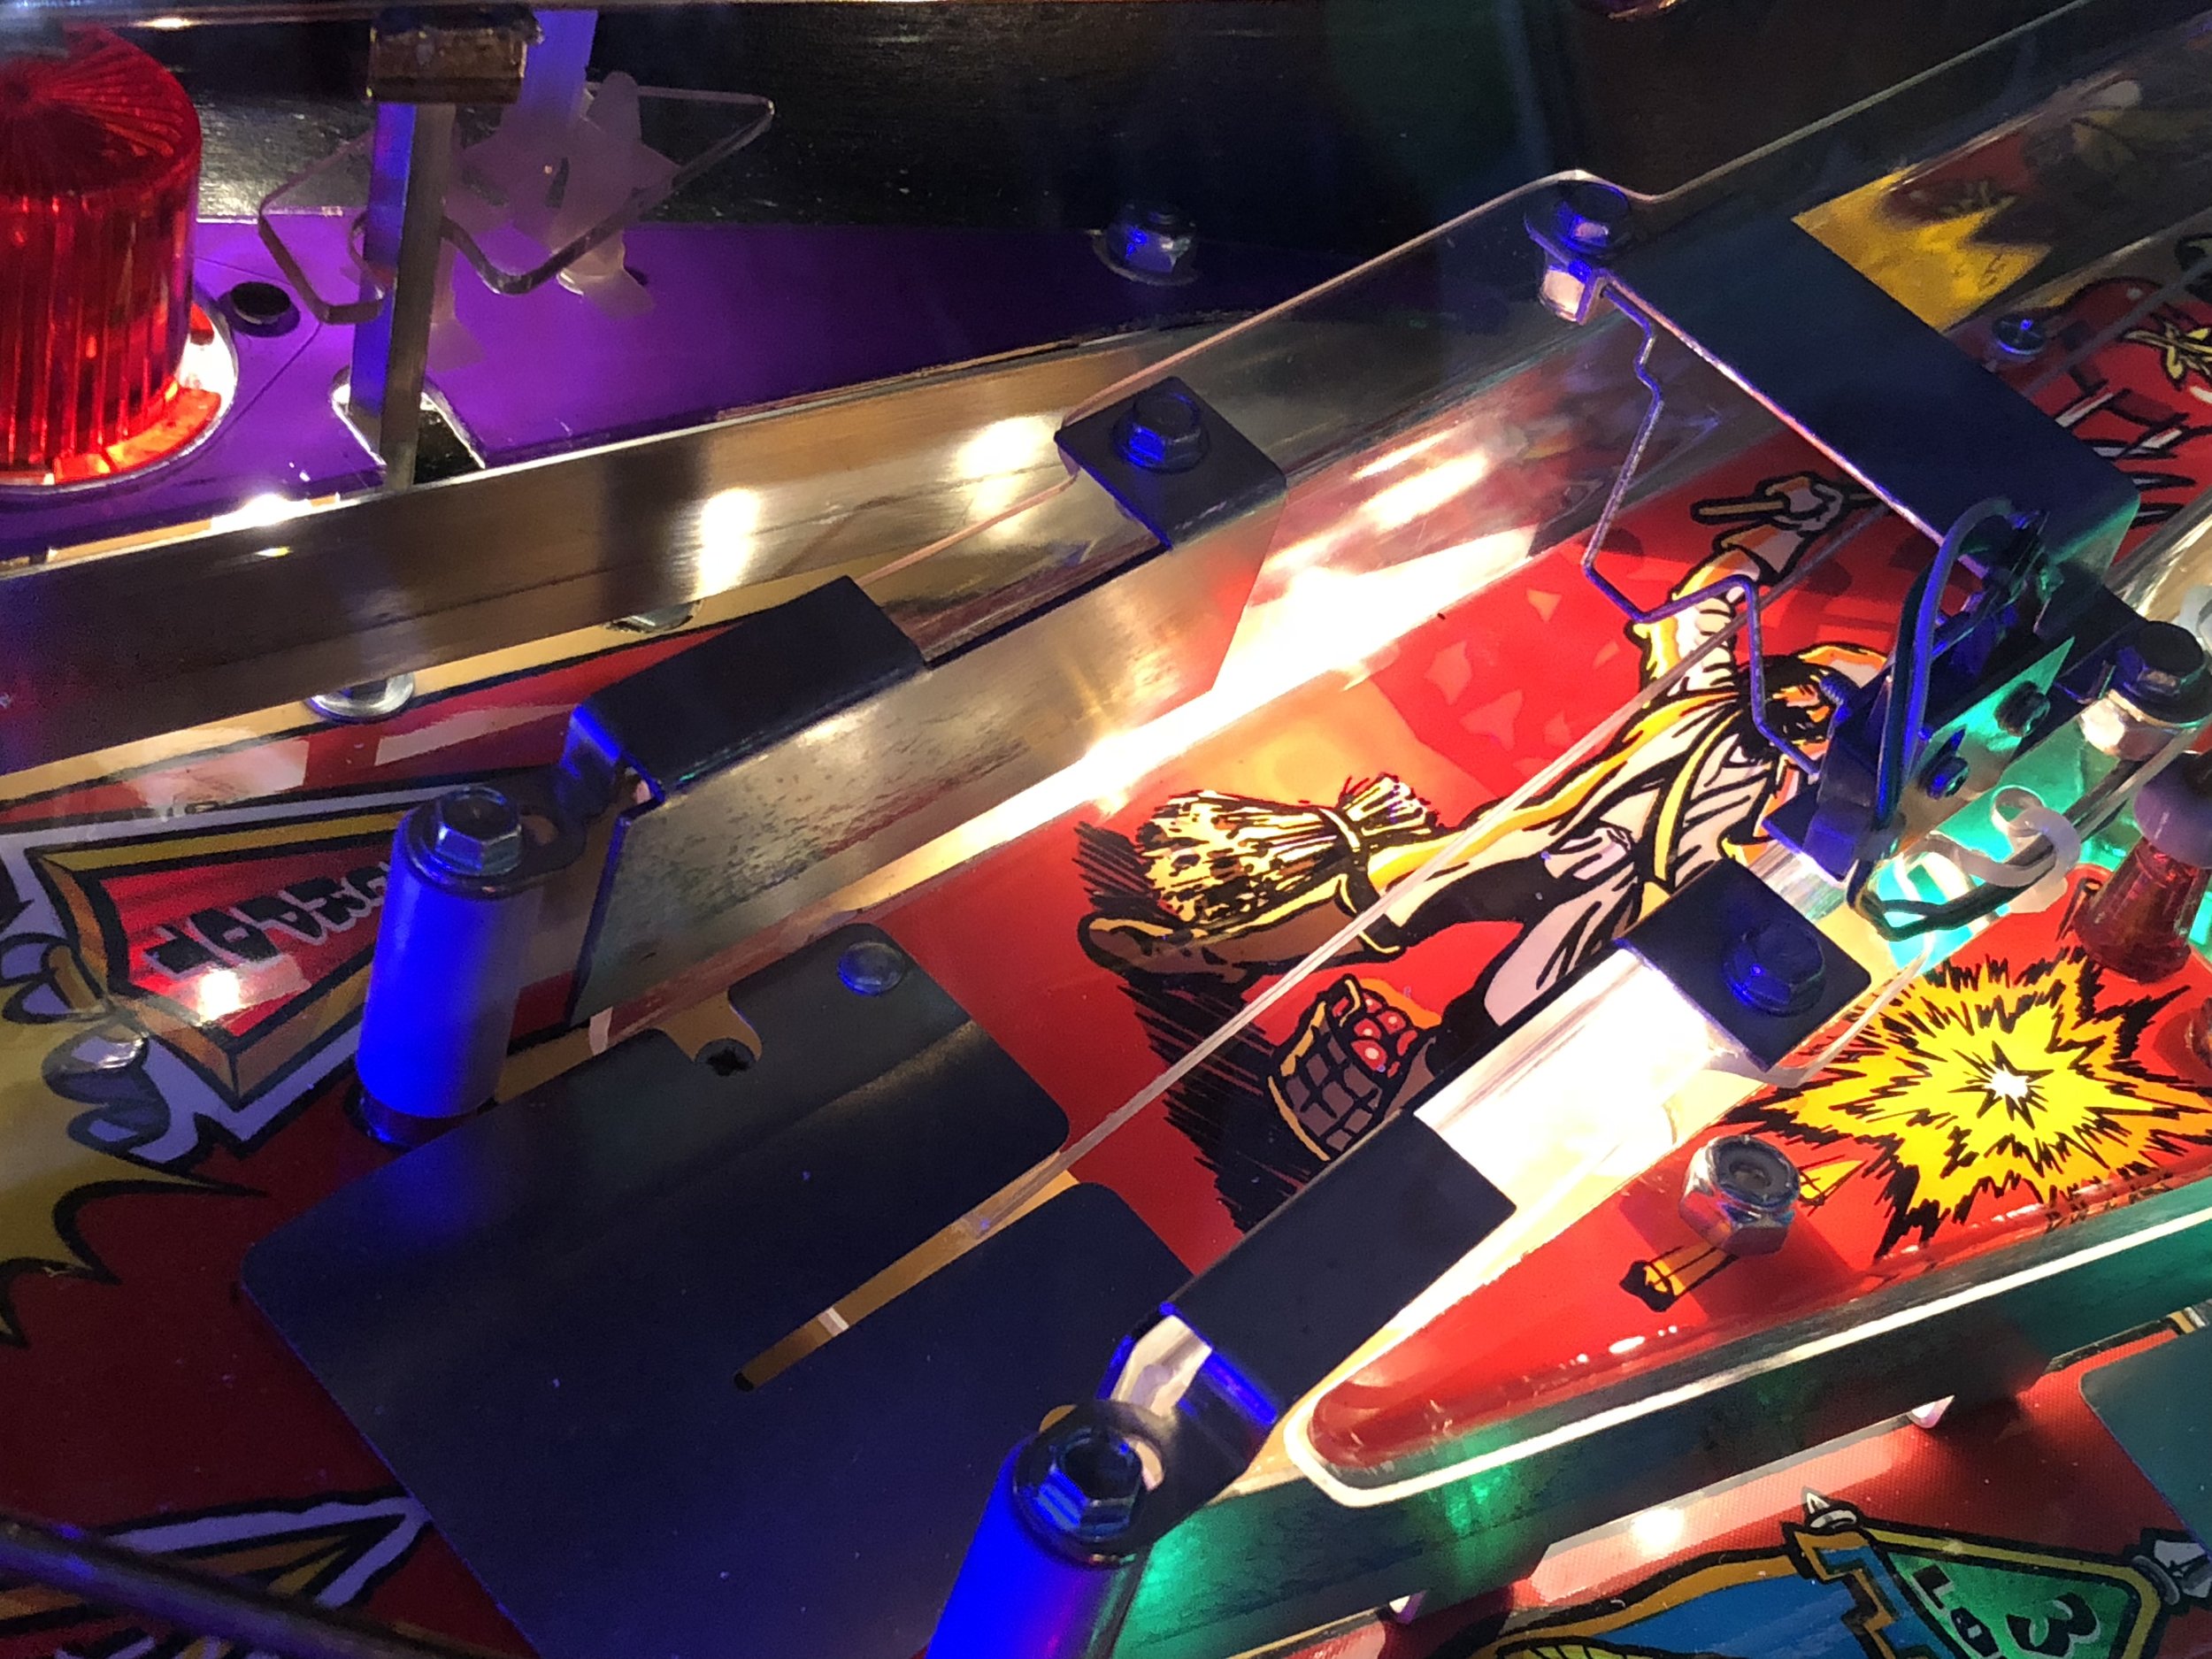
I also took the time over labor day to replace the ramps in Medieval Madness. A task that took me, entirely too long :)
Medieval Madness's ramps were originally flame-polished to a bubbling crisp by a well-meaning previous owner.


The end result is nice though, no more burned ramps. Although the new left ramp has a screw instead of a rivet in the plastic diverter. I didn't have an appropriately sized rivet on hand but I do plan to address that.
Speaking of that plastic diverter on the ramps - ever notice them on Medieval? I never noticed them playing on Pinball Arcade on Steam or at the Pinball Hall of Fame in Vegas. I guess the purpose is to prevent ramp-rejects from STDM? Cool idea, I wonder if this came out of initial testing from the prototype batch in March 1997 or was part of the original design? If anyone knows the story, I'd like to know!
Scared Stiff Progress
Scared Stiff cleaning and mods are coming along..
Shopping List
ColorDMD: http://shop.colordmd.com/colordmd-replacement-display-for-scared-stiff-pinball-machine/
Pinball Life Lit Flipper Buttons: https://www.pinballlife.com/index.php?p=product&id=3760
Mind Orbits / Cointaker Slow Color Changing Shooter: https://cointaker.com/products/led-lit-shooter-rods
New Lockdown Bar (Pinball life "Seconds"): https://www.pinballlife.com/index.php?p=product&id=2061
New Pinball Glass: https://www.pinballlife.com/index.php?p=product&id=768
New Bat Ramp (LSOG): https://littleshopofgames.com/product/scared-stiff-bat-ramp-with-decal-and-hardware-a-20754/
New Bony Beast Ramp (LSOG): https://littleshopofgames.com/product/scared-stiff-boney-beast-ramp/
New Crate Board: https://littleshopofgames.com/product/scared-stiff-crate-board-ssc001
New Dancing Boogies: https://littleshopofgames.com/product/boogie-man-for-scared-stiff-eatpm/
Robert Winter Dancing Boogie Extension Arms: http://www.robertwinter.com/pinball/ss/kitbm.html
Robert Winter Skull Pile LED Eyes: http://www.robertwinter.com/pinball/ss/kitled.html
Scared Stiff Slingshot Plastics: https://bit.ly/2KIpqh1
Clear Warm White Comet LED: http://www.cometpinball.com/product-p/1smd5050.htm
Flame Comet LED: http://www.cometpinball.com/product-p/fire.htm
RGB Color Changer: https://cointaker.com/products/ct-color-changer
Clear Warm White Retro Cointaker LED: https://cointaker.com/products/44-47-retro
Titan Pinball Glow Rubber Kit: https://www.titanpinball.com/kits/index.php/view/id/126
LED OCD Controller: http://ledocd.com/cart/index.php?main_page=product_info&cPath=1&products_id=22
GI OCD Controller: http://ledocd.com/cart/index.php?main_page=product_info&cPath=1&products_id=7
Power Splitter: https://www.pinballlife.com/index.php?p=product&id=4234
Power Tap: https://www.pinballlife.com/index.php?p=product&id=5037
LED Strip with Waterproof Coating: https://amzn.to/2AZFoDO

I tried to "warm up" the tone of the pin. It already had LEDs but many were on the cool side of the spectrum. I tried both the Cointaker Warm Retro and the Comet Warm 1SMD and found them to be identical to my eye. Both are still a little brighter and blown out than I'd prefer. I have a GI OCD kit to put in the pin, which will give me better control over the GI brightness. Contemplated putting incandescents back in the GI, even. So far, I don't hate it but I'm not 100% satisfied. "Needs something". The flame flicker bulbs maybe interspersed? It would be pricey and may not play well with GI animations in the game..
Custom Paint
My friend, Nathan provided some inspiration with his background in imagineering-level yard haunts. He showed me plastic skeletons that he had tea-stained and melted plastic to them to appear fleshy. Googling some resources I found these helpful:
https://www.instructables.com/id/How-to-Corpse-a-Skeleton-The-Quick-and-Dirty-Way-/
http://manningkrull.com/manningmakesstuff/making-plastic-bones-look-aged-dirty/
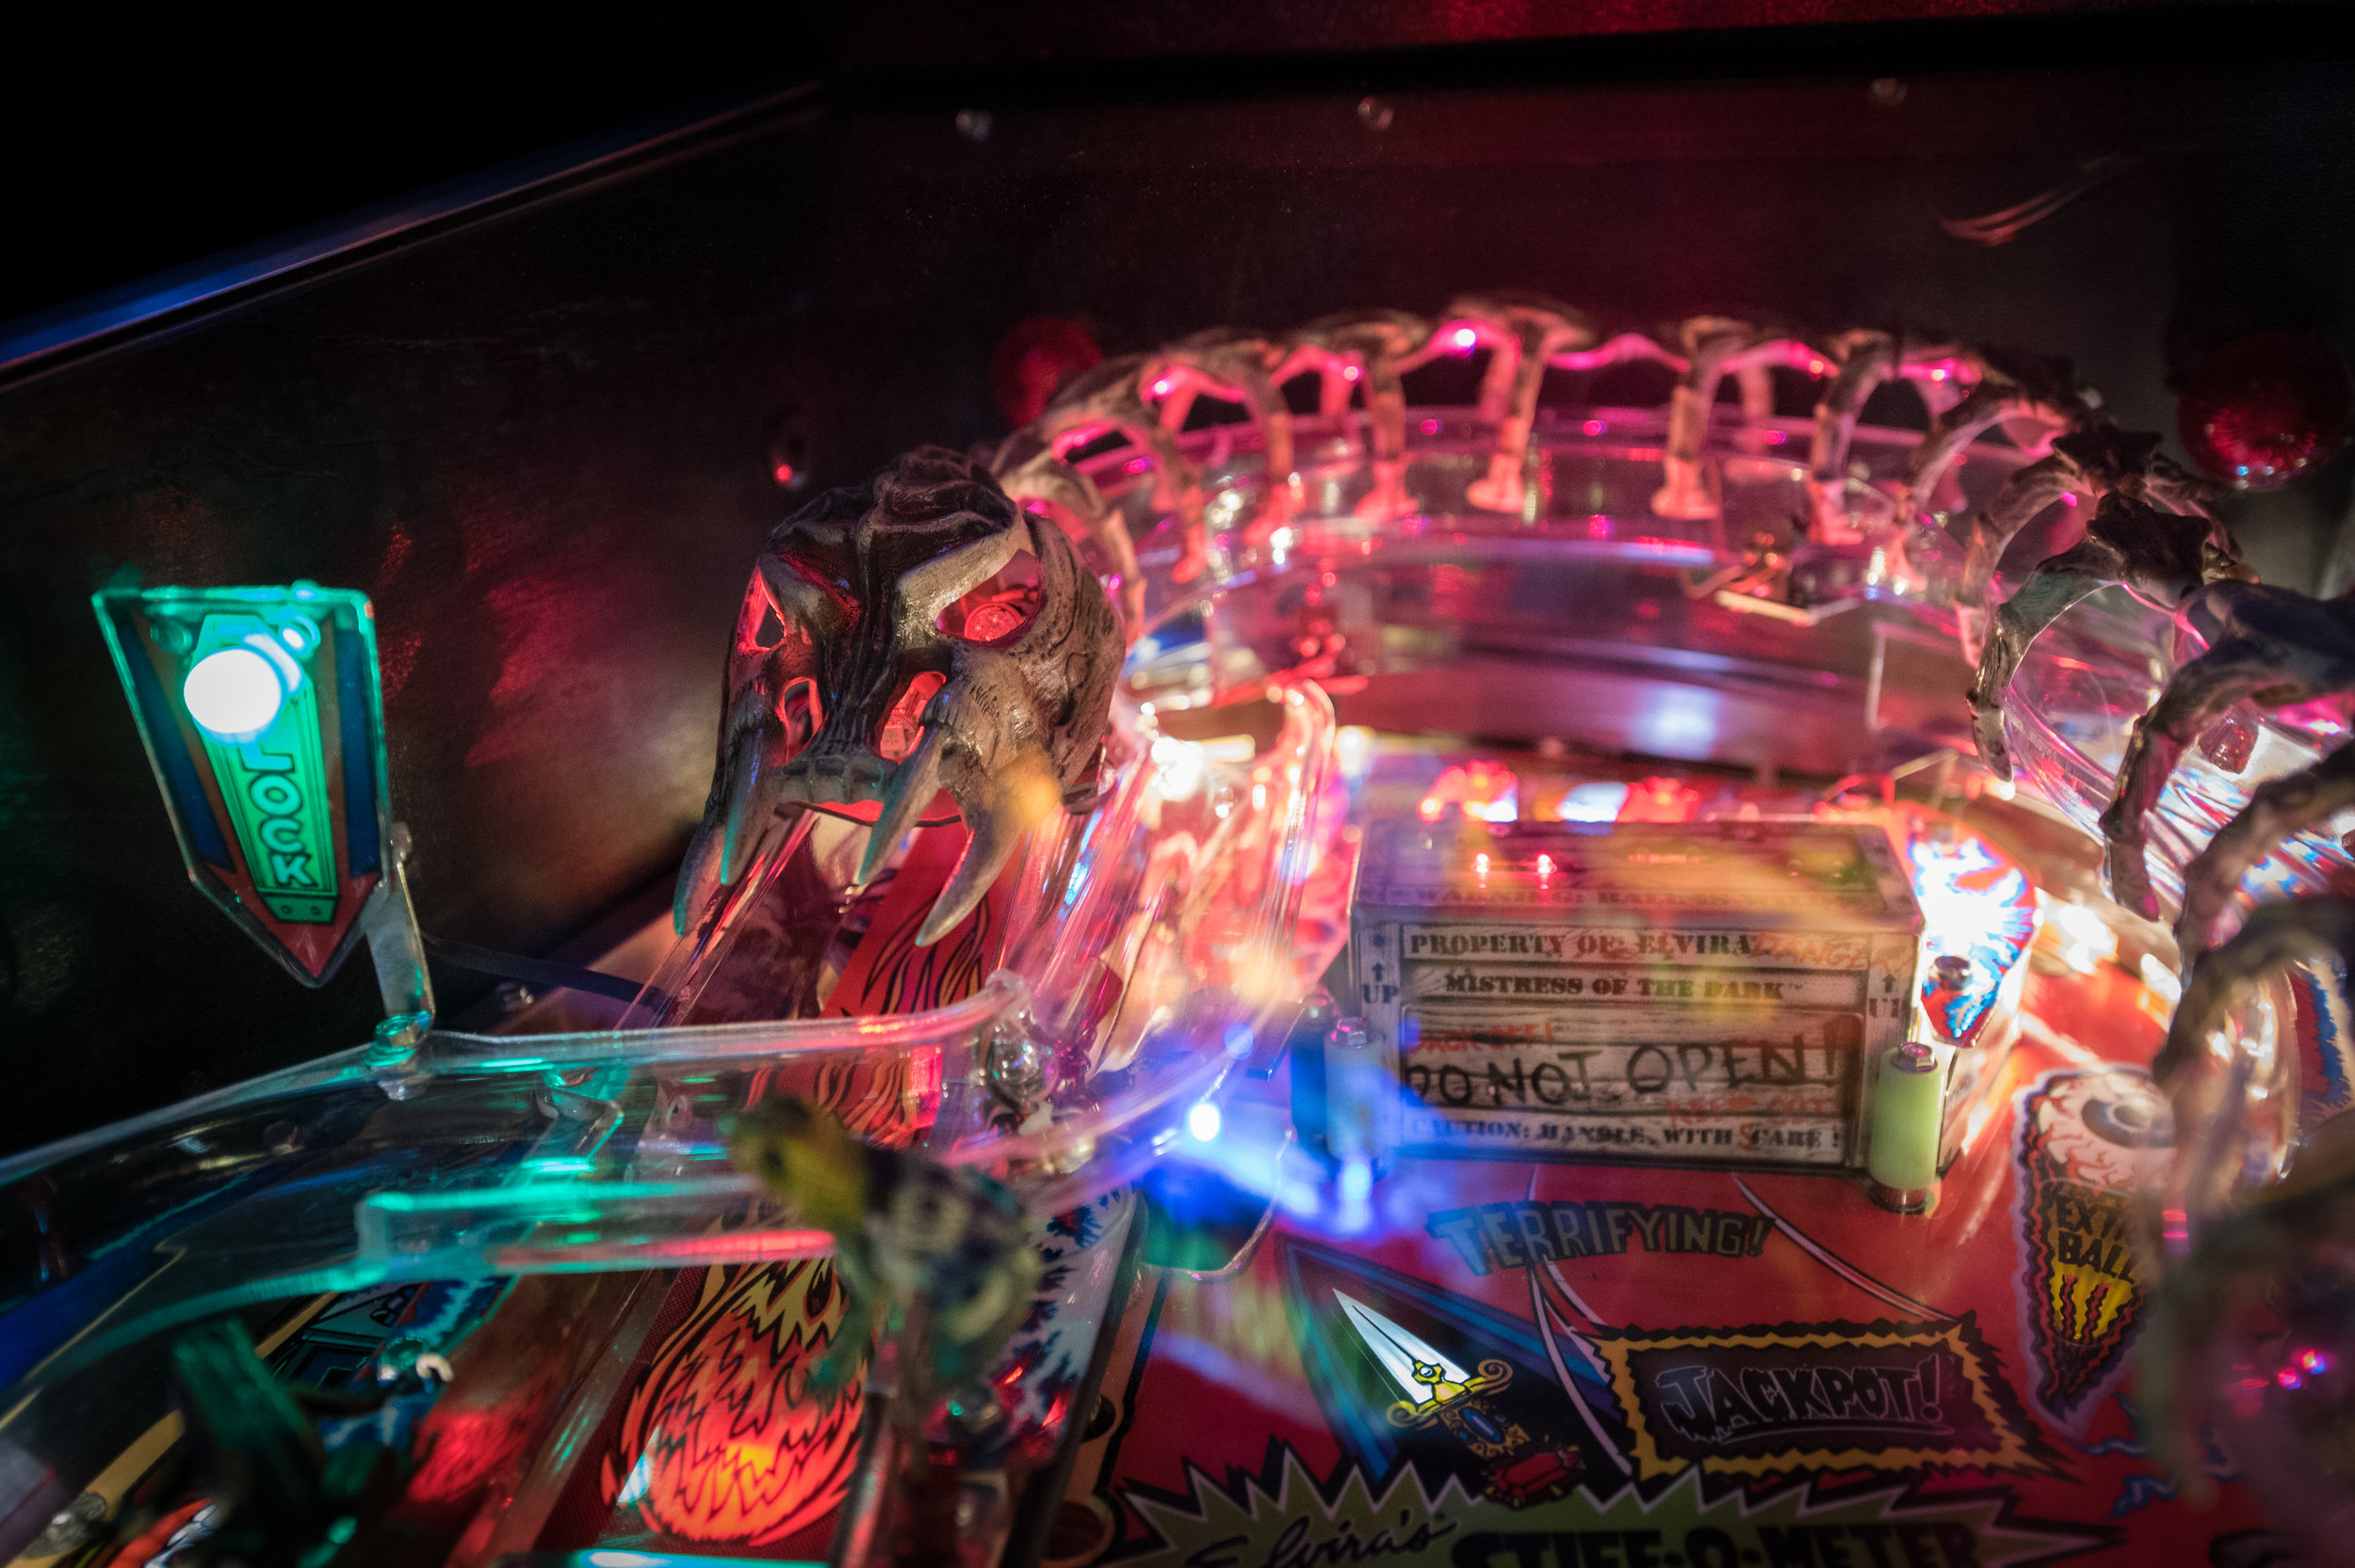


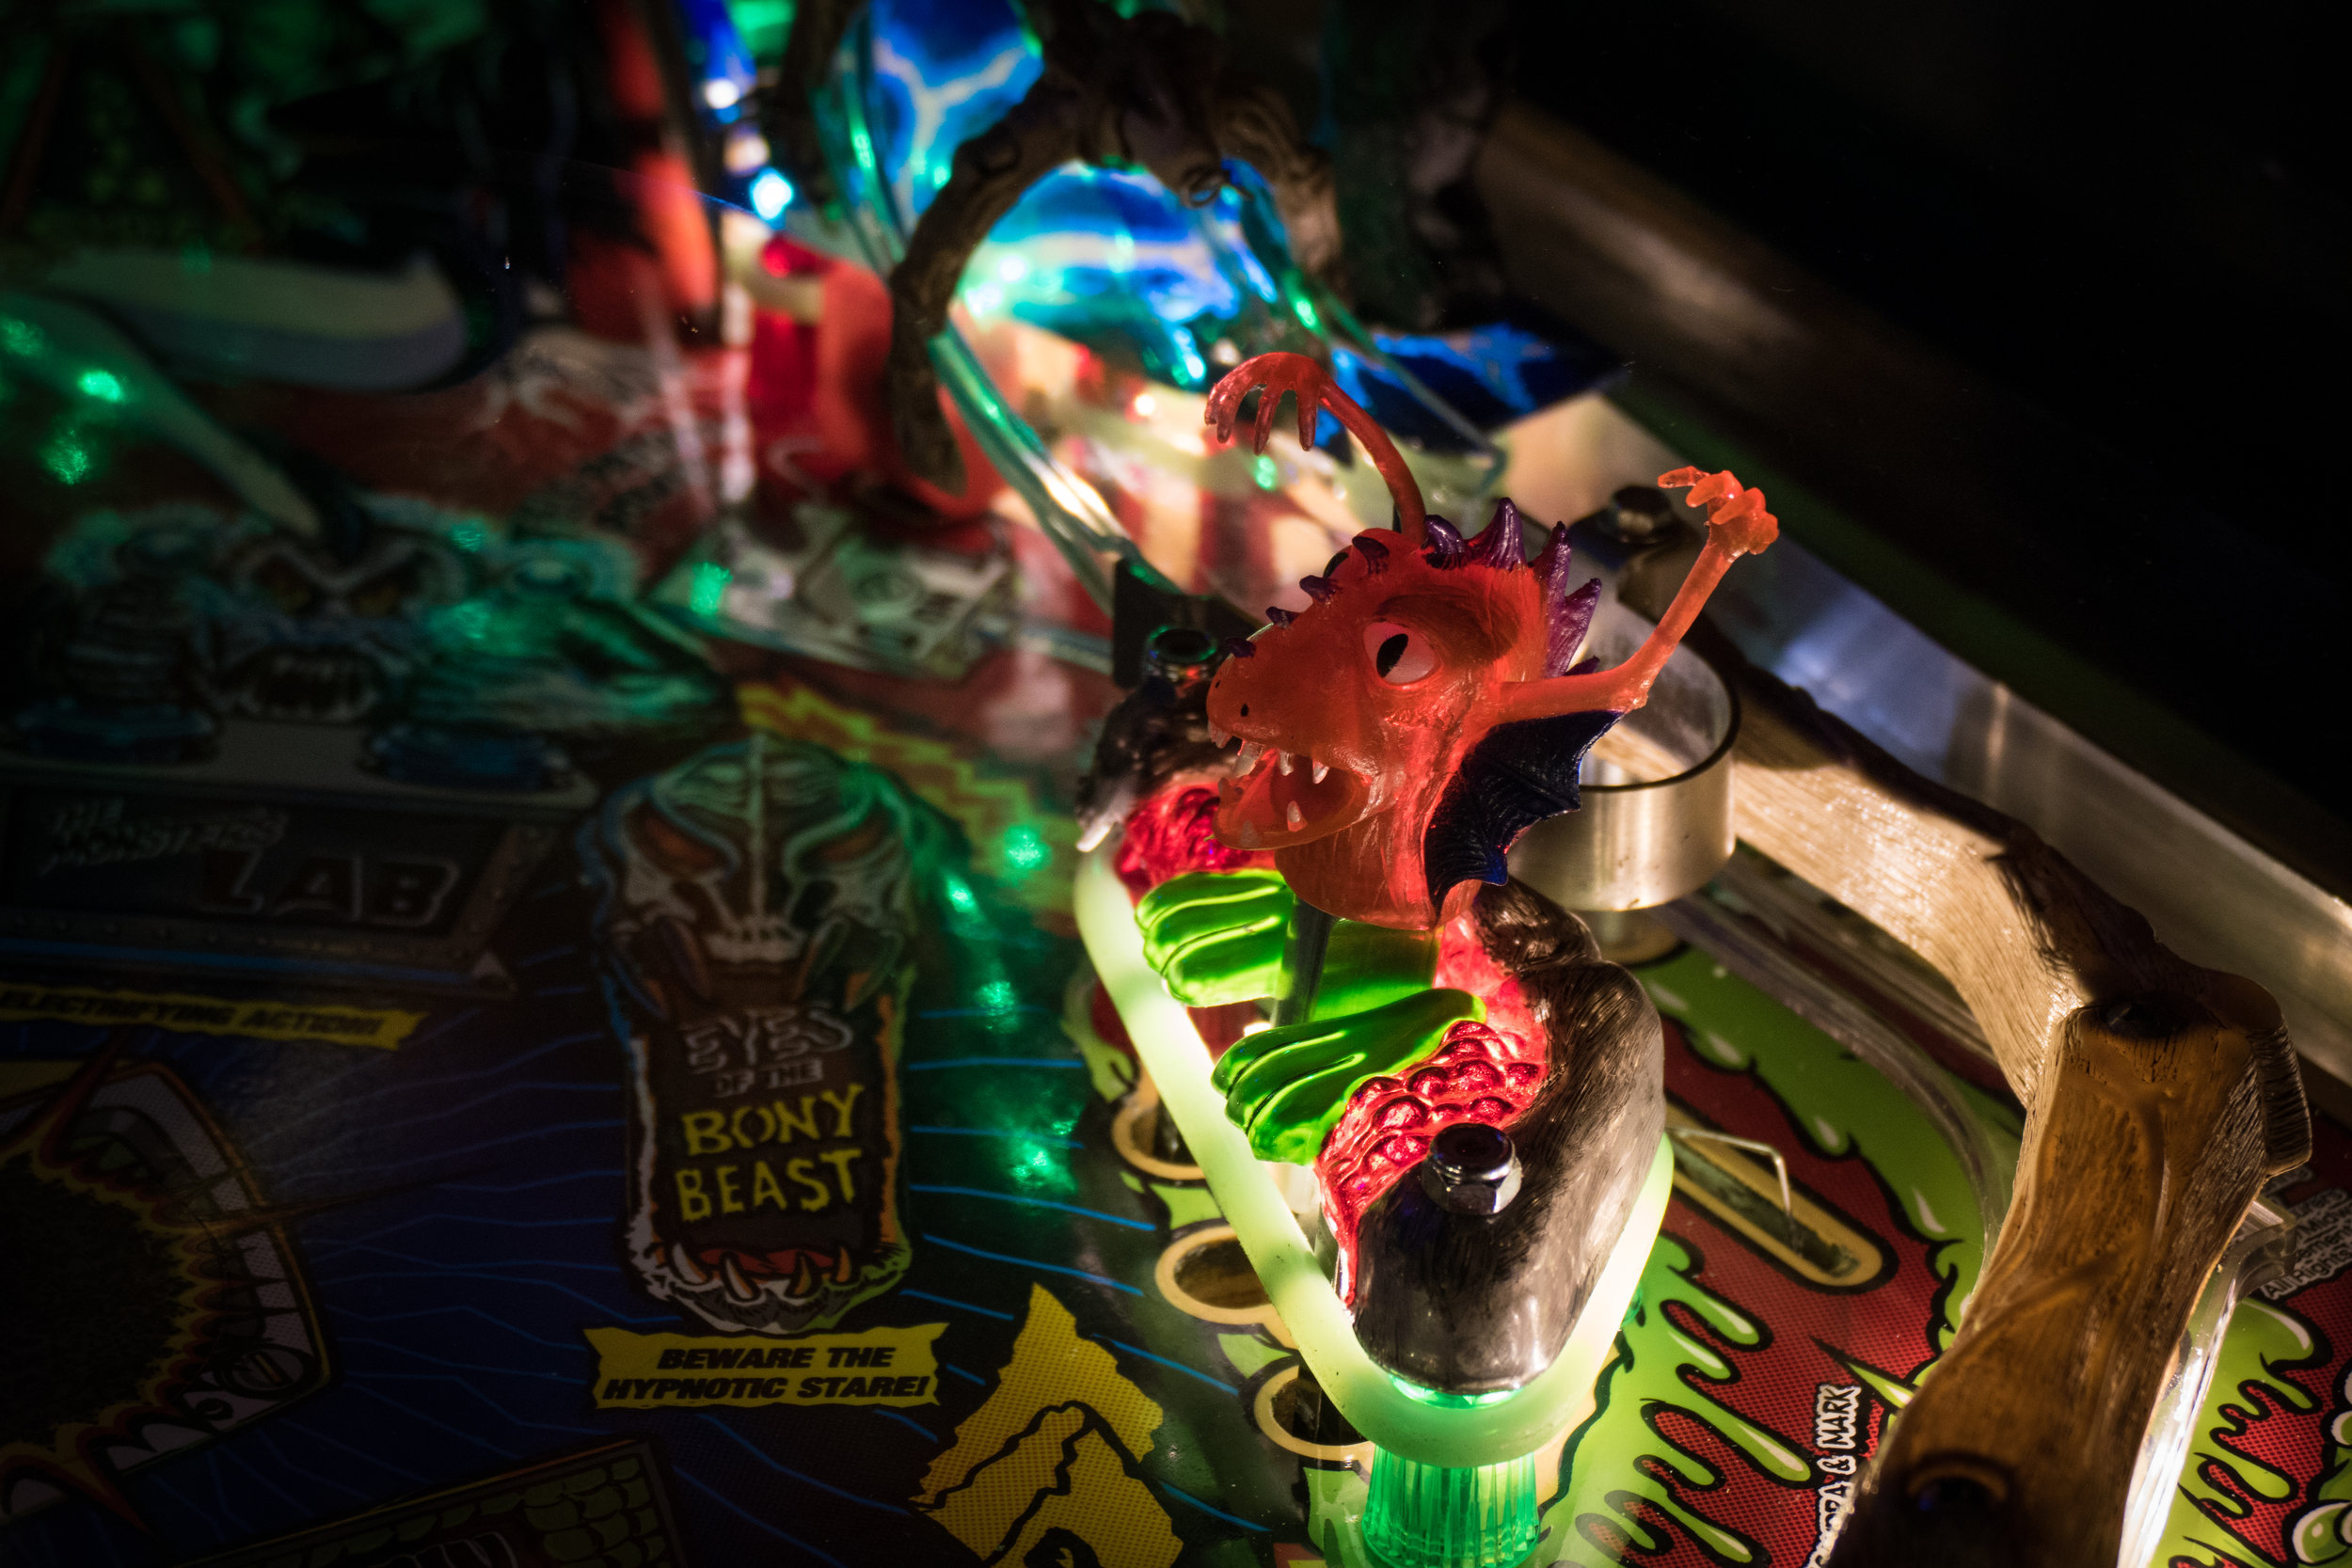
I re-strung the Bony Beast spine with thin picture-hanging wire and zip tied the LED strip at every vertebrae joint, pointing downward. Use the waterproof-type LED strips, they are more sturdy because of the plastic casing. I used Minwax Special Walnut Stain and a bristle brush. A light coating of spray urethane to seal in the stain.
Skull Pile
The game was wired for LED eyes in the Skull Pile plastic on the backboard but this was not included when the game shipped. A mountain of hot glue later, it is mounted and installed. I went a little overboard b/c the LED and wiring seem quite delicate and I don't want them moving.

Other Stuff

The coffin door was a little fidgety. The door pops open and the coffin inhabitant yells "boo!" and horizontally rotates to allow a ball to eject from beneath. It would often hang open after ejecting a ball. When another ball ejects while the door is open, it ejects the ball over the lane guides into the drain. I replaced the vertical hinge pin, straightened the horizontal hinge pin flaps and replaced the horizontal pin with a new one.
Finished it out with a color-changing LED spotlight on the sarcophogus face.

Clips
Addendum 2/18/2019 - Powering the LEDs on the beast ramp


Power from a DK Power Tap to an 8-way splitter and we power the LED controller from that splitter. (roughly 12v)
Wake me up when you're done
Many pinball podcasts and discussions have ruled out DMD games as being yesterday's titles. Light shows, Engaging sound and satisfying shots. That's what I look for in pinball.
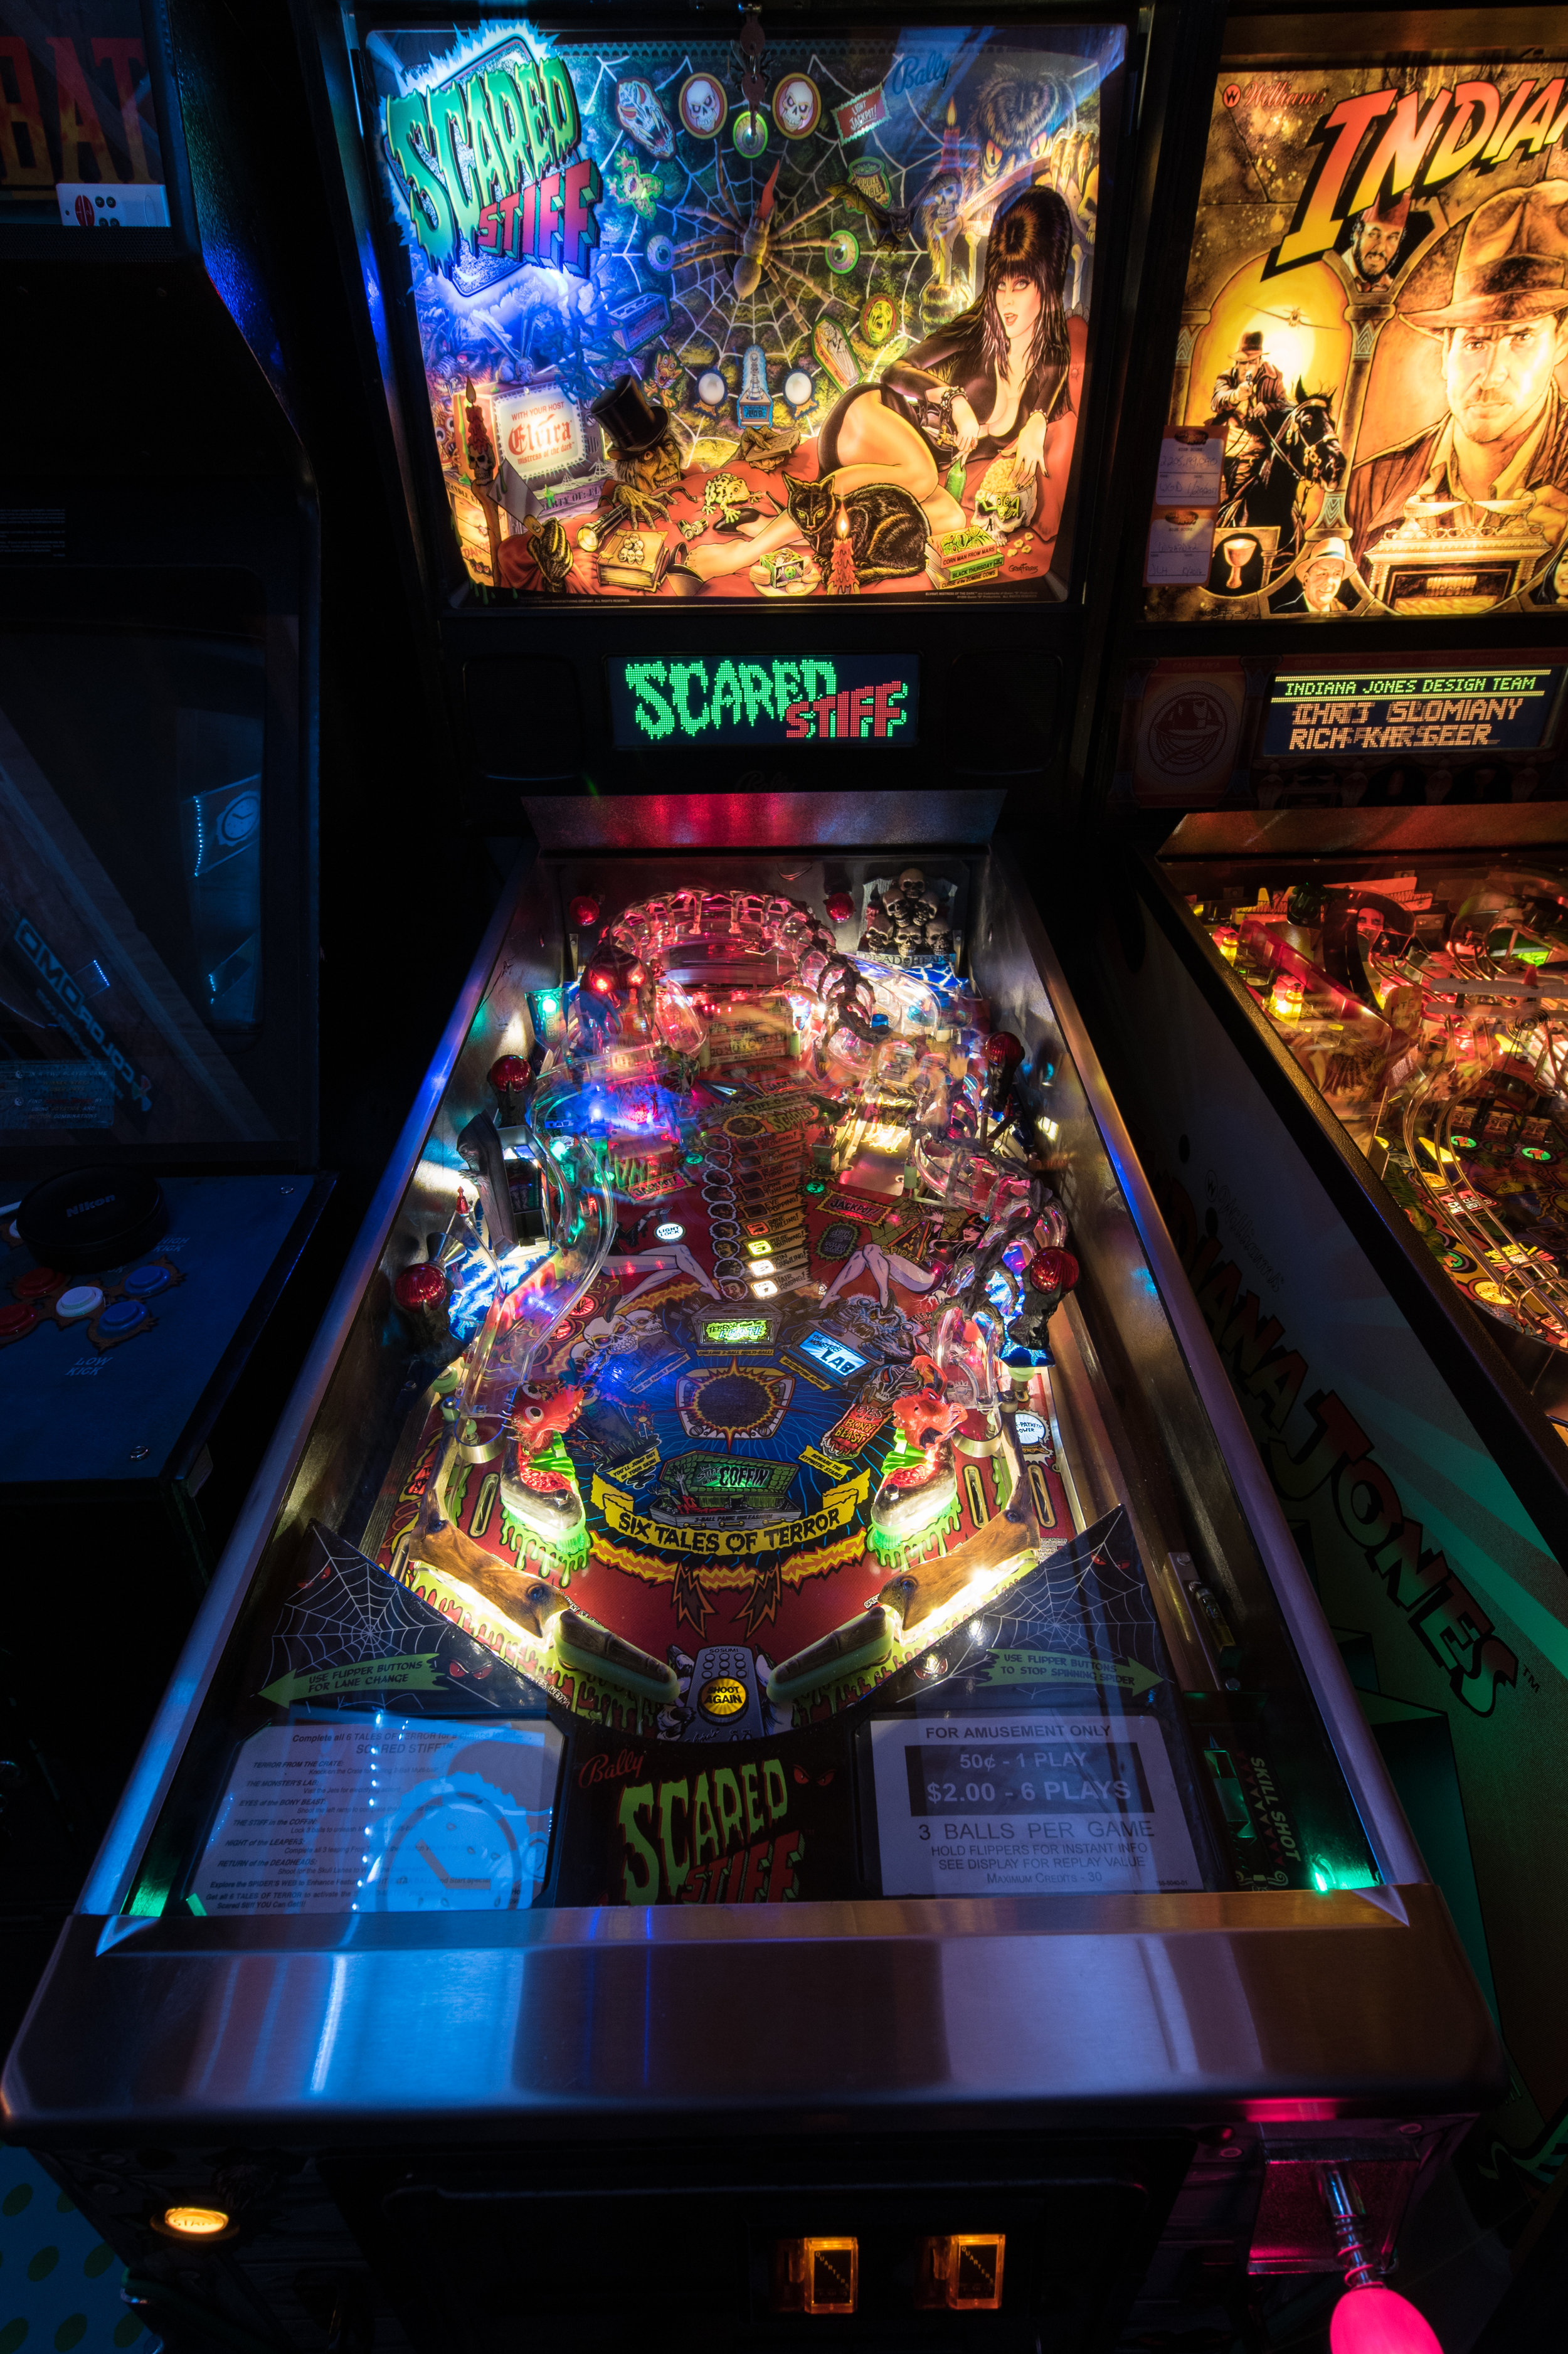
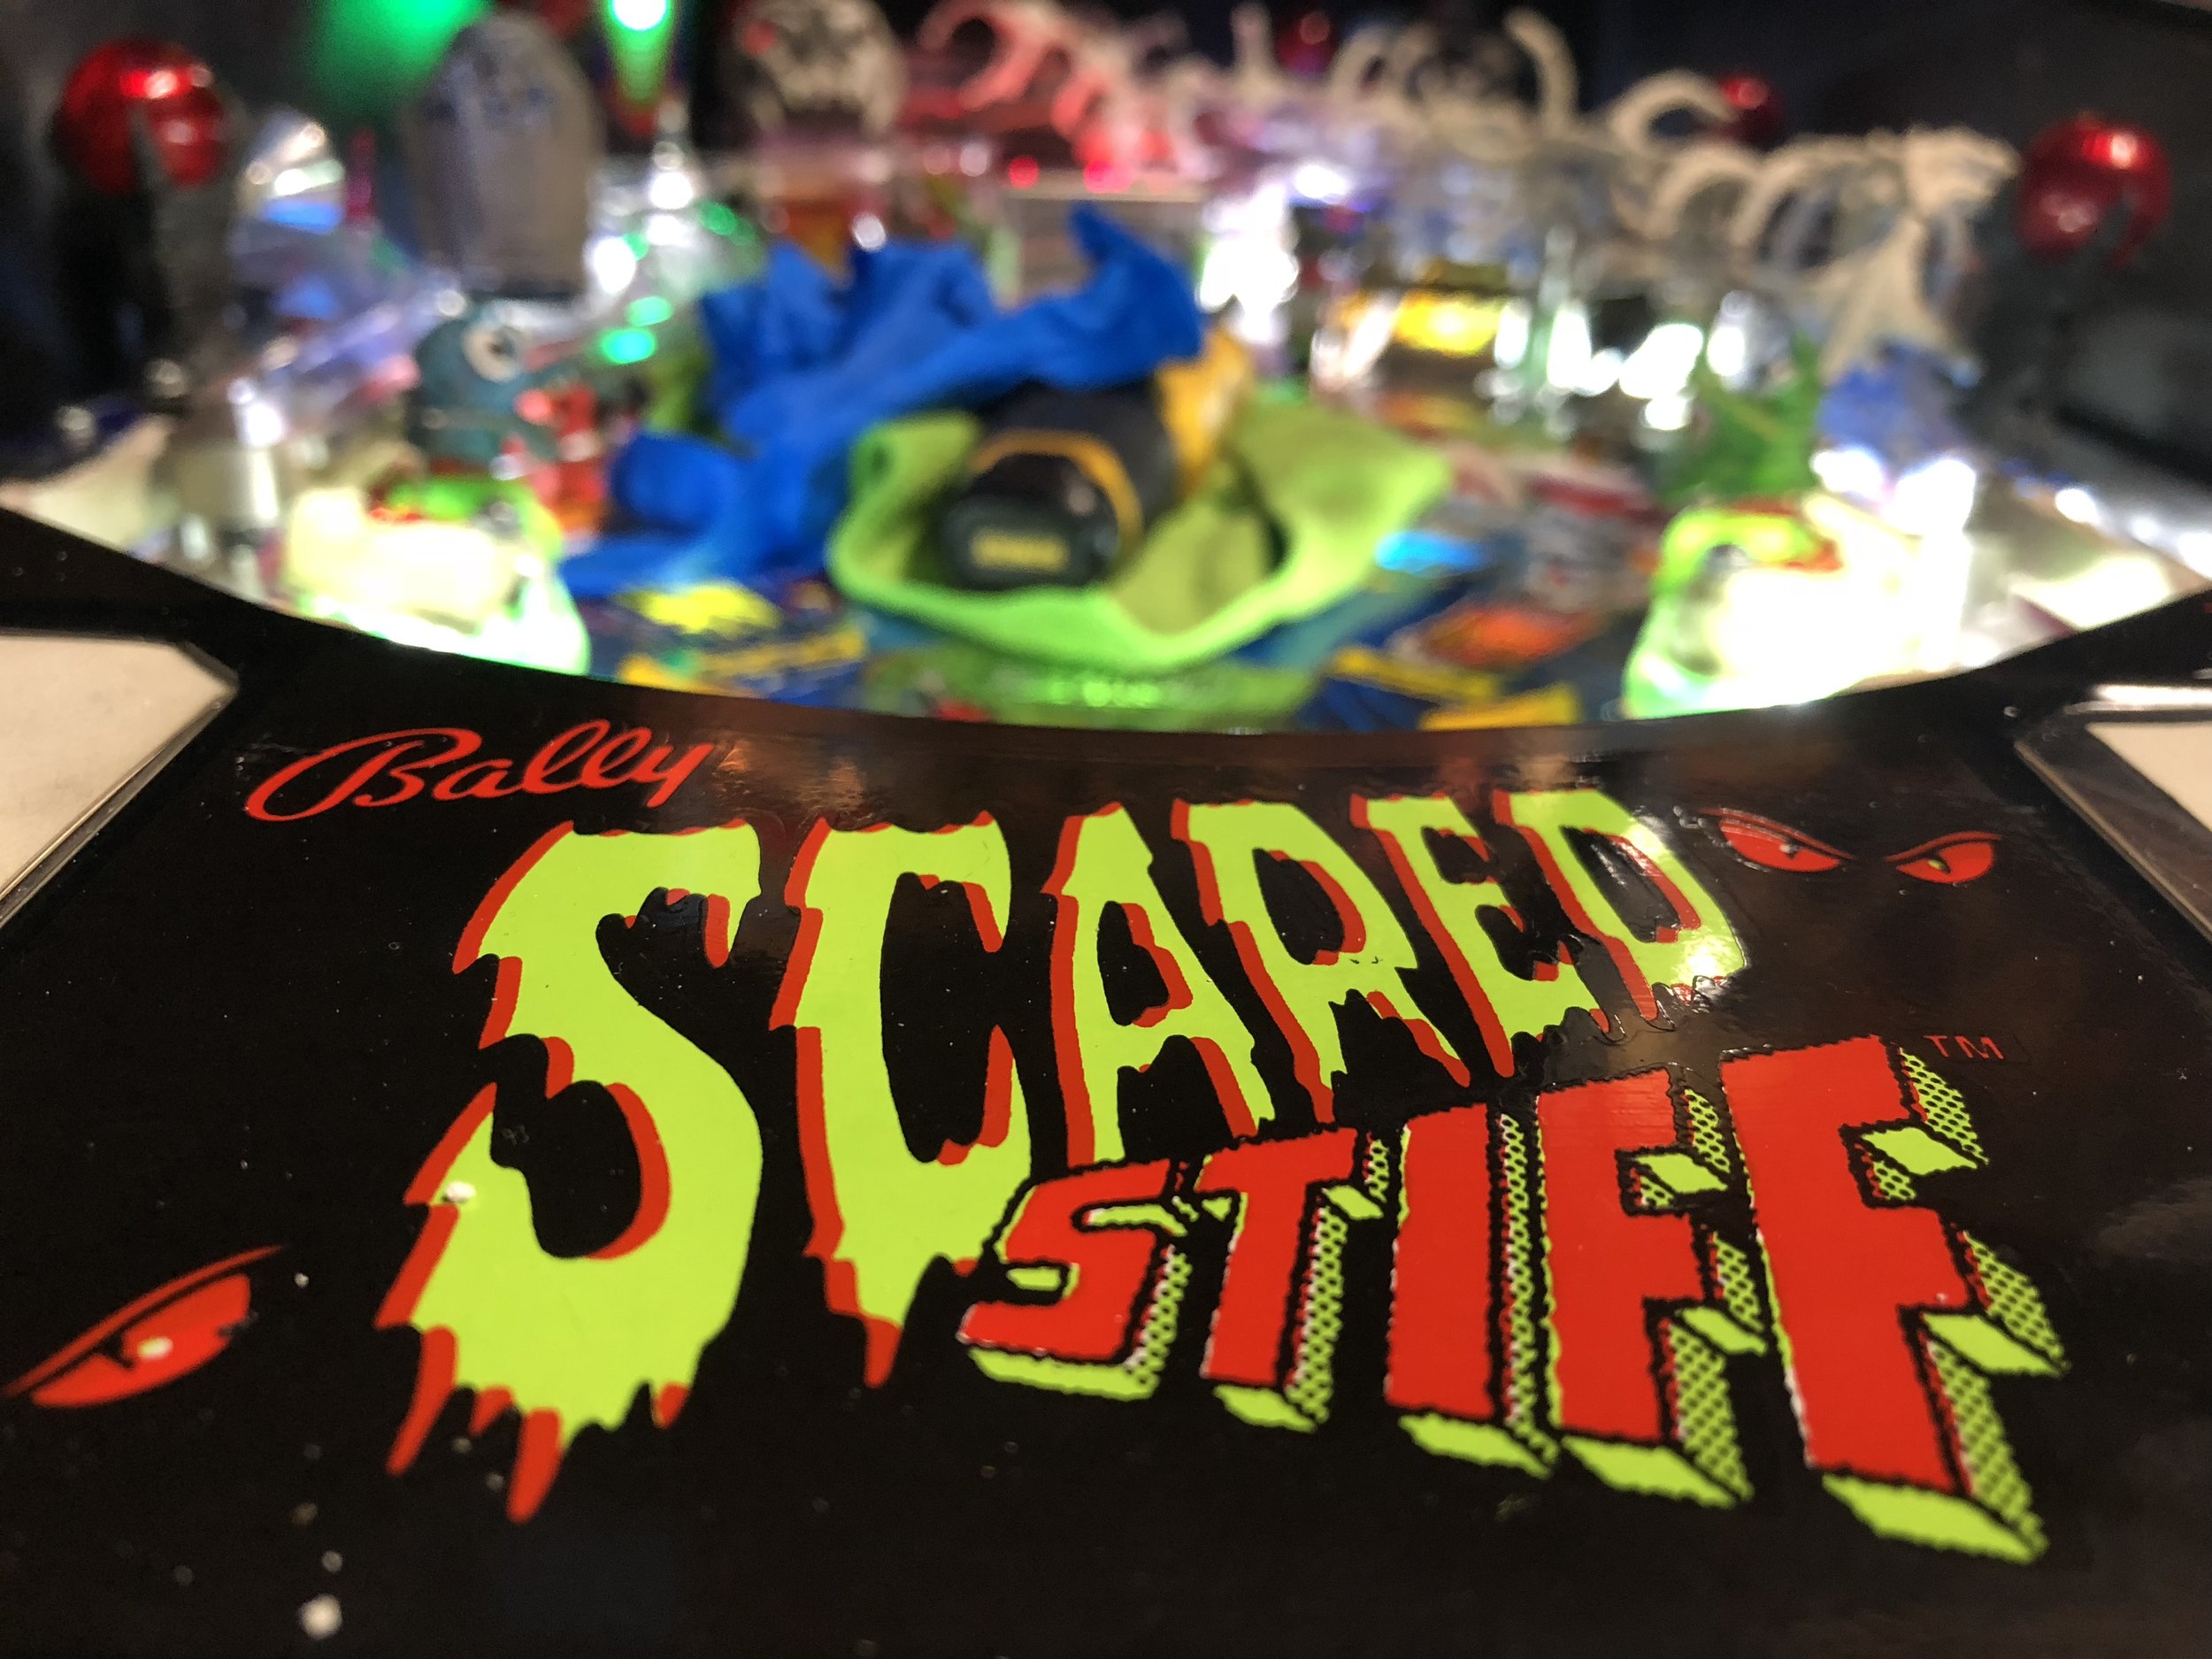
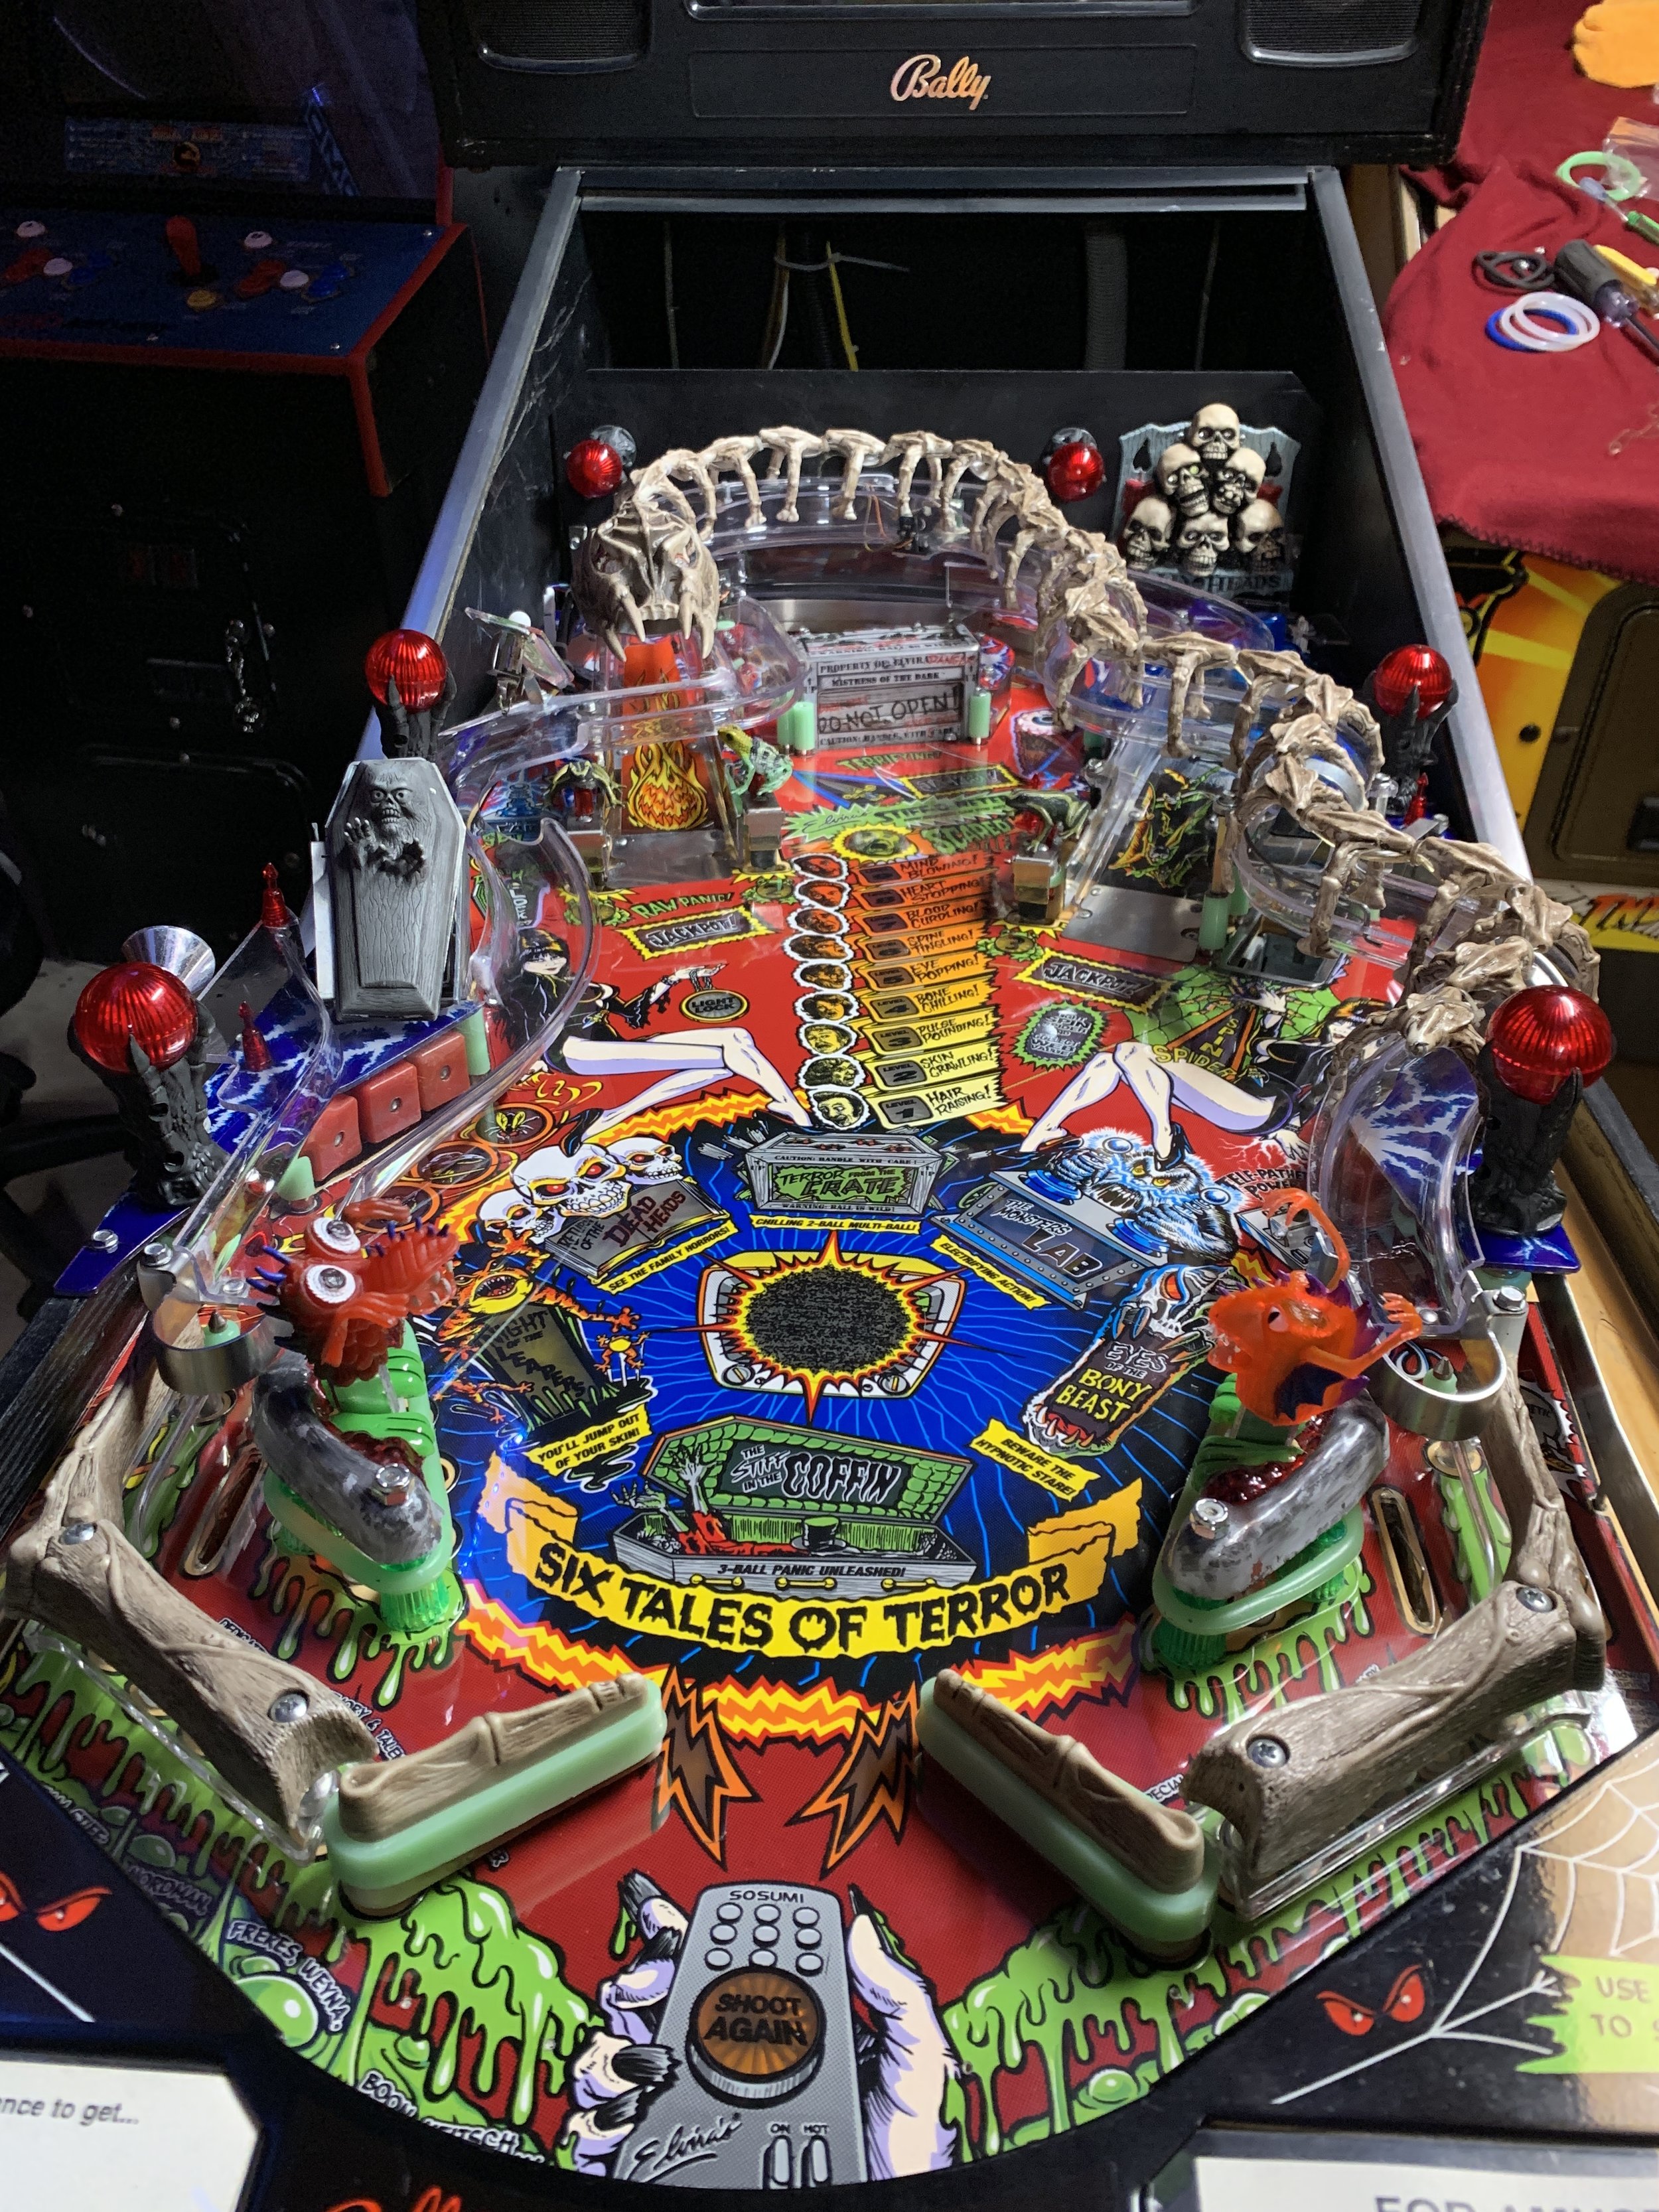
Scared Stiff
This post will be my home for all things related to my Scared Stiff adventures in 2018 and 2019. It will include a running log of restoration & mods, repairs & more.
July 16, 2018
Well, I did it again. I re-bought an existing title that I'd already owned. First, it was Data East Star Wars. (which, I intended to re-theme until I realized it was the nicest condition I'd ever seen for a DESW) . Then, STTNG... and now, Scared Stiff.
My list of "wanted" pins is pretty small. One day talking with a friend, he asked (mostly kidding) - "Wait, you HAD a Scared Stiff and got rid of it?"
The short version of the story was: I sold a Scared Stiff, Monster Bash & Woz in a multi pin deal. Double-dumbass on me for having gotten rid of it. Especially having sold them to ride the NIB pinball wave.
I hadn't actually searched for-sale pins for a couple of months, instead saving cash with intention to buy something at SFGE in June. As it turns out, the only thing(s) of substance I bought as a result of SFGE were new tools as a result of the Tubby Incident.
Following the trip down pinball-memory lane, I did a quick search for Scared Stiff and found two for sale. One was a Bryan Kelly or HEP restoration for north of $12k. The other, was this one: https://pinside.com/pinball/market/classifieds/archive/58351
Original photos from the pinside listing, I saved off to here: https://images.eyedyllic.com/Hobbies/Scared-Stiff-Pinside-Photos/n-nhnhFx/
Delivery / Shipping
After my last headaches with STI, I decided to give a reputable arcade & pinball mover a try, this time. Bob Cunningham picked it up in the Rhode Island area on June 25, 2018. It rode in his truck for about a week and landed at his warehouse in Kentucky. He delivered it to me on July 12, 2018.
Pros:
Nice Guy
Experience in the Industry in various capacities
Preps games correctly (Blankets, wrap)
Reasonably Priced ($275)
Cons:
Depending on his route, can take awhile to get your game.
(12 days to pick up, 18 days for delivery = 30 days total)He lost my game's legs
(I had to wait another week for a pinball order to come in before I could actually start playing it.)

Scared Stiff at the pickup location in the Rhode Island Area

Scared Stiff, as delivered here on the Gulf Coast
Despite the leg snafu, I'd definitely consider using Bob again for a pinball move - seems like a solid dude.
Initial Survey of Condition
The machine's condition was better than I expected. The playfield and backglass are really good. They had partially LED'd the playfield, the backglass still had burning incandescent space heaters in it.
The inner side board on the left has a non-structural crack that will fill easily enough. The left side, side art red color is faded by around 60% but the right-side isn't. The cabinet is solid, no real damage to speak of. The ramps are hazy. The haze would flame-polish out but they have ball-wear lines that probably won't polish out without something creative and potentially friction-melty.

All switches and boards work, has all original boards which I see as a plus.
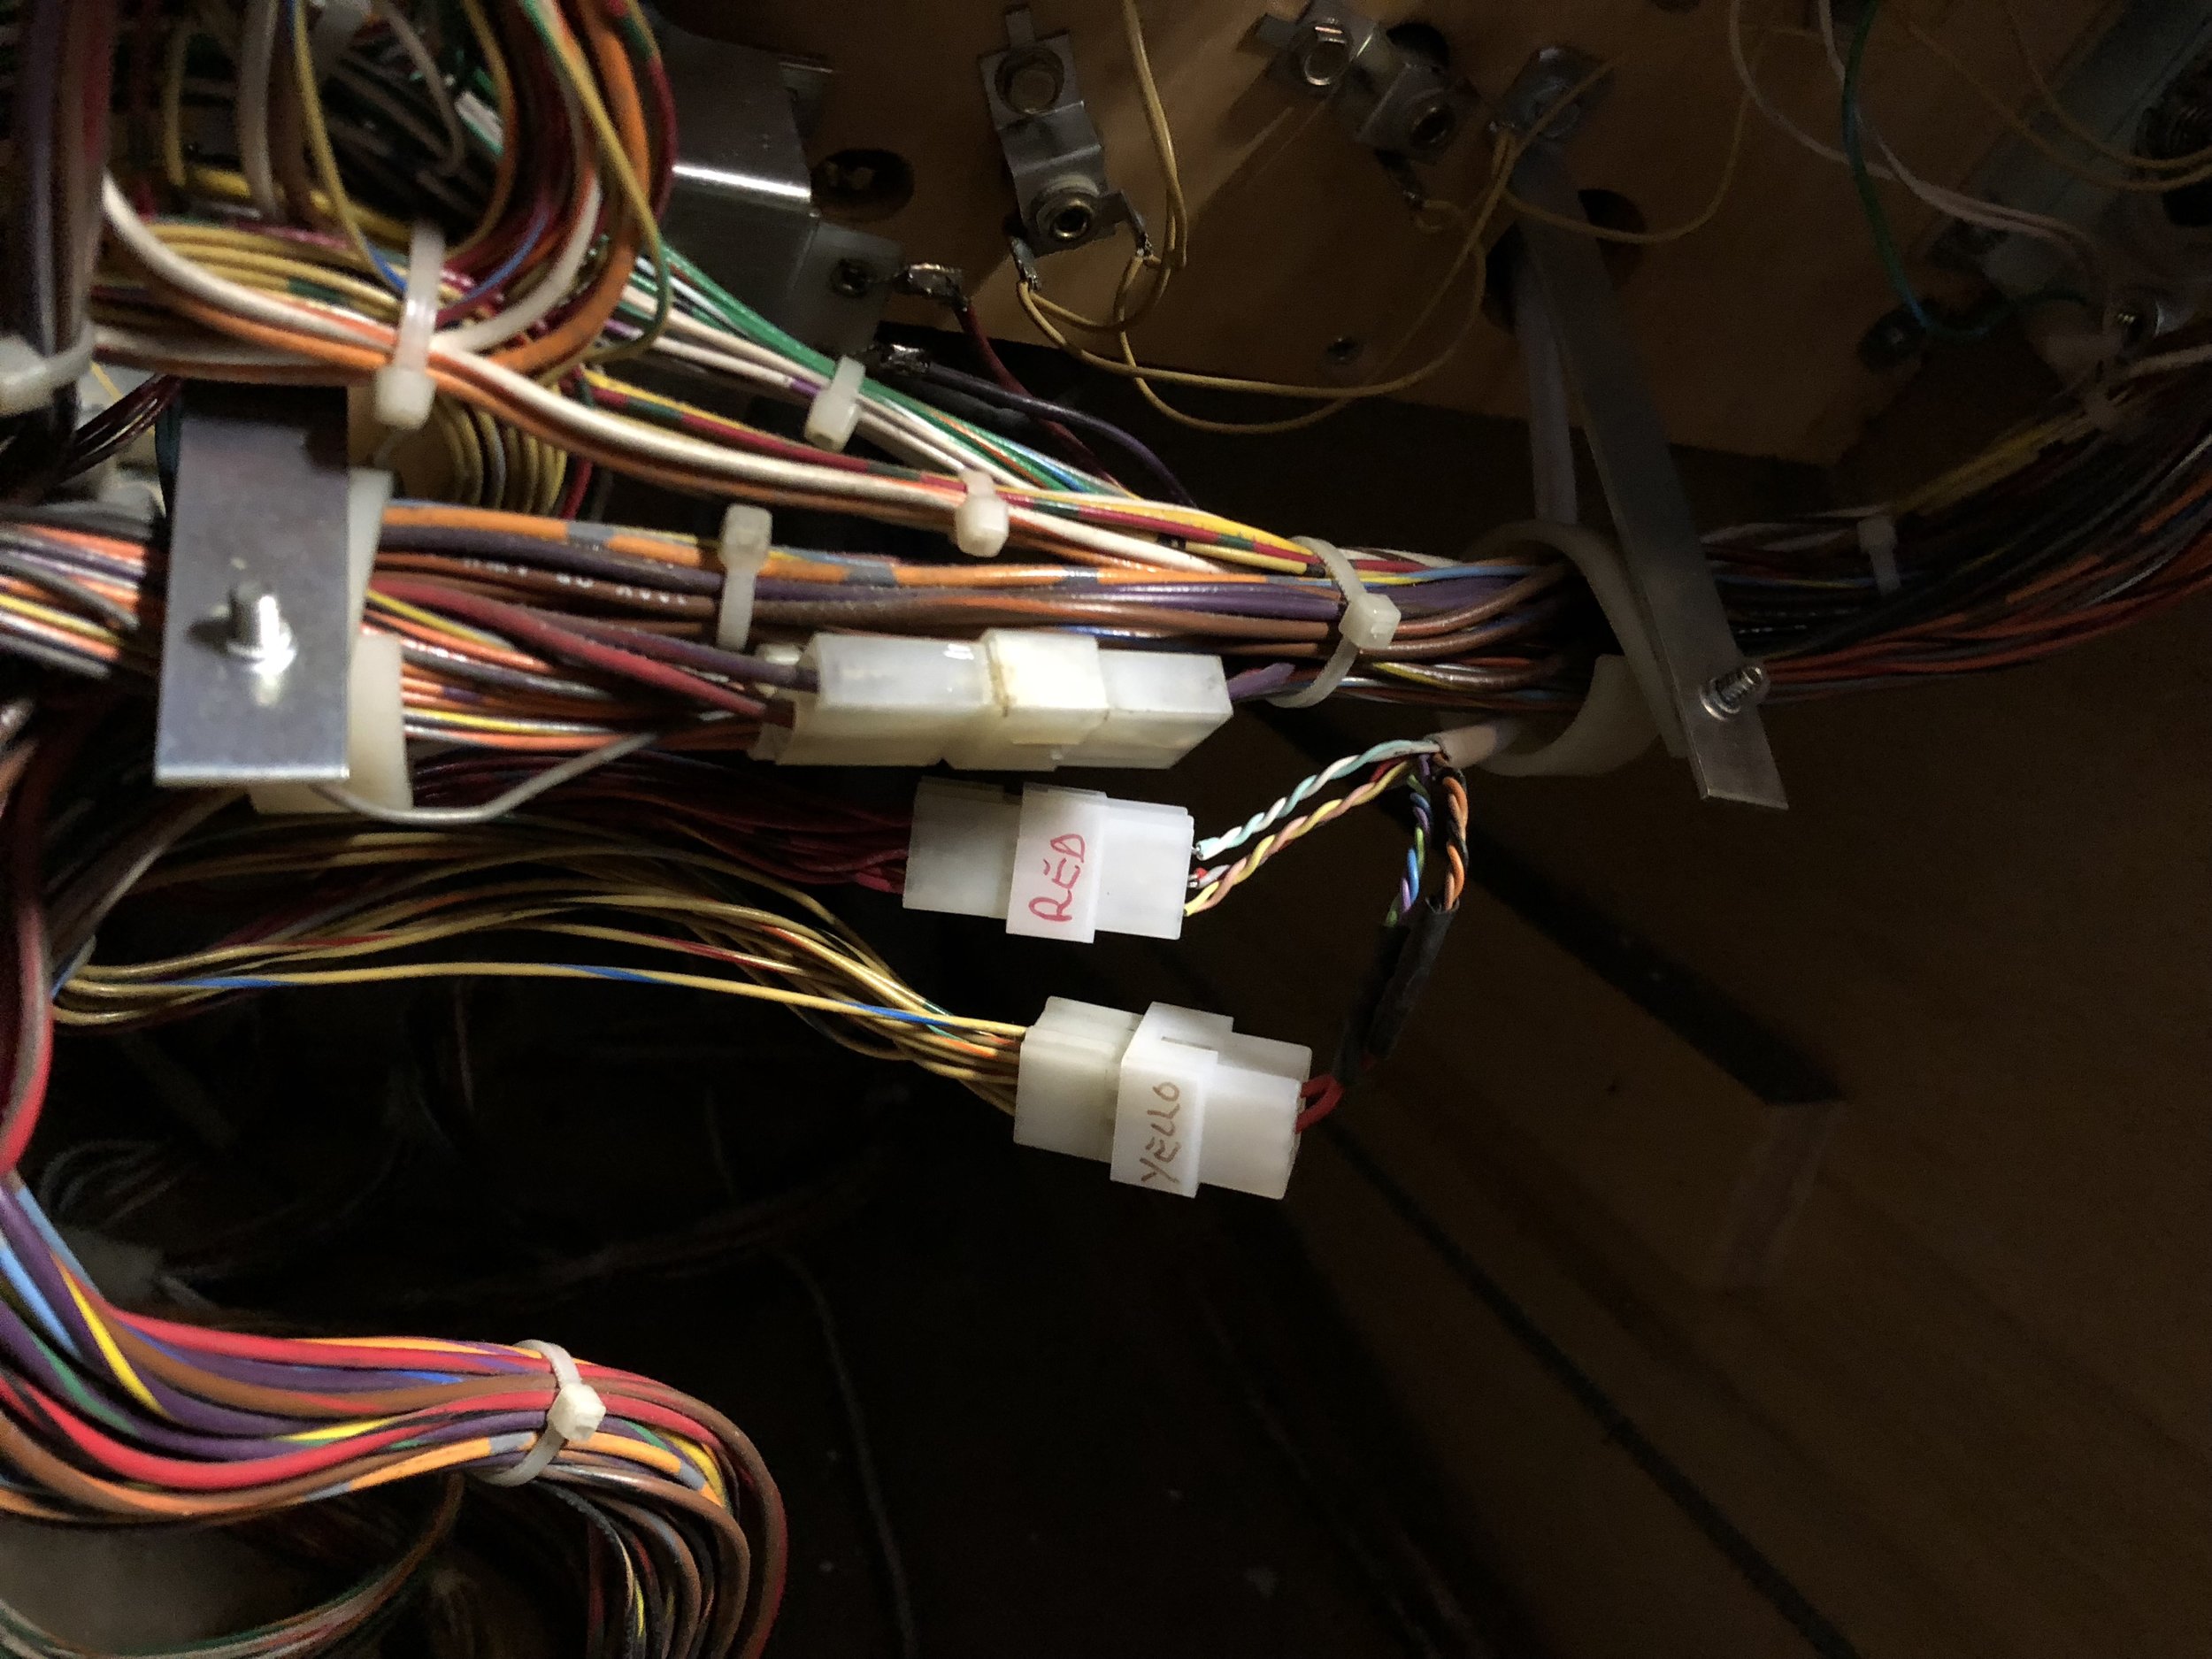
The worst "hack" I've found if this fuse work which, honestly I respect versus the usual foil wrapped fuse or beer-tab solution to blown fuses.
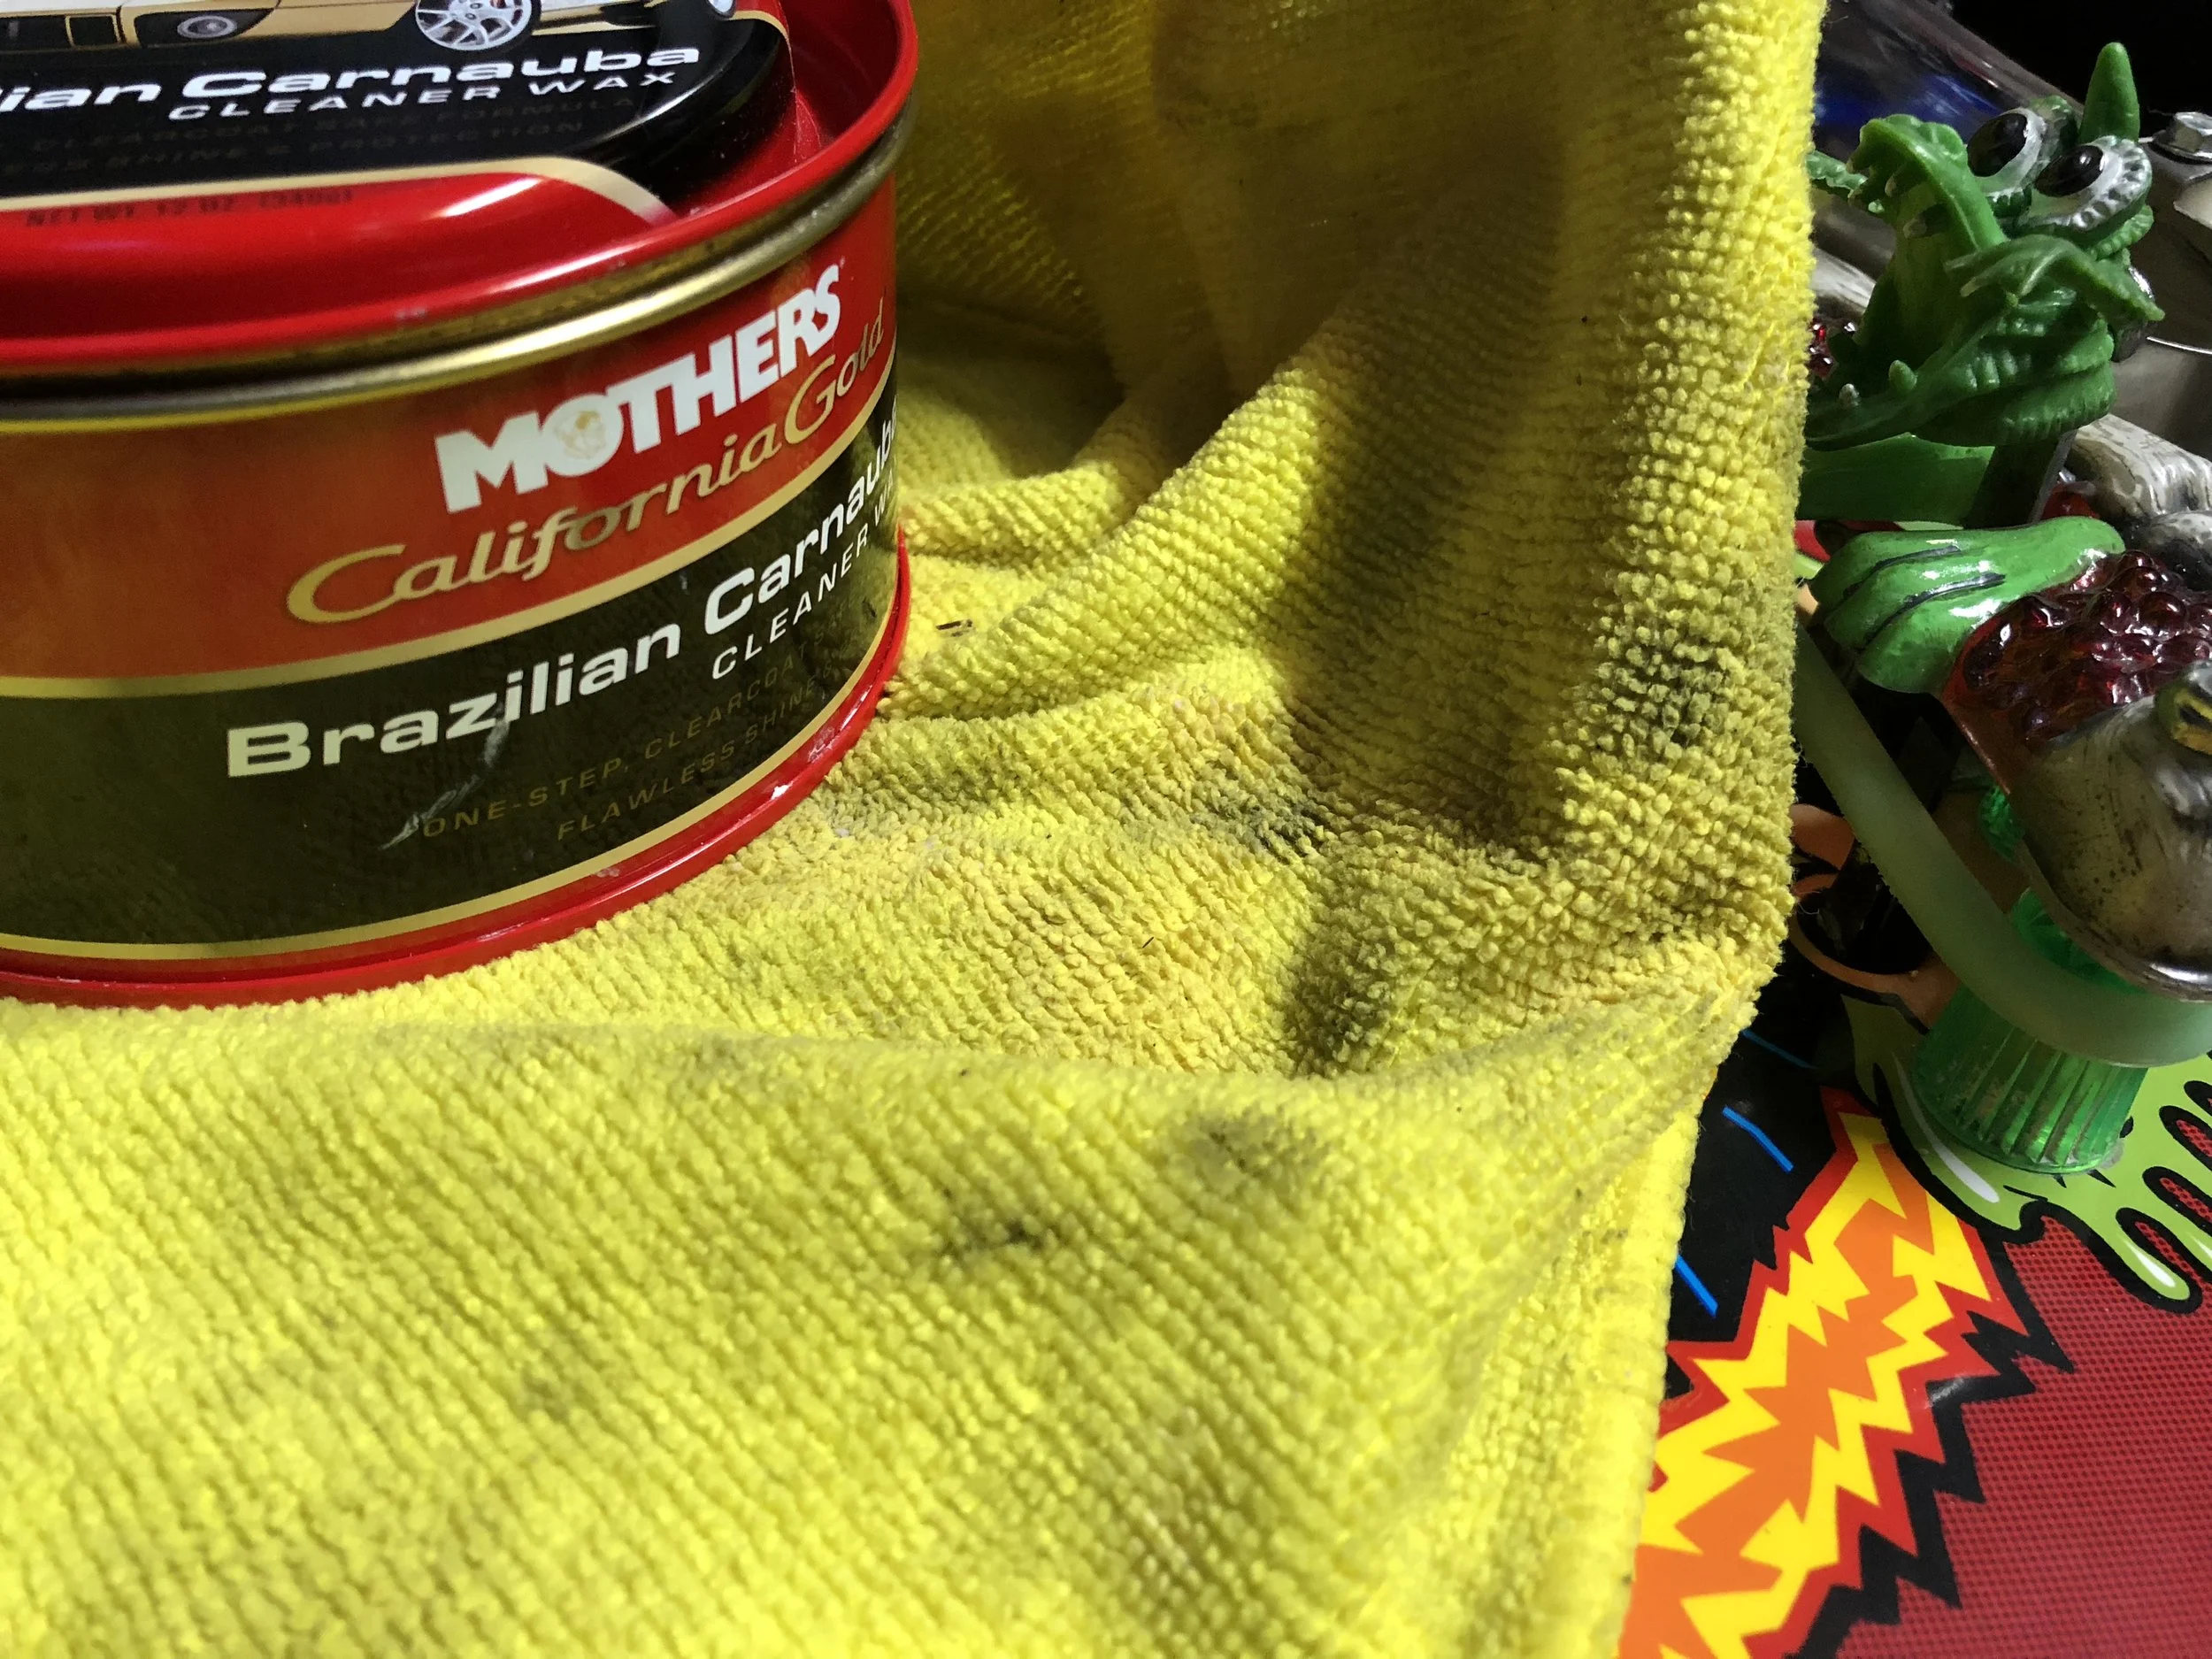
I normally use p21s as a playfield wax, or the meguires carnuba stuff. I know there are Brazilians if wax options out there (dad joke) but I had some of this Mother’s cleaner wax left over from another project and I found that it actually cleaned better than Novus 2.
Don’t know if I’m ready to jump ship to Mother’s but I liked the early results using it like a cleaner.

Now, we wait for packages..
So far, zero games played while I wait on new legs and glass from Pinball Life. Did manage to get the ColorDMD installed. Ordered warm tone retro bulbs to kill some of the LED brightness.
From there Mind orbitz style slow color changing shooter knob from CoinTaker, dancing boogies and the skull pile mod along with some new plastics should round it out.
Takes a lot to whip a game into shape but once you get them to that point- worth it.
More to come..
August 10, 2018
More good progress on Scared Stiff
Cleaning and Mods

Shopping List
Chrome Legs: https://www.marcospecialties.com/pinball-parts/A-19514
Leg/Cabinet Protectors: https://www.marcospecialties.com/pinball-parts/PINCAB-G
ColorDMD: http://shop.colordmd.com/colordmd-replacement-display-for-scared-stiff-pinball-machine/
Pinball Life Lit Flipper Buttons: https://www.pinballlife.com/index.php?p=product&id=3760
Mind Orbits / Cointaker Slow Color Changing Shooter: https://cointaker.com/products/led-lit-shooter-rods
New Lockdown Bar (Pinball life "Seconds"): https://www.pinballlife.com/index.php?p=product&id=2061
New Pinball Glass: https://www.pinballlife.com/index.php?p=product&id=768
New Bat Ramp (LSOG): https://littleshopofgames.com/product/scared-stiff-bat-ramp-with-decal-and-hardware-a-20754/
New Bony Beast Ramp (LSOG): https://littleshopofgames.com/product/scared-stiff-boney-beast-ramp/
New Crate Board: https://littleshopofgames.com/product/scared-stiff-crate-board-ssc001
New Dancing Boogies: https://littleshopofgames.com/product/boogie-man-for-scared-stiff-eatpm/
Robert Winter Dancing Boogie Extension Arms: http://www.robertwinter.com/pinball/ss/kitbm.html
Robert Winter Skull Pile LED Eyes: http://www.robertwinter.com/pinball/ss/kitled.html
Scared Stiff Slingshot Plastics: https://bit.ly/2KIpqh1
Clear Warm White Comet LED: http://www.cometpinball.com/product-p/1smd5050.htm
Flame Comet LED: http://www.cometpinball.com/product-p/fire.htm
RGB Color Changer: https://cointaker.com/products/ct-color-changer
Clear Warm White Retro Cointaker LED: https://cointaker.com/products/44-47-retro
Titan Pinball Glow Rubber Kit: https://www.titanpinball.com/kits/index.php/view/id/126
LED OCD Controller: http://ledocd.com/cart/index.php?main_page=product_info&cPath=1&products_id=22
GI OCD Controller: http://ledocd.com/cart/index.php?main_page=product_info&cPath=1&products_id=7
Power Splitter: https://www.pinballlife.com/index.php?p=product&id=4234
Power Tap: https://www.pinballlife.com/index.php?p=product&id=5037
LED Strip with Waterproof Coating: https://amzn.to/2AZFoDO
New Power Driver Board: https://ksarcade.net/rottendog-power-driver-for-bally-williams-wpc-95-a-20028-wdb095.html
New MPU Board: https://ksarcade.net/rottendog-wpc-95-security-cpu-plug-and-play-a-20119-a-21377-mpu095.html
Playfield Protector: https://www.playfield-protectors.com
Pinball Pro Speakers: https://pinballpro.net/shop/williams-wpc-complete-speaker-kit-swtr-hf/
Crate Decal (LSOG): https://littleshopofgames.com/shop/decals/decals-playfield-ramp/scared-stiff-crate-door-decal-a-21336-d/

I tried to "warm up" the tone of the pin. It already had LEDs but many were on the cool side of the spectrum. I tried both the Cointaker Warm Retro and the Comet Warm 1SMD and found them to be identical to my eye. Both are still a little brighter and blown out than I'd prefer. I have a GI OCD kit to put in the pin, which will give me better control over the GI brightness. Contemplated putting incandescents back in the GI, even. So far, I don't hate it but I'm not 100% satisfied. "Needs something". The flame flicker bulbs maybe interspersed? It would be pricey and may not play well with GI animations in the game..
Custom Paint
My friend, Nathan provided some inspiration with his background in imagineering-level yard haunts. He showed me plastic skeletons that he had tea-stained and melted plastic to them to appear fleshy. Googling some resources I found these helpful:
https://www.instructables.com/id/How-to-Corpse-a-Skeleton-The-Quick-and-Dirty-Way-/
http://manningkrull.com/manningmakesstuff/making-plastic-bones-look-aged-dirty/


I re-strung the Bony Beast spine with thin picture-hanging wire and zip tied the LED strip at every vertebrae joint, pointing downward. Use the waterproof-type LED strips, they are more sturdy because of the plastic casing. I used Minwax Special Walnut Stain and a bristle brush. A light coating of spray urethane to seal in the stain.
Skull Pile
The game was wired for LED eyes in the Skull Pile plastic on the backboard but this was not included when the game shipped. A mountain of hot glue later, it is mounted and installed. I went a little overboard b/c the LED and wiring seem quite delicate and I don't want them moving.


Other Stuff

The coffin door was a little fidgety. The door pops open and the coffin inhabitant yells "boo!" and horizontally rotates to allow a ball to eject from beneath. It would often hang open after ejecting a ball. When another ball ejects while the door is open, it ejects the ball over the lane guides into the drain. I replaced the vertical hinge pin, straightened the horizontal hinge pin flaps and replaced the horizontal pin with a new one.
Finished it out with a color-changing LED spotlight on the sarcophogus face.


Clips
Addendum 9/3/2018
Added GI OCD and LED OCD modules.


Addendum 2/18/2019
Powering the LEDs on the beast ramp


Addendum 2/22/2019
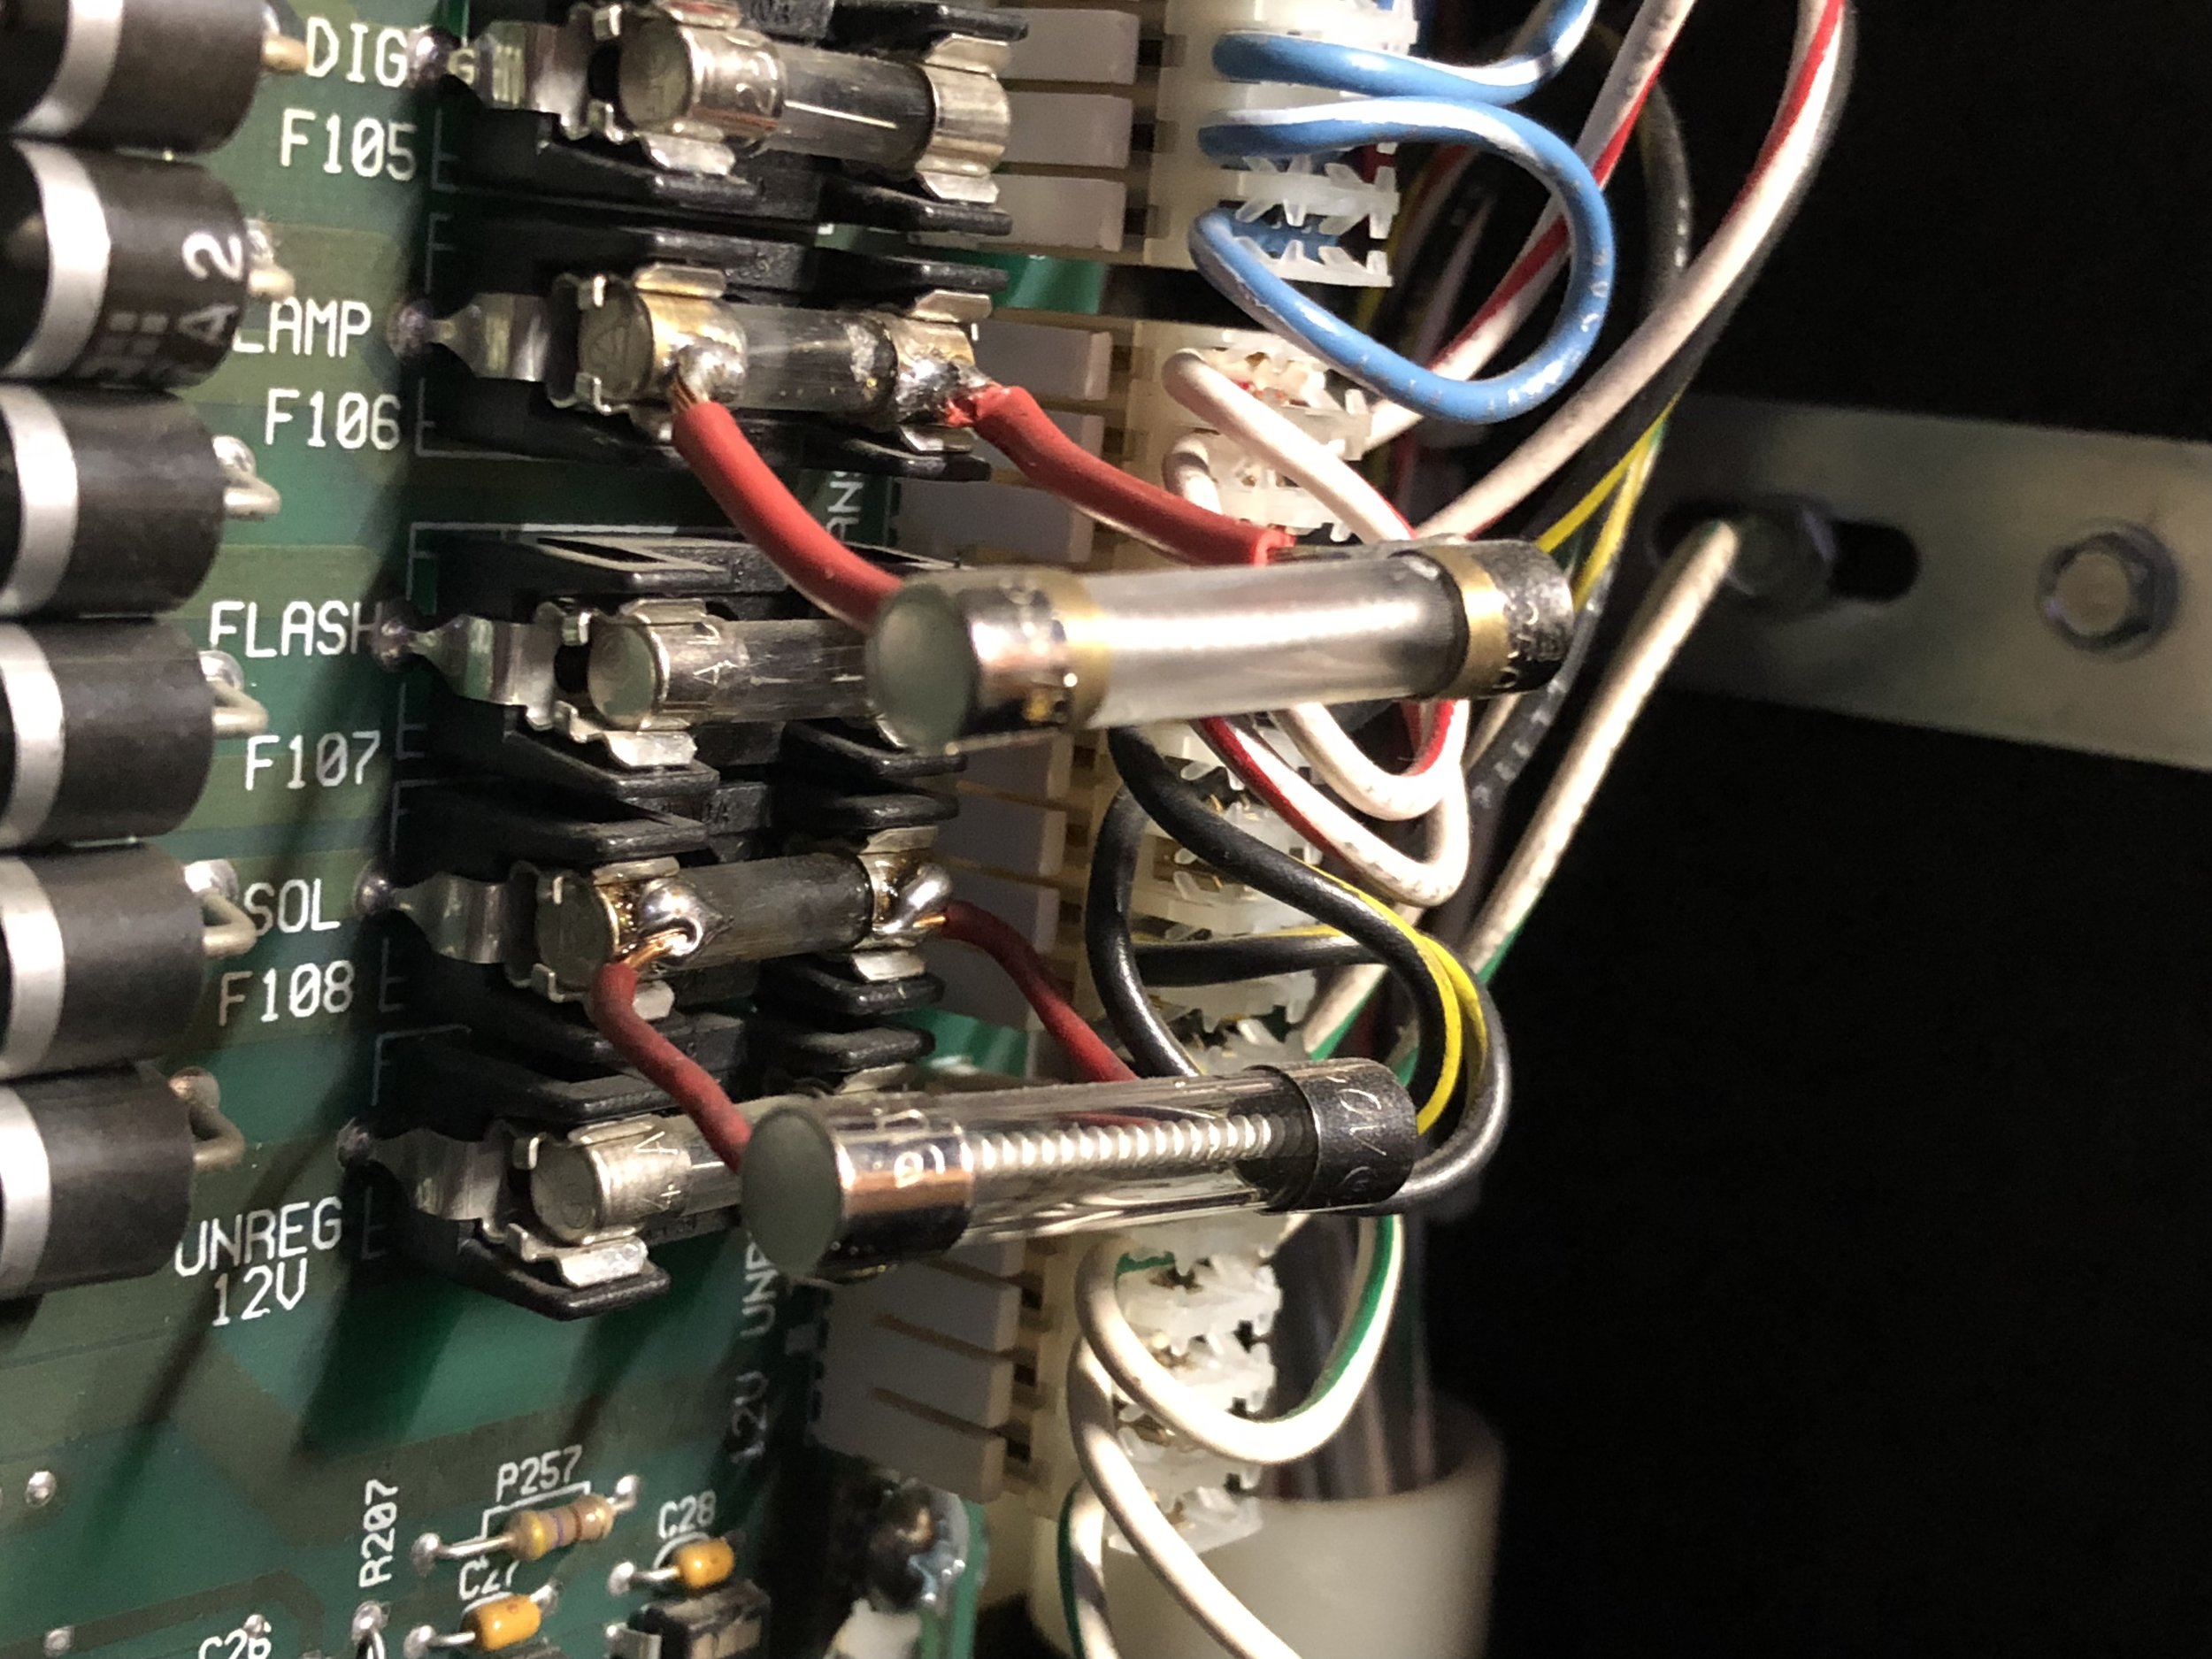
Inspecting the Power Driver and MPU, I noticed a ton of odd board hacks. Thing is, the game is playing fine… but the hacks include straight-wire replacements on resistor banks and complete bypass of fuses. I sent both boards off for repair but his repair queue is ~3 months, so I ordered replacement boards.
Maybe a waste of time and money since the game was playing fine but those fuses & resistors are there for a reason, ya know? :) My best guess without schematic diving is that they were bypassed for features not necessarily used in WPC-95 on this game.
Power from a DK Power Tap to an 8-way splitter and we power the LED controller from that splitter. (roughly 12v)
Addendum 5/10/2019
Touch up Time
I’m not super OCD about making a game that is based on a beat-up crate look like it is brand new. But - the reds were really faded on the cabinet - and that part did stand out. Re-decaling a cabinet is a time suck nightmare and at the end of the day: you have a decal’d cabinet.
A friend offered to help in this respect and Greg was kind enough to lend me some of his time and considerable skills to fill in the reds!


It turned out waaaaaayyyyy better than anything I could have done on my own. Pretty stoked with the result and bonus - originality & no covering decal! :)
Playfield Protector


Addendum 5/17/2019 - More Touch up
Now that the reds had some time to cure, I went back with an airbrush and three or four light coats of clear to lock it in. My game will spend the majority of its life in a dark dungeon basement but it sure is nice to have the reds livened back up.

6/13/2019
Speaker-Time. I have been impressed with the Pinball Pro premium system in my Medieval Madness, Scared Stiff now has the same system. The Scared Stuff Multi-ball will really rock now. :)
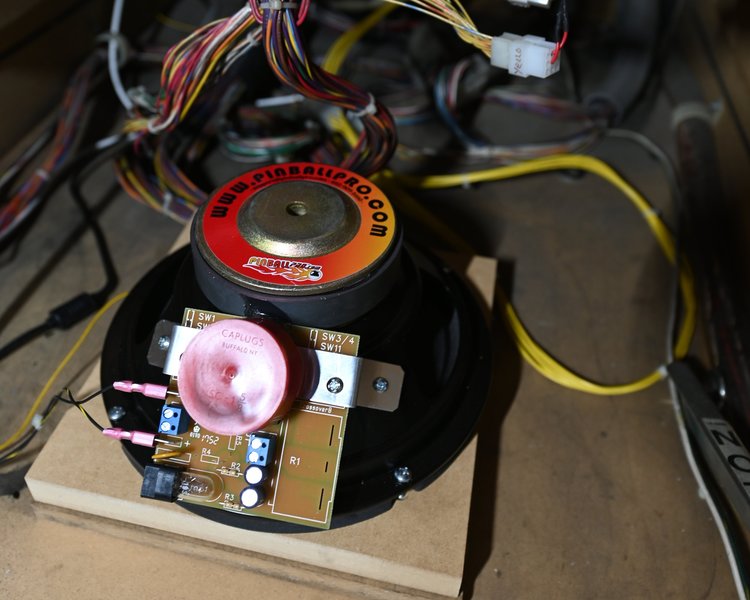
Installed Pinball Pro Premium Speaker Kit
Addendum 7/7/2019
Mirror Blades & Shipping Prep for SFGE.

Packed and ready for SFGE. My Scared Stiff on the right, Cody’s Drop-target equipped Firepower on the Lef!
For SFGE 2019, I was hoping to equip Scared Stiff with a set of Pingraffix Mirror BladeSkins. If you’ve never seen them - click that link - they are awesome.
Sort of the best of both worlds between regular art blades and mirror blades.
Unfortunately as of time of this writing, they’ve been out of stock for about 2 months. I reached out but doesn’t seem like they were able to get a supply of Mirror blade, in time. I ordered two regular mirror blades from Cointaker but by the time they arrived, I’d already packed up Scared Stiff for the show.
I’ve considered bringing the regular Mirror Blades with me to the show to install them there but I also don’t want to be a bad game-bringer neighbor and be in the way for the install.
Will play it by ear, I guess.